
Warrumbungle National Park was somewhere I’d wanted to go for some time. The images of dramatic rocky outcrops and towering spires against rolling ridgelines and starry nights were utterly enticing. I was excited to finally get the chance to visit the national park and head out on a Warrumbungles overnight hike during my visit.
While the national parks along the South Coast of New South Wales were consumed with torrential rain and flooding earlier this year, I headed inland and turned the steering wheel north towards the Warrumbungles instead. I spent over a week in the park, walking every trail and admiring the views from different angles.
However, the highlight was completing the Warrumbungles circuit hike across the Grand High Tops to Bluff Mountain and Mount Exmouth on a two night, three day adventure. The 27 km loop is a perfect opportunity for an overnight hike in one of the most underrated national parks in the state.
I’m going to detail everything there is to know about completing this hike here, so you can begin planning your own trip out to the Dark Sky Park.
Disclaimer: This post contains affiliate links which means I get a commission if you buy a product through my link at no extra cost to you. By doing so, I can keep this blog going and continue to create helpful guides for you. Read more: Privacy Policy
About Warrumbungle National Park
Warrumbungle National Park is located in central New South Wales. Just 145 km north of Dubbo, the region is characterised by remnants of volcanic activity from millions of years ago, with rugged peaks, exposed rock formations and forested gorges.
The various jagged rock spires and domes are one of the most unique landscapes you’ll see in New South Wales. The most well-known feature is The Breadknife, which is a 90 metre high volcanic dyke. However, there’s various other incredible formations including Belougery Spire, Bluff Mountain, Crater Bluff and Belougery Split Rock.

The otherworldly place is significant country for the Gamilaraay, Wayilwan and Wiradjuri language groups of Aboriginal people. There is evidence of stone tools, burial grounds and carved trees which demonstrate the longstanding connection the Aboriginal people have had with the region for thousands of years.
The park was added to the National Heritage List in 2006 and became the first International Dark Sky Park in Australia in 2016. It’s considered the astronomy capital of Australia, with the nearby Siding Spring Observatory looking across the landscape and its pitch-black sky.
The park is absolute paradise for outdoor enthusiasts, particularly, photographers, bushwalkers, campers, and birdwatchers. You’ll find an extensive network of walking trails and a few campgrounds scattered around to allow you to admire the incredible views from various angles.

Multi day hikes in Warrumbungle National Park
Most of the hiking trails are located in the southern half of the national park. While there are several day hikes you can complete to reach the key highlights, it’s also possible to join most of these together into one long circuit.
This makes the Warrumbungle National Park perfect for anyone looking to complete an overnight hike. The circuit trail connects the Grand High Tops (the most famous walk in the park) with Bluff Mountain and Mount Exmouth, before heading back down towards the main road and visitor centre again.
The hike follows well-made walking tracks and has many side trips to the various peaks and attractions. If you complete most of the side trips, it totals around 27 km from Pincham Car Park to Split Rock Car Park (or 30 km if you can’t car shuffle).

While there may be a couple of you who might think, “I could do that in a day!” Think again. The trail is rugged, and there are so many stunning viewpoints that it requires at least one night and two days to complete the full circuit and appreciate the raw beauty of it (although there are options to shorten it, if you’d rather do one long day).
There are a few basic walk-in campsites along the circuit, meaning you can easily plan to spend one or two nights out there. I chose to camp out for two nights, simply because I wanted to catch multiple sunsets, but if you’re short on time, one night is perfectly doable.
You can do the circuit in any direction. I chose to do it clockwise, by starting from Pincham Carpark and heading up the Grand High Tops first and then finishing across at Mount Exmouth and down the Burbie Fire Trail. I don’t think it matters either way, you’ll still have steep climbs and descents to complete one way or another.

Getting there and away
Warrumbungle National Park is located 530 km northwest of Sydney. The closest town to the national park is Coonabarabran, which is just 30 km to the east. Otherwise, if you’re coming from the west, Gilgandra is 78 km away.
If you want to camp the night before or after your hike, then Camp Blackman (pictured below) is the main campground in the national park. It’s a huge space with powered and unpowered sites, hot showers, toilets, 4G phone reception, dump point, laundry and kitchen sinks and water. You can book it online here or in person at the visitor centre.
Don’t forget! You need a NSW Parks Pass to enter Warrumbungle National Park. You can choose from either a day pass or a yearly pass, with the latter working out much more cost effective. Purchase online or in person at the visitor centre.


Parking options for this hike
There are three parking options for the circuit I’m describing here. To complete the full loop to get back to your start point you’ll need to walk 3.5 km back along the main road through the national park, which will mean a total of 30 km.
If you’re hiking with a friend and have two cars, you could leave one car at Pincham and the other at Split Rock or Burbie Canyon to save you the road walking at the end. This would mean you’d walk around 27 km all up.
Pincham Carpark is the start of the Grand High Tops trail and has plenty of room, although it can be very busy with day walkers.
Split Rock Carpark and Burbie Canyon Carpark are both at the western side of the hike and are smaller but less popular than Pincham. You can use either one, although Burbie Canyon would save you around 800m of walking.

Three day hike via Grand High Tops, Bluff Mountain and Mount Exmouth
This is the detailed track notes of the three days I spent hiking the circuit. Hopefully it helps you plan your Warrumbungles overnight hike.
Day 1: Pincham Carpark to Dows Camp via Grand High Tops
- Distance: 7.5 km
- Time: 2.5 hours
- Ascent: 626 m
- Descent: 173 m
I didn’t get going until after 10am, but I knew I didn’t have far to walk. The weather was perfect with a cool breeze but clear blue skies, despite the terrible forecast. The first three kilometres from Pincham Carpark were quite easy, as the paved path followed Spirey Creek.
I passed the turnoff for the Goulds Circuit (I’d already completed it a couple of days prior), but I did stop to do the short walk up to Spirey View. The trees obscured the best views, so it wasn’t entirely worth it, but it reminded me that I still had a very decent climb ahead.

The next 1.5 kilometres really tested my lungs out as the trail suddenly took a steep ascent towards Balor Hut and The Breadknife. It was quite a workout, but I could start to see I was getting closer to the ridgeline.
The first of the wooden staircases were a bit of a shock, and I took it slowly while my calves and quad muscles felt the brunt of the extra kilos on my back. I finally got to the Balor Hut turnoff, and I made a quick detour to the camping area to refill my water.

I then continued along the main Grand High Tops trail as it climbed steeply over rocky ground for the next almost-kilometre to Lugh’s Throne, the highest point of the ridge. A bit of effort was required to haul myself and my pack on top of the rocky throne, but it provided stunning panoramic views across the incredible spires and peaks, including The Breadknife.
The trail then descended steeply and around the rocky ridgeline towards Dows Camp. When I arrived, it was perfectly quiet and I realised I would likely have the place to myself. I set up my tent just across the stream and relaxed for a couple of hours until the sun dipped a bit lower.

Side trip: Dows Camp to Bluff Mountain
- Distance: 2.6 km return
- Time: 1 hour
- Ascent: 250 m
- Descent: 250 m
When the clock ticked over to 4pm I began my ascent up to Bluff Mountain. The trail began right in the camp area, and climbed steadily for 1.3 km to the top. It was immediately a leg burner as it clambered over rocks around and up the dome peak.
As I emerged above the tree line, I could tell it was going to be an incredible sight. The long shadows accentuated the rolling mountains and ridgelines of the national park, and the golden light was hitting the various tors and spires.

Once at the top, I spent around 45 minutes taking photos and admiring the incredible sunset. It was easily one of the most memorable and spectacular sunsets I’ve had, as the air was completely still with no distracting sounds at all: just total silence and stillness, a rarity in the great outdoors.
I descended back down shortly after sunset, with my headtorch required for the last half of the climb. I made my dinner and then crawled into my sleeping bag to rest until the next day.

Day 2: Dows Camp to Danu Gap Camp including Cathedral Rock and Arch
- Distance: 5 km
- Time: 2 hours
- Ascent: 244 m
- Descent: 353 m
It had been a peaceful night without anyone around except some jumpy wallabies in the early hours of the morning. I knew I didn’t have a long distance to cover if I chose to spend a second night camping, so I took my time and packed slowly.
I left camp at around 9.30 am and continued along the relatively flat trail across the ridgeline. It then started to descend again, past Point Wilderness, which was a nice viewpoint, and down towards Ogma Gap.

I walked past the campground and along the shady trail to the intersection for the side track to Cathedral Rock and Arch. I dropped my pack at the sign and just walked the 500m down to the Arch.
The trail abruptly stops across from this perfect rocky archway, which bizarrely has a tree growing from the top of it. It’s difficult to get a good photo of it, but it’s still a unique feature to see.
I then returned to the intersection, picked up my pack and walked the 500m to Danu Gap across some landslide scree. When I got to Danu Gap, I wasn’t impressed with the camp spot but still decided to stay for the night instead of heading down the fire trail.
I set my tent up across the track, near the Mount Exmouth trail and had some lunch. I chatted with a few day hikers as they headed up and back to Mount Exmouth to pass the time.

Side trip: Danu Gap to Mount Exmouth
- Distance: 5.2 km return
- Time: 1.5-2 hours
- Ascent: 364 m
- Descent: 364 m
I was considering a late afternoon hike to catch the golden light, but the last day hiker informed me that he’d seen some dark clouds coming this way. I checked the weather and it said potential rain, so I decided to leave around 3pm for the summit.
Almost immediately I could see the dark clouds to the south, so I picked up my gait and pushed my legs hard to climb up and up along the trail at a fast pace. It was another decent workout, and I only stopped a couple of times to sip some water.

Once I popped out onto the rocky summit, the trail turned sharply right to head towards the highest point. I soon realised that there were more rain clouds coming from the north, moving fast across the surrounding flat farmland. So, I quickly pushed onto the summit, took some photos, and then promptly headed back down again.
I broke into a jog a couple of times, but still caught the very start of the rain in the last 200m dash to my tent. I jumped inside and lay there all afternoon as the rain came down hard. It continued to rain well after dark and I gave up on making my dinner and settled for the nutritious alternative of chocolate, bliss balls and lollies instead.

Day 3: Danu Gap Camp to Split Rock Carpark
- Distance: 6.2 km
- Time: 1.5-2 hours
- Ascent: 50 m
- Descent: 436 m
I surprisingly slept quite well, considering I knew my little old tent wasn’t entirely waterproof. We somehow survived the night, and another hiker had even joined us at the campground (although he had a much better tent!).
I packed up my wet and muddy tent by 8.30 am and hit the Burbie Fire Trail back down to my van at Split Rock carpark. The six kilometres were pretty easy, on a wide and recently graded track. However, a couple of sections were muddy from the rain overnight, which caked my boots in rich brown muck.
I arrived back at my van at 10 am and was keen to get back to Camp Blackman so I could dry my tent out and have a hot shower. It had still been an incredible few days!

Essential information for hiking in the Warrumbungles
If you’re planning on doing this hike yourself, here’s some more practical information you need to know.
Campsites
There are a total of six walk-in campgrounds you can technically use on the circuit described above. However, some make more sense than others given distances and a couple of options are much nicer than others too.
In my opinion, I would aim to use either Dows, Ogma or Danu for an overnight hike. Although Dows and Ogma I would say make more sense and are nicer spots. For two nights like I did, I would suggest Dows and Danu or Balor Hut and Ogma, if going clockwise.
Remember that these are remote walk-in campgrounds, there are NO FACILITIES except at Balor Hut (more on this below). You must be self-sufficient with water (although Dows has a small creek) and you must carry toilet paper out with you.
You need to book these walk-in campsites online. They are all “free” (except Balor Hut which is $12.30 for a tent site or $24.60 for the hut) but there is a $6 booking fee. So, technically they are not free! Unfortunately, the ranger at the visitor centre was honest and said that they don’t receive any of the fees. The booking fee literally goes to the private booking company, so I don’t see any point, other than to limit numbers at the campsites. If you’re hiking in low season and mid-week like I did, whether you book or not is up to you.
Read more: How to Leave No Trace and be Respectful in the Outdoors
Six walk-in campsites
Hurleys Campground: An odd choice for this circuit, but you could make it work if you wanted. Hurleys is around 500m off the track beside a creek. It’s very protected from bad weather but doesn’t offer many other benefits.
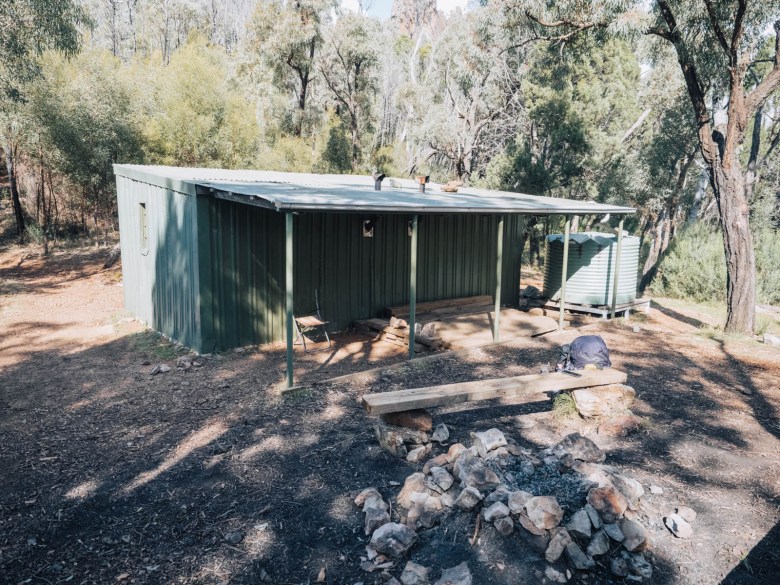
Balor Hut: The only spot with proper facilities. Balor Hut is below the Breadknife and Grand High Tops track. There’s a water tank and drop toilet there. You can either sleep in the hut’s bunks or camp in your tent. It can be busy with school groups, so I’d be wary, but it’s a popular choice.
Dows Camp: In my opinion, the best option for an overnight hike, simply because of its location. Dows Camp is the most central camp on the circuit, splitting the hike up into a nice two days. It’s also in a beautiful spot, underneath Bluff Mountain and next to a small creek. There’s quite a bit of space, enough for around 5-6 tents.

Ogma Gap Camp: An alternative option to Dows Camp, although not as nice. It’s a flat area underneath some trees on the ridgeline. It would be a nice second choice if Dows was full, but it’s more exposed to weather than Dows. No water available. You can fit around 4 tents.
*There’s also an unofficial campsite about 300m before Ogma Gap, when coming from Dows. You can see people have used it before and it would be an option if others are full.
Danu Gap Camp: A popular overnight choice for those wanting to just do Mount Exmouth. This camp is not very appealing other than its convenient location. It’s literally just off the side of the Burbie Fire Trail and has pretty rocky ground to pitch on. You could put 2-3 tents there, but it’s not ideal. No water available.
*There is actually an unofficial campsite on Mount Exmouth summit. If you climb up with your pack from Danu Gap, you’ll find the campsite under a rocky cave near the very top. You’ll see that people have camped there before, with flat but solid ground. I’d personally only attempt to camp up there, if you were certain the weather was going to behave.
Camp Burbie: Along the Burbie Fire Trail, this is a huge camping area with plenty of flat ground and a water tap. However, it’s pretty close to the start/end of the hike at Burbie Canyon and Split Rock Carparks so it’s probably only ideal if the weather around Danu Gap turns bad.

Water access
Water is pretty limited on the Warrumbungles overnight hike. Balor Hut is the only reliable source of water with a rainwater tank at the hut. Otherwise, Dows Camp has a small creek which was just flowing when I did this in May. Camp Burbie on the fire trail also has a water tap.
Before you set off, it’s a good idea to check in at the visitor centre and ask about water supply. The rangers will be able to tell you whether the tanks and creek are full at that point in time.
I carried enough water to get to Balor Hut on the first day. I then filled up around 4.5 litres and then carried that to Dows Camp. At Dows, I was able to refill a bit from the creek and that was enough to get me through to the end. I would definitely filter, purify or boil the water from the creek, although it looked pretty clean when I was there. However, I chose not to filter or treat the water from the tank at Balor Hut because it’s rainwater, but the rangers advise that you do.
I carry a LifeStraw bottle with me for times when I fill from a creek. Otherwise, you could also carry purification tablets if you prefer.

Safety and navigation
This Warrumbungles overnight hike circuit is well worn, and you shouldn’t have any major problems navigating. There are signposts at the major junctions, otherwise, you’ll find the trails are easy to follow.
The exception to this is on Bluff Mountain and Mount Exmouth. The trails to the summits cross a lot of rocky ground, which can be difficult to follow. On Bluff Mountain, there were cairns people had made to show the way. However, Mount Exmouth had no signage whatsoever. If you have an app like Maps.Me, you’ll be able to easily find your way, otherwise a couple of spots could be tricky.
I would especially ensure that you had Maps.Me or something similar downloaded if you were planning to do a sunrise or sunset mission to either peak.
You should also take care with some of the rocky ground and exposed sections, especially on Grand High Tops and Bluff Mountain. Poles can be helpful for balance.
Serious dangers mainly come in the form of injury or snakes. Make sure that you carry a first aid kit, including a snake bite bandage, in case of emergency.
Other than that, you’ll likely come across wallabies, kangaroos and wild goats, all of which are pretty friendly.

Essential gear for Warrumbungles overnight hike
I’m not going to list all my gear here, but these are some of my essential pieces you’ll definitely need to carry with you for this multi-day hike:
Sleeping bag | You’ll want a good sleeping bag for the High Country, one that will keep you warm no matter the temperature and be lightweight enough to pack easily in your backpack. Sea to Summit is one of the best brands on the market and you can’t go wrong with their Spark III bag.
Backpack | A 65L pack is usually a good option for multi-day hikes, especially in the Alpine region when you’re going to be carrying warm gear.
Hiking boots | I’m a bit old fashioned when it comes to my footwear and I can’t hike without my hi-cut boots. I’ve been wearing Keen Targhee boots for over a year now and I’m super happy with how they go on all adventures.
PLB | Any hiker, especially a solo hiker, should carry a Personal Location Beacon. For the cost, these small devices can save your life anywhere, anytime. If you don’t want to buy one, you can hire one from any Macpac store, find out more here.
Power bank | I rely on my phone (maybe too much) while I’m hiking. From Maps.Me to recording videos to listening to music, I can recommend the BioLite power bank which will easily last days off the grid.
Tent | I’ve so far stuck with a light, one-person tent, which has gotten me through plenty of extended hiking trips. There’s plenty of choices out there on the market, but the Nemo Dagger OSMO 2 is a high quality, lightweight option, or this budget one from Sportztrek is good for beginners.
Down jacket | You should be prepared for any weather on alpine adventures, so a down jacket is a must to ensure you keep warm. Mountain Designs Ascend range is lightweight, warm and water repellent, so it’s perfect for the High Country.
Pin this post


