
The purpose of this article is to help you understand:
- How to add a thank you page
- How to connect the thank you page to your booking form
- Adding a custom URL for the thank you page
Create a Thank You Page
If you would like to add a "Thank You" page that customers will see after saving a booking, please go to:
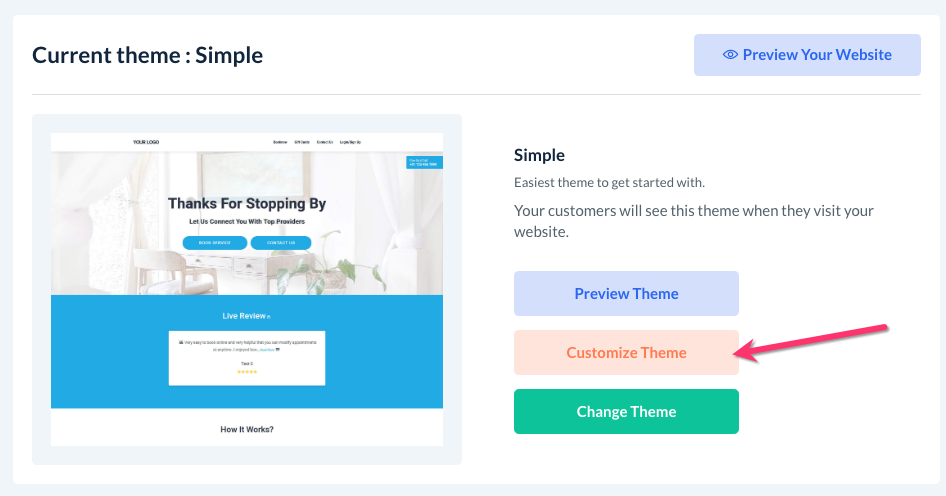
Settings >Design Forms and Website > Website Builder and Themes
Click on the orange "Customize Theme" button to open the website and theme editor.
By default, you will land on your website's home page. Click the Pages menu at the top center of the screen and then select "Manage Pages".

A menu will appear on the left side of the screen. Click the light blue "Add Page" button at the bottom of the menu.
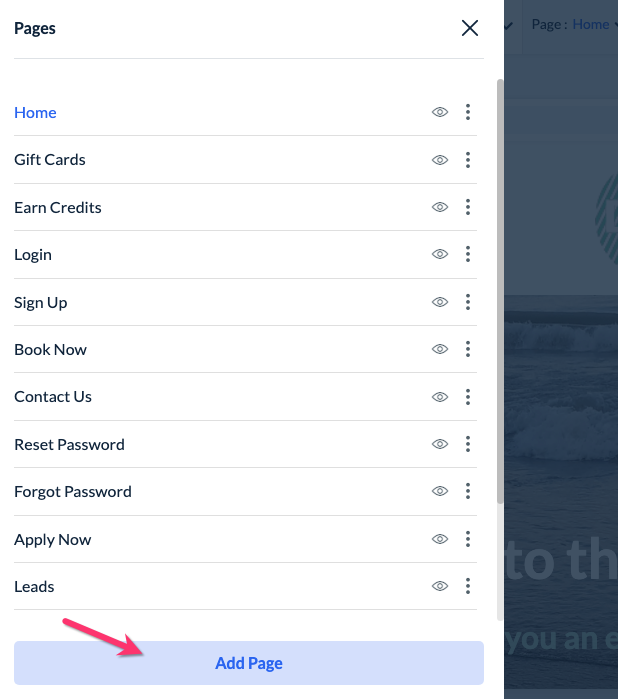
A page title pop-up will ask for you to enter a name for the page and enter "Thank You" (or any other name that will help you locate this page).

Once you click the blue "Save" button, you will be redirected to your new page. To add the "Thank You" block to the page, hover your cursor over the page until a blue "Add Section" button appears.
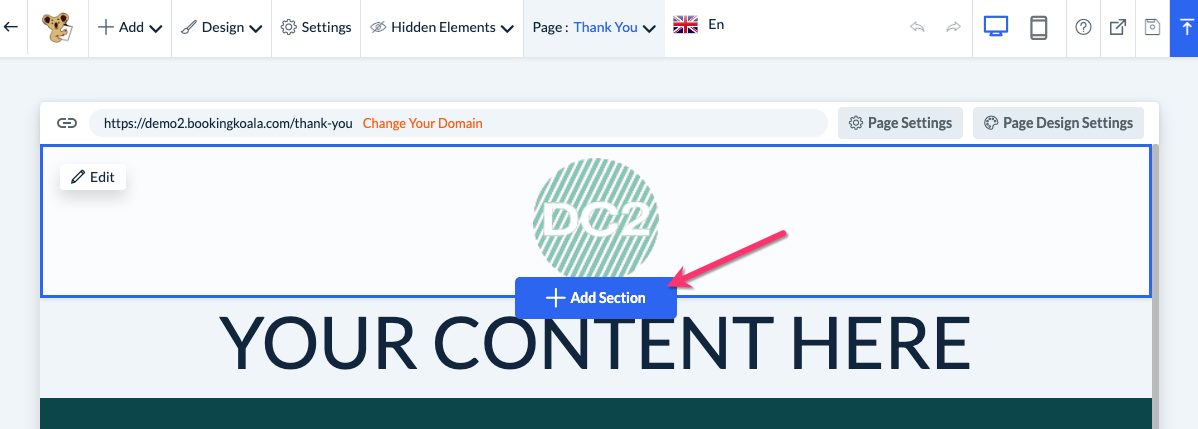
A side menu will appear on the left. Scroll down and click on the "Thank You" section. There are three different types of thank you templates to choose from. Hover over a template with your cursor and click the white "Add this section" link.

Once the section has been added, you can modify the title, text, and button options by hovering over each element and clicking the white "Edit" button that appears.

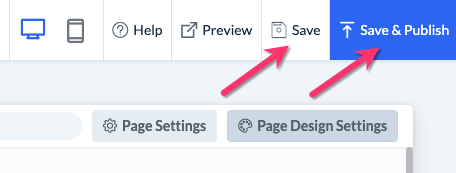
Once you are finished creating the page, please remember to click the "Save" or "Save & Publish" button at the top right-hand corner of the screen.
Connect the Thank You Page
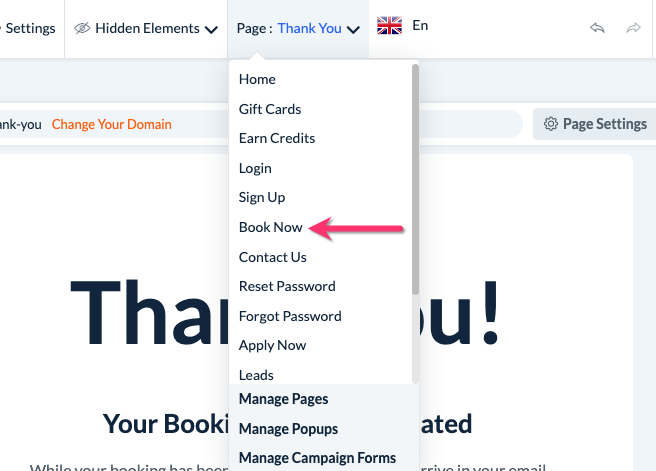
Once you've created and saved your thank you page, you will need to update your booking page to direct users to this page. To set this up, select the "Book Now" page from the top-center "Pages" menu.
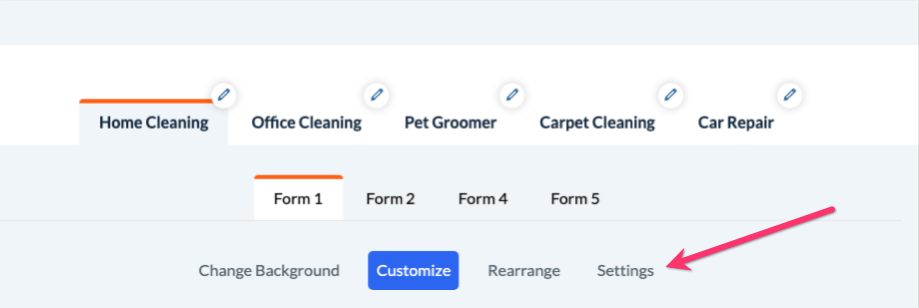
Next, scroll down the page until you see four buttons that say "Change Background", "Customize", "Rearrange", and "Settings". Click on the "Settings" button to continue.
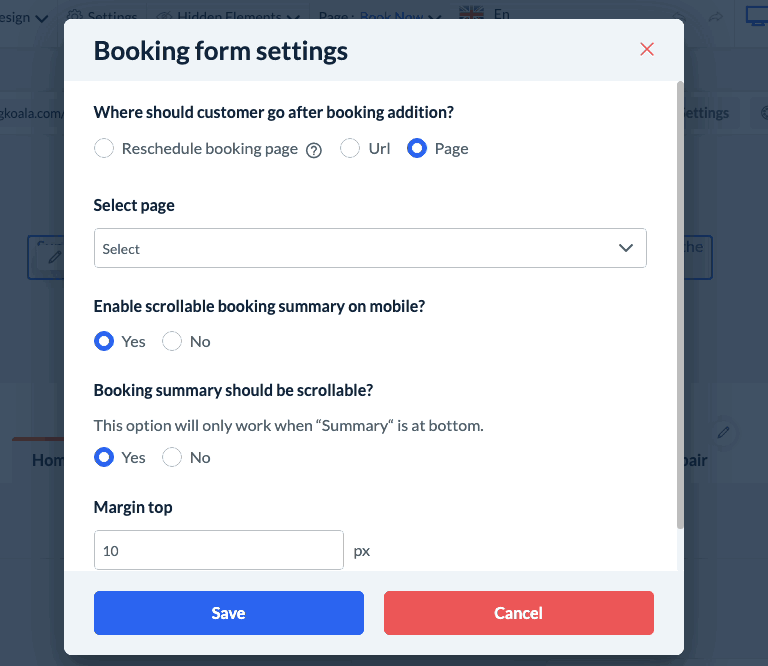
A "Booking Form Settings" pop-up will appear. For the first question, "Where should the customer go after booking addition?", select "Page". Below, use the drop-down menu to select the "Thank You" page you just created.
Click the blue "Save" button to update your "Book Now" page settings. A green system notification will appear in the top-right corner letting you know the page has been updated successfully.
To push your updates live, please remember to click the blue "Save & Publish" button at the top-right corner of the page. You can also click the "Save" button if you only want to save these changes in the backend.
You have successfully added a thank you page to your booking form.
Add a Custom URL Thank You Page
If you would prefer to redirect customers to an external thank you page, you can instead link a custom URL.
To set this up, select the "Book Now" page from the top-center "Pages" menu.
Next, scroll down the page until you see four buttons that say "Change Background", "Customize", "Rearrange", and "Settings". Click on the "Settings" button to continue.
A "Booking Form Settings" pop-up will appear. For the first question, "Where should the customer go after booking addition?", select "URL". Below, enter the URL for the external thank you page under where it says "Web Address".

Click the blue "Save" button to update your "Book Now" page settings. A green system notification will appear in the top-right corner letting you know the page has been updated successfully.
To push your updates live, please remember to click the blue "Save & Publish" button at the top-right corner of the page. You can also click the "Save" button if you only want to save these changes in the backend.
You have successfully linked a thank you page to your booking form.