My Top 12 Tips on Linocut Printmaking
This article will be helpful to beginning to intermediate artists who have had a chance to try linocut printmaking. Hands on experience is very helpful with this technique. Linocut relief printmaking is easy to get into and execute at home without a printmaking press or other large equipment.
You have to handle the cutting tools and learn to be careful with how you handle them. Always keep your hands behind the movement of the cutting tool. You do not want to hold the material with one hand and cut with the other hand, moving the sharp tool toward the hand holding the material, putting that hand in the line of fire if you slip with the tool. Be careful with the tools. Cut the linoleum, not yourself. Sharp tools work better and are easier to control.
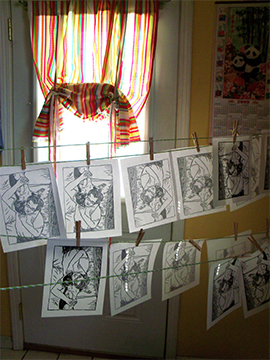
Clothesline in the kitchen? Your prints need to dry.
1. Reverse your image. You need to flip the drawing or photograph you want to work from. Use Photoshop to Flip the image or trace it on a light table or using a window. A cut blocks prints a mirror image of the design.
2. Transfer the image with carbon paper. I like to have my image worked out on paper rather than drawing directly on the block. I find that carbon paper and a ballpoint pen works well to trace and transfer my image onto the surface of my linoleum.
3. Brush a wash of thinned acrylic paint onto the surface of the linoleum. Many artists use a wash of black India ink so the cuts made show well. I prefer thinned acrylic paint because it seals the lines drawn or traced on the surface, and I can still see the lines clearly. You hand can’t rub away the lines you are trying to cut. I use very fine grit sandpaper to remove the acrylic paint after the block is completely cut.

Leftover acrylic from a painting. The color just needs to show well.
4. Hot linoleum cuts easier. I use a hot air hair drier to heat the surface of my linoleum. Some people warm the material on radiators or with pans of boiling water. I like the hair drier because I can use it to heat the linoleum over and over again, warming the surface once it gets cool enough to offer resistance to my cutting tools.
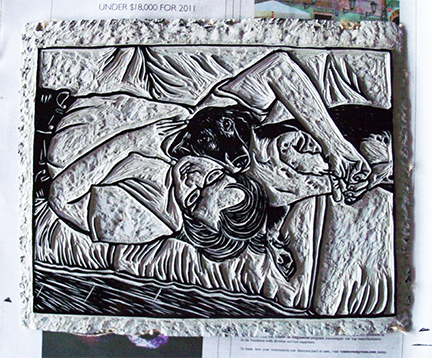
5. Try an X-Acto knife. If you use an X-Acto or hobby / pen knife with a fresh blade, you can make incredibly fine cuts. This is one of the most effective and least expensive tools you can use to incise lines. You only have to cut deep enough to make an impression, creating a variance in depth from the surface so the relief cut can be printed; you do not have to go very deep. (I’m bad at this. I seem to have some kind of linoleum anger-management issue, because I tend to hack into the linoleum much deeper than needed.)
6. Don’t hoard linoleum. Linoleum prints well over the years because the older it gets, the harder it gets. Buy your linoleum in small amounts and use it quickly. If you have older linoleum, it is a lot harder to cut.
7. Did you make a mistake? It is easy to cut away an area that you did not want to. Slips will happen. Glue a piece of the cut linoleum into place, refine the glued piece with cutting tools when it is dry and sand it smooth. I like to use Loctite Super Glue for repairs; I have also used very strong wood glue. You can also make lines with a hot glue gun and replace lost or damaged lines.
8. Print your block with thin papers. Smooth, thin rice and mulberry papers print well. I also like old typing paper and very lightweight drawing paper.
Take a photo the first time you ink your linocut. You will only see this once. After you clean the block, the cut away areas will be stained from the ink.
9. Try using oil-based ink. Oil-based inks build up nicely on the block and have a nice rich tone on paper. They are more work to clean up; using vegetable or mineral oil helps to clean up the majority of the oil on your block. I like how well oil-based inks pebble when I roll them out on a piece of glass with the brayer. It is easy to tell when you have enough tackiness to roll the ink on the linoleum.
10. Handprint fine lines. You can run linocuts and other relief cut blocks through a printing press, but fine lines can break down or break away. If you have thin, delicate lines in your design, it is best to handprint your design using a bamboo / wooden spoon, baren or a home-made wooden printing tool.
11. Prevent getting fingerprints onto your printing paper with talcum powder. If you keep a cup or small bowl of talcum powder [baby powder] close to your work area, you can dip your fingers into it to coat over any ink that you pick up on your finger tips. You don’t have to stop to clean and wash your hands if you get inky.
12. Print block onto block for multi-colored works. If you want a multiple color design and do not want to destroy your carved linoleum using a reductive method, insure the registration of the print lines up well: carve your key block [black color], ink it and print it onto the pieces of linoleum for each successive color. You want one carved linoleum for each color. Carve the blocks for the individual colors in the shapes needed for the complete composition.

Linocuts are a good way to make multiple hand-made works to share!
