


This quilt is a first for me in two ways: it is my first foundation piecing quilt and it is my first QAYG quilt too.
Both techniques were a bit intimidating to me but both have turned out to be quite straight forward.
The diagram above is what I want the back of the quilt to look like. It looks a bit like a pixelated flower though my idea was to have like an explosion of colour starting with a very bright centre.
Fabric needs
- 5 inch square in the backing fabric (you can use a charm square if your block fabrics are not washed)
- 5 inch square of batting
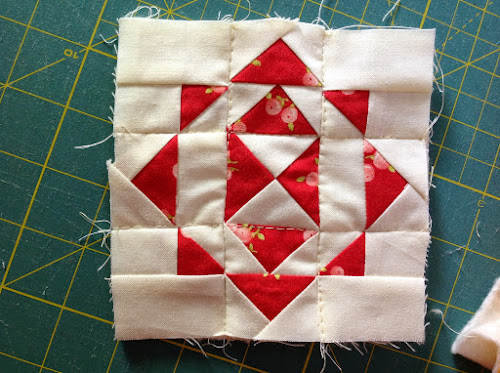
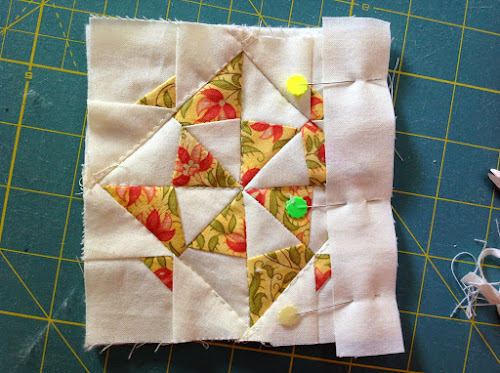
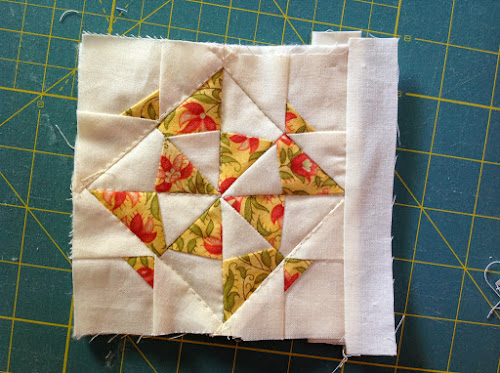
- one DJ block
- 1 1/8 in x 5 1/2 in strip
- 1 3/4 in x 5 1/2 in strip
Quilt-as-you-go method 1 – no hand sewing or batting required
Please ignore the use of a strip of batting for sashing on this video. Batting is only necessary for wide sashing. The fabric needs on the video are for a different quilt. Use the fabric needs above.
Quilt-as-you-go method 2 – hand sewing required
Step 1 – Quilt the blocks individually
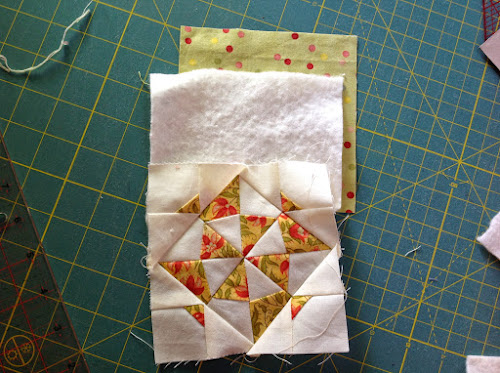
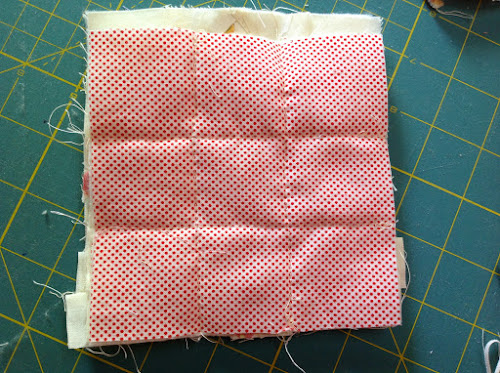
Make a quilt sandwich by placing the backing fabric wrong side up, the batting on top and finally the block on top.
Pin or baste.
Quilt as desired. You don’t even have to quilt the block! Many batting types will take stitching 5 inches apart.
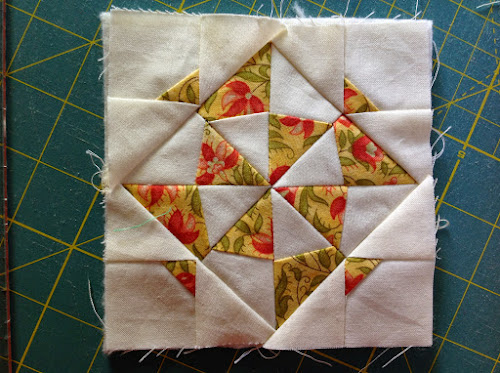
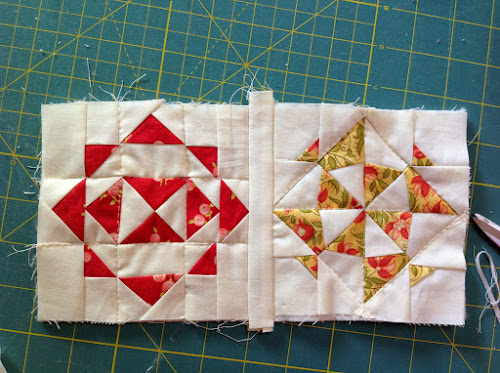
Block 1 is ready.
Do the same with block 2.
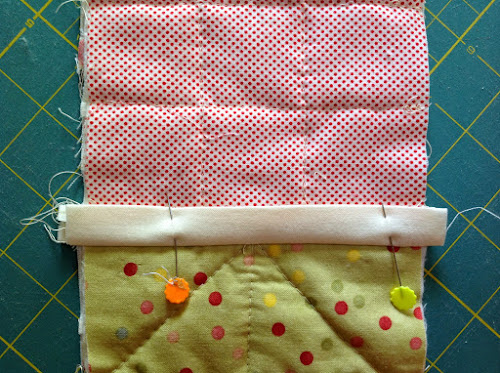
Step 2 – Cut and stitch the front and back sashing
Now cut your strips.
Fold the 1 3/4 in strip in half and press as per picture.

Place the 1 1/8 inch strip on the block as per picture.
Now turn over and place the 1 3/4 in strip on the back with the raw edge aligned to the quilt sandwich raw edge.
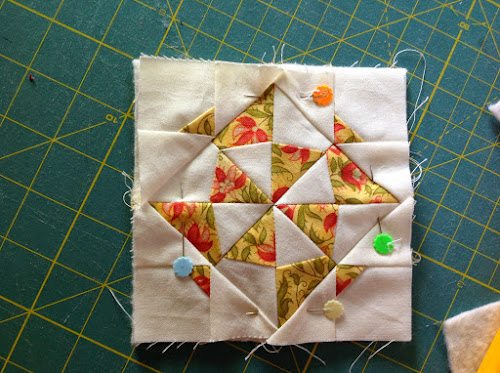
Pin.

Stitch all layers together with a 1/4 in allowance.

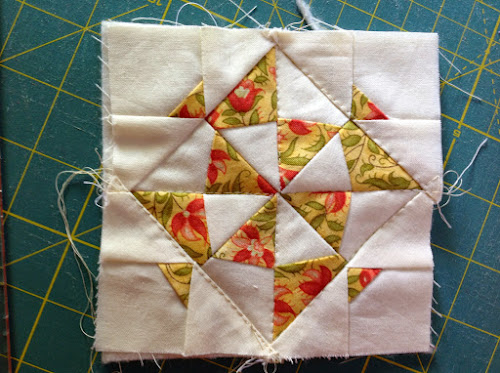
Now press open just the top strip (see picture).
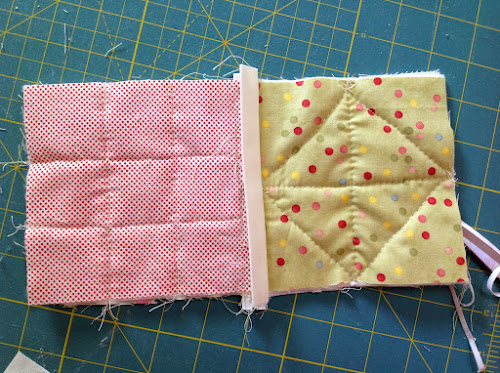
Step 3 – Stitch next block
Attach the next block to the top strip by placing it aligned with the strip.
Turn over and pin. Notice we’re not doing anything with the folded strip.
Stitch block and strip together.

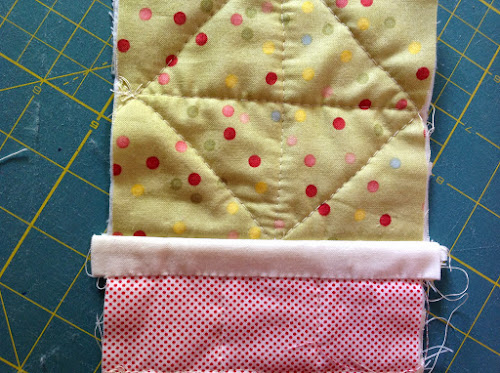
Both blocks are now stitched together via the top strip.
Time to stitch the back strip.
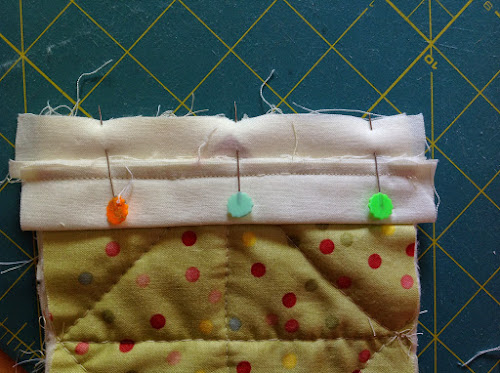
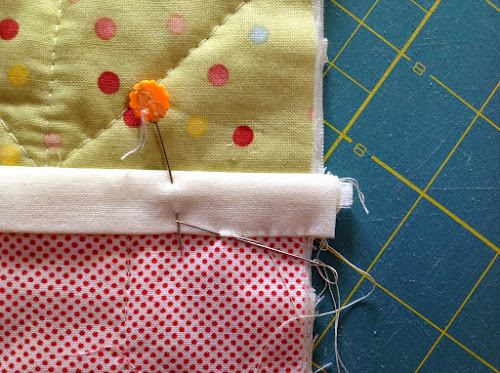
Step 4 – Hand stitch back sashing
Pin making sure the strip goes about 1/4 in over the next block and pin.
Slip stitch all along the edge.
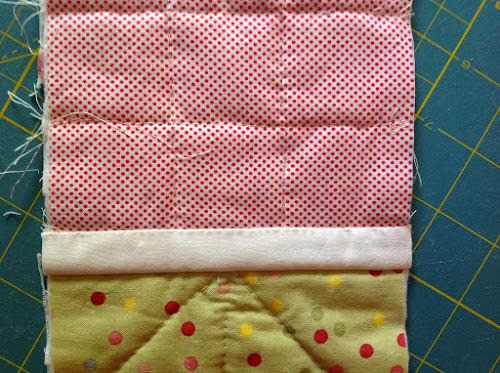
Done.
Trim excess fabric from the strips’ sides.
The first two blocks are stitched together.
Eleven more to go!
Row A is finished….

Twelve more rows to go… and quite a few triangles.
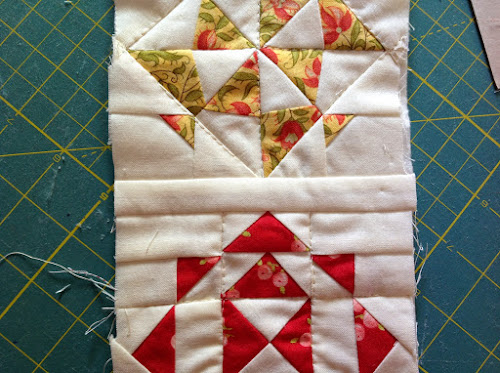
If you want to see my DJ blocks, check out my Dear Jane progress page.

So cute your DJ and sewing like “as you go” is easier.
LikeLiked by 1 person
Dear Teresa, Your quilt will be beautiful front and back. A caution: I once made a friendship star quilt with yellow stars and blue starry prints in the background. In the center of the quilt were light yellow stars with a medium blue background. This graduated out to the edges with deep gold stars on a dark navy background. When I finished I realized the center looked burned out or washed out. The first “real” quilt I ever made was QAYG reversible log cabin. Each little “log” strip was pieced to the adjoining log, and to a strip of batting and another log on the back at the same time. The sashing strips were prints that blended right in. Come to think if it, there is a reversible mini-version on my coffee table right now:
The books I used for reference were by Sharon Pederson: “Reversible Quilts: Two at a Time” and “More Reversible Quilts”.
I use a different method for QAYG now, one that requires no sashing strips for joining. The only hand sewing is basting together the sections of batting. I’m not sure whether I read about this method somewhere, or just thought it up. First I sew the entire backing together into one large piece. The pieced blocks on the front side are left in sections–perhaps top section, middle section, bottom section. On the queen-sized “strippy” quilt below, there were five sections: left, middle, and right strips, plus wide top border and bottom border.
I started by cutting a piece of batting a couple of inches larger than the middle pieced section. I laid that batting in the center of the face-down backing, then laid the middle pieced section on top and pin-basted the layers. Then I rolled up the extra backing on each side. The quilt fit easily into the arm of my domestic machine. I was able to free motion quilt, to within 1/2″ of the edge, without effort.
Then one side section of the top was machine sewn to the center section of the top alone– not to the batting or the backing. I used the usual 1/4″ seam. Then the backing on that side was unrolled, a piece of batting was placed between the backing and the top. The batting was hand basted to the adjoining center section batting. The three layers were then pin-basted together, and that side was quilted. I continued section by section, without ever having to cram half of a fluffy quilt into the arm of the machine. (I always use mid-loft polyester batting–I like fluffy quilts!) For the applique quilt below, the top was just one large piece:
So for that one, I pieced the backing in sections instead. I laid the appliquéd top face down, put a section of batting in the center, added the center section of backing, pin-basted, rolled up the appliquéd top on each side and quilted the center section. I quilted it from the back, so the bobbin thread (a metallic) was on the appliquéd side. On this appliquéd quilt, the pieced backing was done in three sections–on the diagonal!
I really look forward to all the creative ideas you share in your blog. I especially love your textured 3-D blocks. “Someday” I hope to try some of those, using chambray. I think they would really shimmer with the two-toned weave of chambray. Keep on quiltin’ Carol
Sent from my iPad
>
LikeLiked by 1 person
This is a wonderful tutorial on Quilt as you go and I will be referring to it a lot, as I have wanted to try this for a long time! Love your fabrics on the DJ quilt too. Thanks so much for sharing .
LikeLiked by 1 person
Teresa, I meant to add to my original post before I hit “send” by mistake…… Wanted to tell you how much I enjoy your imagination and fabric choices and especially the fabric manipulations ideas. So talented. I often wonder where you get your fabrics….they are just my style. I’m from the United States and I find it fascinating to learn new things from other countries due to technology available. Keep up the great work.
LikeLiked by 1 person
I LOVED THE WAY YOU DID THIS , IM SURE THAT EVEN I CAN DO IT , THANKS FOR POSTING,
LikeLiked by 1 person
Carol, thank you for the explanation of your QAYG method. Now that I’ve thrown myself into it I can see a world of possibilities. I look forward to seen your fabeic manipulations in chambray (I had to look up what chambray was but it should work).
Dottie I get my fabrics from the US usually but I sometimes buy them in Australia. Many of them are Moda fabrics. I used to buy from Etsy sellers but the freight has gone up too much in the last 2 years so I now buy from http://www.hancocks-paducah.com.
LikeLike
Lovely, lovely blocks and a wonderful method of putting them together! Thank you for sharing the technique!
LikeLiked by 1 person
I love your pixelated flower plan. It will result in a colourwash effect without the overly formal diamond pattern of the original’s colour placement.
LikeLiked by 1 person
I wonder though with the sashing if the effect will be a bit lost. But since I started with a very loose idea of what I wanted it won’t matter too much.
LikeLike
I see! I think it will still work beautifully with sashing.
LikeLike
Oh, the flower plan is only for the backing. The top will be whatever it’ll be. I’m not paying attention to my fabric placement at the moment…. Maybe I should…
LikeLike
My top was random too, and I am happy with it.
LikeLike
Teresa, thanks for the fabric info about Hancock. I have not looked at their website for years, as I have enough fabric to open my own store! And I do have a favorite site or two. I have a lot of Moda things and did recognize a few goodies. I am partial to Bonnie and Camille and Fig Tree older patterns that are no longer available. Sometimes I can catch something on Etsy. I have difficulty doing “scrappy” things, so I have lots of leftovers. I keep saying I will get a basic neutral and do lots of 9-patches or flying geese. Appreciate you responding to me, as most times questions asked on sites never get a reply. It was a treat to see the note from you.
LikeLiked by 1 person
My pleasure.
LikeLike
Thank you for this tutorial. I’ve been investigating this method for the Dear Jane quilt. After watching this tutorial I’m going to give it a go.
LikeLiked by 1 person
Wonderful idea!. You quilt it by hand? I also have a doubt about the border:do you use bating inside the fabric?. I love very much your work.
Thanks
LikeLiked by 1 person
I quilt by machine. With sashing as narrow as the one on this quilt I don’t use any batting because there isn’t enough gap to add any.
LikeLike
Dear Teresa, Being from VT, USA I have always wanted to make this quilt. My husband and I plan to go to Bennington so I will send you a original photo of DJ. Your directions seem like I could really do this. Josephine from up North. Thank you for your great teaching skills.
LikeLiked by 1 person
Oh good. I need to get back to it 😊
LikeLike
I have all of the blocks completed and waiting in a huge tub for quilting. Would it be possible to get a copy to print-out these instructions? I’ll be away at hubby’s trapline and would like to have this to follow. Thanks so much for your generous assistance. email: hehjude53@hotmail.com
LikeLike
Hi, I am from Dubai and some of the friends have decided to start dear Jane in quilt as you go method. Your tutorial is amazing and thank you so much for the same. I have a doubt about the border triangle and corner stone. Can you show how to join them in the quilt as you go method. Thanks in advance.
LikeLiked by 1 person
Hi Brinda,
I haven’t finished my quilt yet but the plan is to add the border as one single piece in the same way as I’m joining the blocks in rows.
LikeLike
Hi Teresa.
You have inspired me to get going and put together my center blocks that I finished last year. Still haven’t completed the triangles but really quite worried that they will have to fit the center square so precisely and not be too “ wavy”. Doing it as one single piece seems the way to go. Thanks for the inspiration to take the next step to finishing this challenging quilt
Gail from the Sunshine Coast
LikeLiked by 1 person