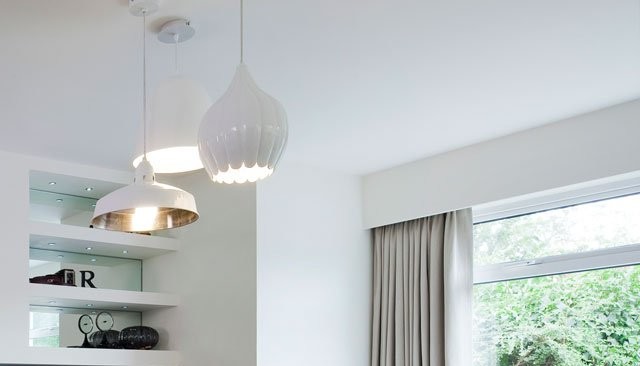
How to... DIY Window pelmet
Something that we frequently get asked about is window dressing and how best to finish off a window. To us, simplicity is key. We aim to avoid fuss and frills and create a simple and streamlined look. Windows are there to provide a view and to allow in natural light. We aim to maximise that and enhance the natural view as much as possible by framing it. Often curtains can reduce the window size and block some of the natural light. By spanning the poles the full width of the room, the curtains can be kept on either side so that you can appreciate the full size of the window.
In order to do this, we choose to hide curtain poles, tracks and the detailed tops of curtains. We do this by creating simple pelmets that hide all of the fussiness. Pelmets in the past were busy and decorative. They used to be upholstered and tended to add clutter to a space. We have changed this up and use them to achieve a more high end, simple, hotel feel.
Pelmets are simple to make and fit and they are inexpensive. We recommend painting the pelmet in with the wall colour for a seamless, contemporary look. Following this guide will instantly refresh and lighten your room.
Because the top of the curtain is covered, it means that you can use inexpensive curtain poles and ready made eyelet curtains.
Here is an easy to follow DIY guide to make your own pelmet.
MATERIALS NEEDED:
- MDF sheets - The amount required will depend of the length of the window wall.
- Rough timber batons
- Screws
- Wall plugs
- Drill
- Measuring tape
- L-Brackets
- Filler / Caulk
- Existing curtain pole to hang curtains inside the pelmet box
- Primer
- Paint (the same as the wall colour)
- Paint brushes and tray
PROCESS:
STEP 1:
Take down your existing curtains and curtain pole. Leave the brackets in situ... you can work around them. If you have a track already mounted to the ceiling or wall, you can work around this too. If getting a new curtain pole, try and get a pole or track that spans the length of the room for maximum effect. If using a new pole, make sure to put the brackets up before the pelmet.
STEP 2:
Measure your window and decide on the height, width and depth of your pelmet before cutting the MDF board.
The length of the board is determined by the width or length of your room. We span pelmets the full length of the window wall. This creates a seamless hotel feel. Most likely this will require the length of 2 x MDF sheets. These can be joined together centrally with a hidden bracket underneath and then caulked and painted at the front. This will give the appearance of one continuous pelmet.
The height depends on the ceiling height of the room. Ideally we would have the pelmet starting from the ceiling and sitting 20mm below the top of the window. This ensures that you get to see the whole window and avoid seeing up into the pelmet. It also enhances the seamless feel.
If it is a very high ceiling in the room, 350-400mm height works well.
The recommended depth is 200mm to the front of the MDF pelmet. This is a safe option to ensure the top of the curtain is not crushed or flattened and the curtain hangs in its natural pleats.
STEP 3:
Have the boards cut to size in the hardware shop in order to ensure they are perfectly straight and flat. They can be cut at home, but it is difficult to achieve a perfect level. Chadwicks provide a cutting service in their warehouses at little extra cost.
Cut rough block sections of timber batons to help secure the pelmet to the brackets
STEP 4:
Mark out 200mm from the window wall. This will be where the front of the MDF sits. Screw the rough blocks to the ceiling and screw the L- brackets to them for a secure base. Once fixed, screw into the MDF sheets. This will keep the pelmet in place.
Depending on the length of the room, it may require additional brackets for extra support.
STEP 5:
Caulk along the edges of the pelmet where it meets the wall. Caulk along the top of the pelmet where it meets the ceiling. (It is unlikely that the ceiling will be perfectly flat so this will hide any imperfections)
When the caulk has had time to set, prime and paint the pelmet in with the wall colour. Allow 24hours for the caulk to properly dry out. This will ensure it doesn't crack.
STEP 6:
Clip your curtain pole with existing curtains back in place onto the pole brackets.
STEP 7:
Arrange your existing curtains and enjoy the view out of your newly upgraded windows!


