
What tools should I use for linoleum block printing?
The process of choosing a printing block and your carving tools go hand in hand, you cannot use one without the other. Just as there are many options to choose from for a printing block, there are just as many for your carving tools. The difference is, there is a lot of information on the internet on which tools are the best. At the end of the day, you should choose the tools for linoleum block printing that are right for you!
One of the benefits of being an art educator (and there are many) is that I need to find tools for my students that are cheap but useful. Thanks to this, I have been able to observe how some of the most inexpensive tools deal with heavy handling and use.
First, I will go through the linoleum carving tools that I use, and then I will show you all the printing blocks I have tried.
How do I use a linoleum carving tool?
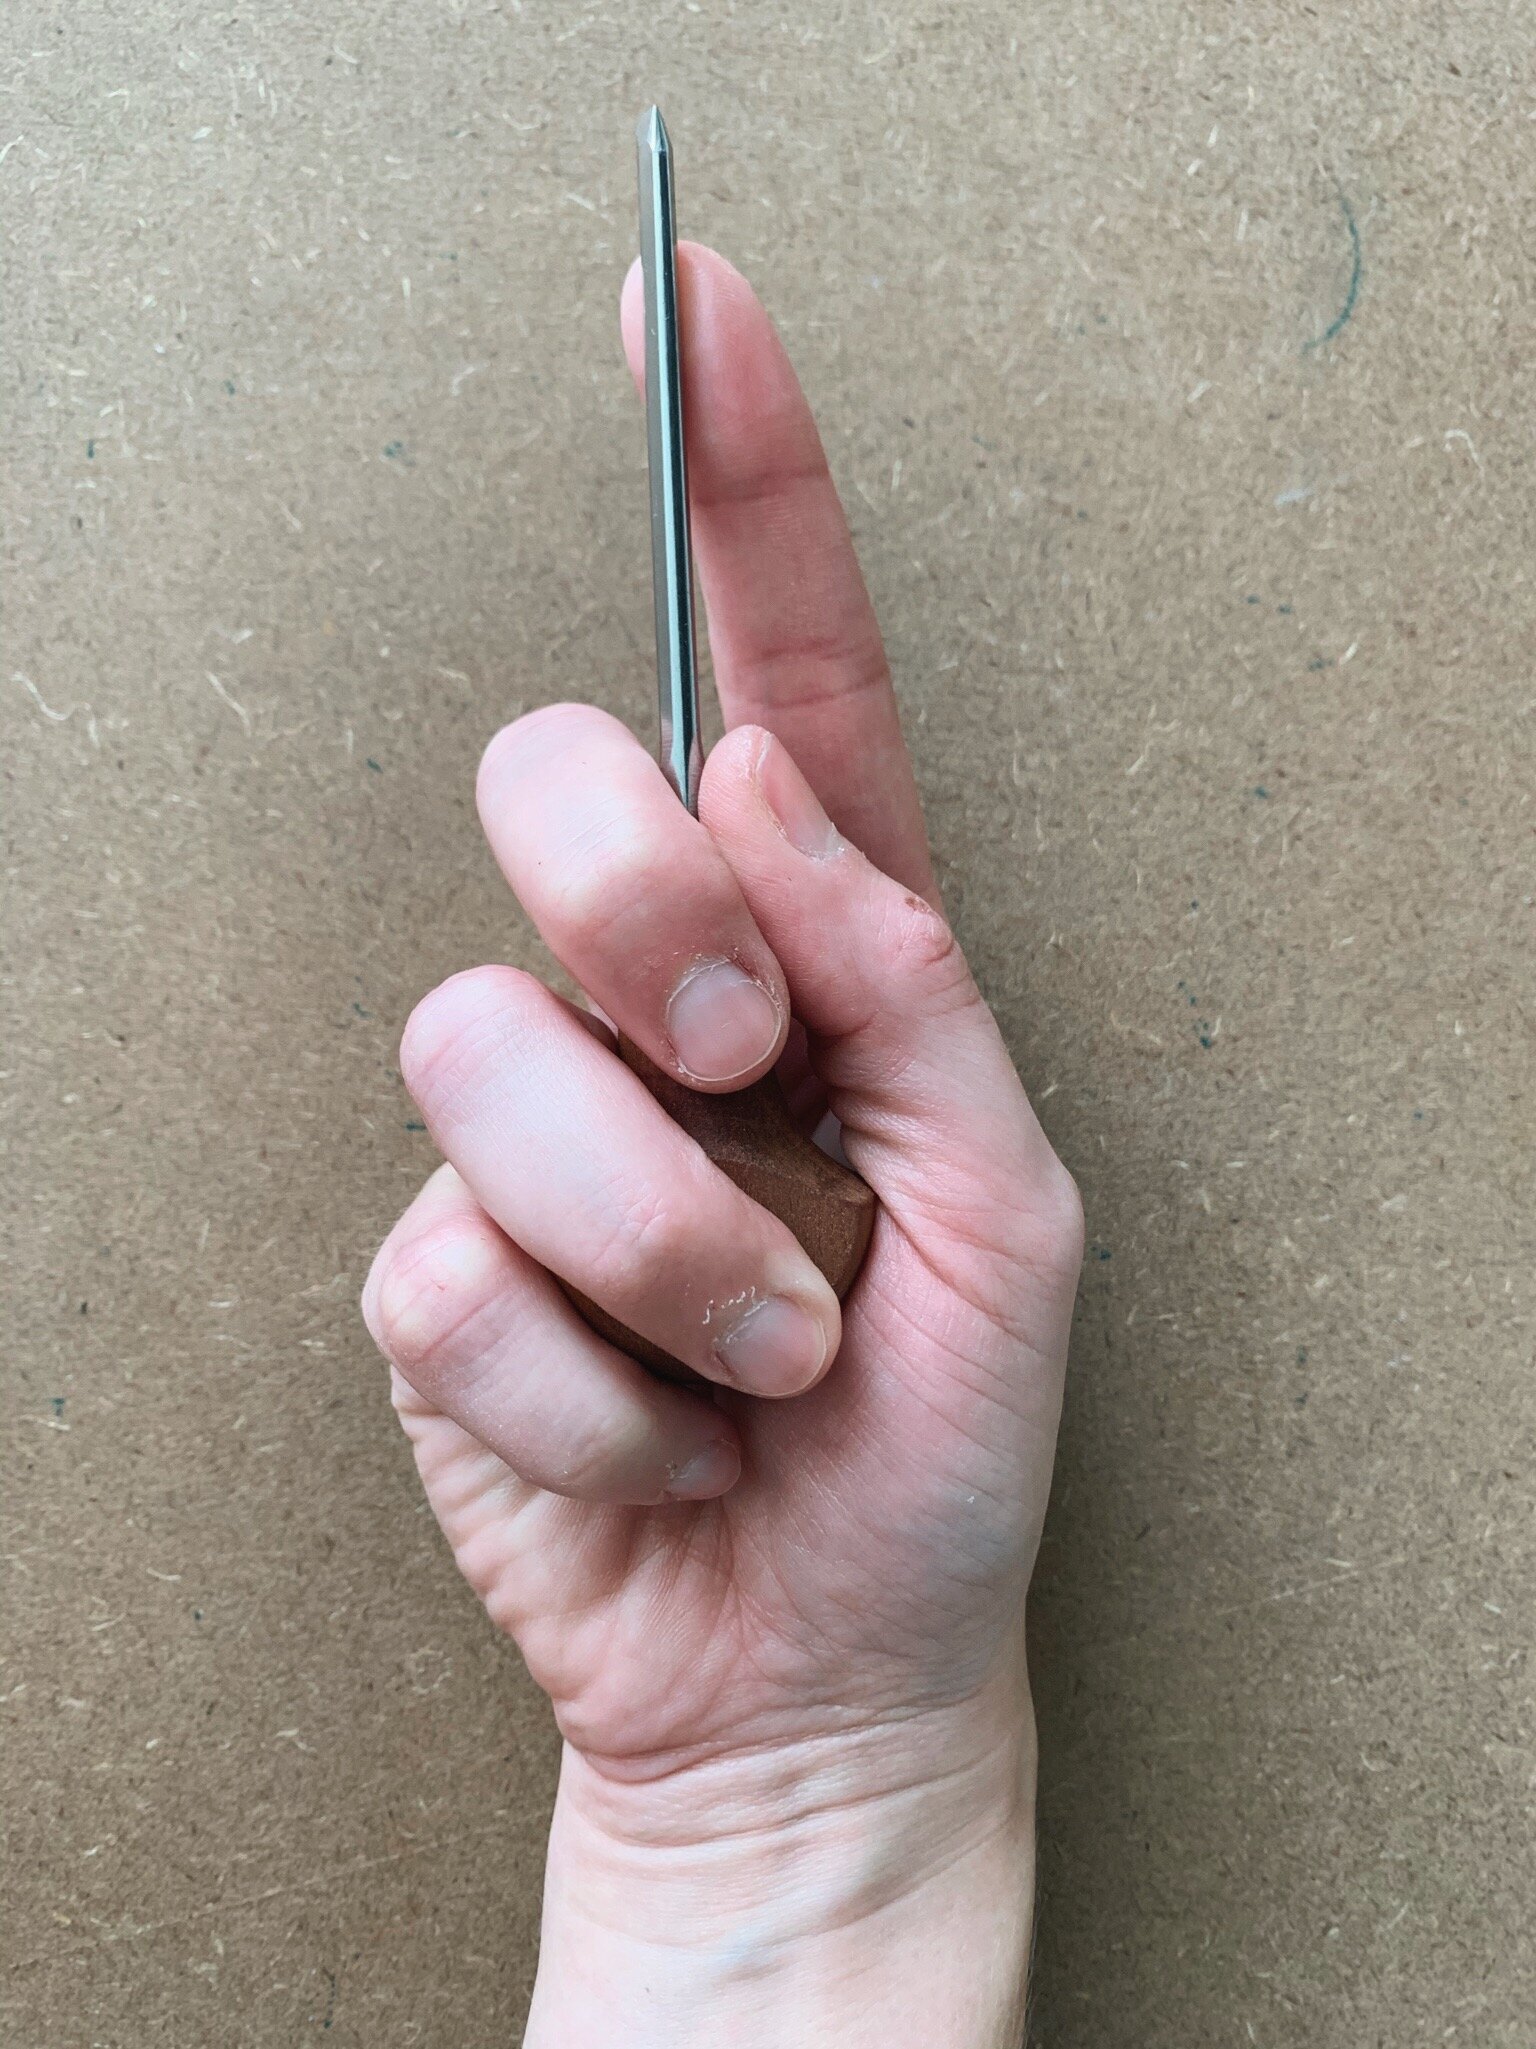
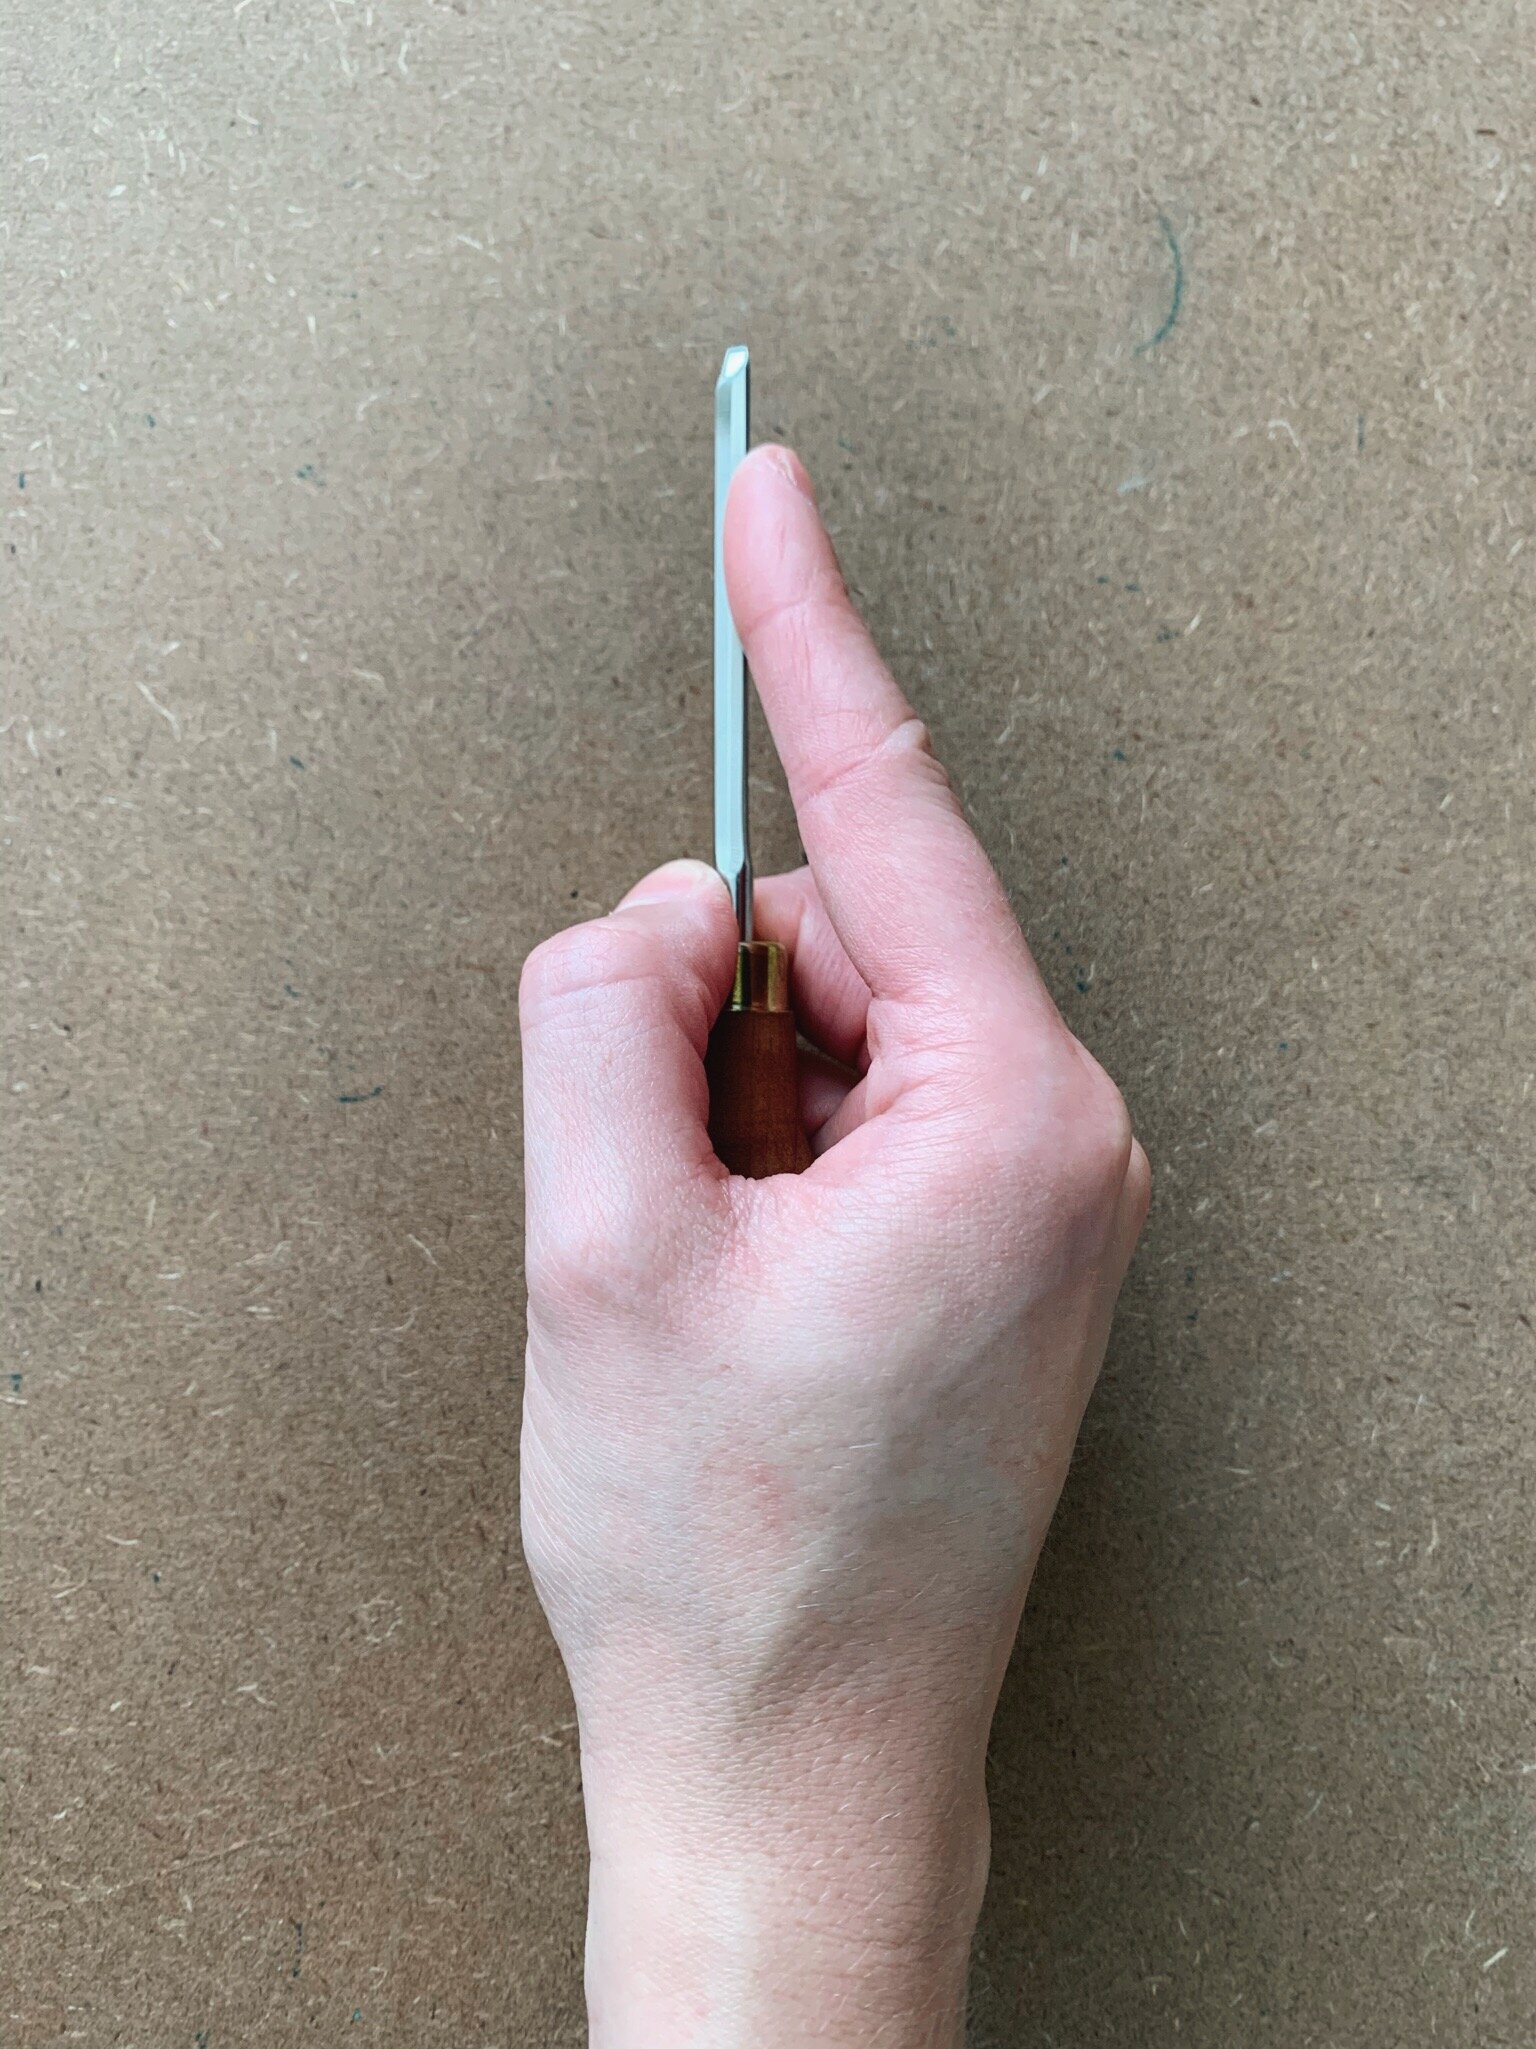
Make sure that you know how to properly grab your carving tools, do not grab it like a pencil. I cannot tell you how many times I have put bandages on student fingers because they are not paying attention to how they are holding their carving tool.
The end of the tool goes on the palm of your hard. You use the palm of your hand to push the tool, this gives you more stability and force. Then, you wrap your remaining fingers around the handle and use your pointer finger to guide the tool as you carve. Your other hand always stays behind your carving hand. You will be tempted to place it in front, I guarantee that if you so that you will shave off a part of your finger. So, don’t do it.
How to sharpen linoleum tools
Making sure that you are sharpening and smoothing your tools makes it feel like you are carving butter. The pointy ends do not get caught on the block and you use less brute force to move your carving tools, which makes your hand not cramp. Nobody wants to deal with carpal tunnel.
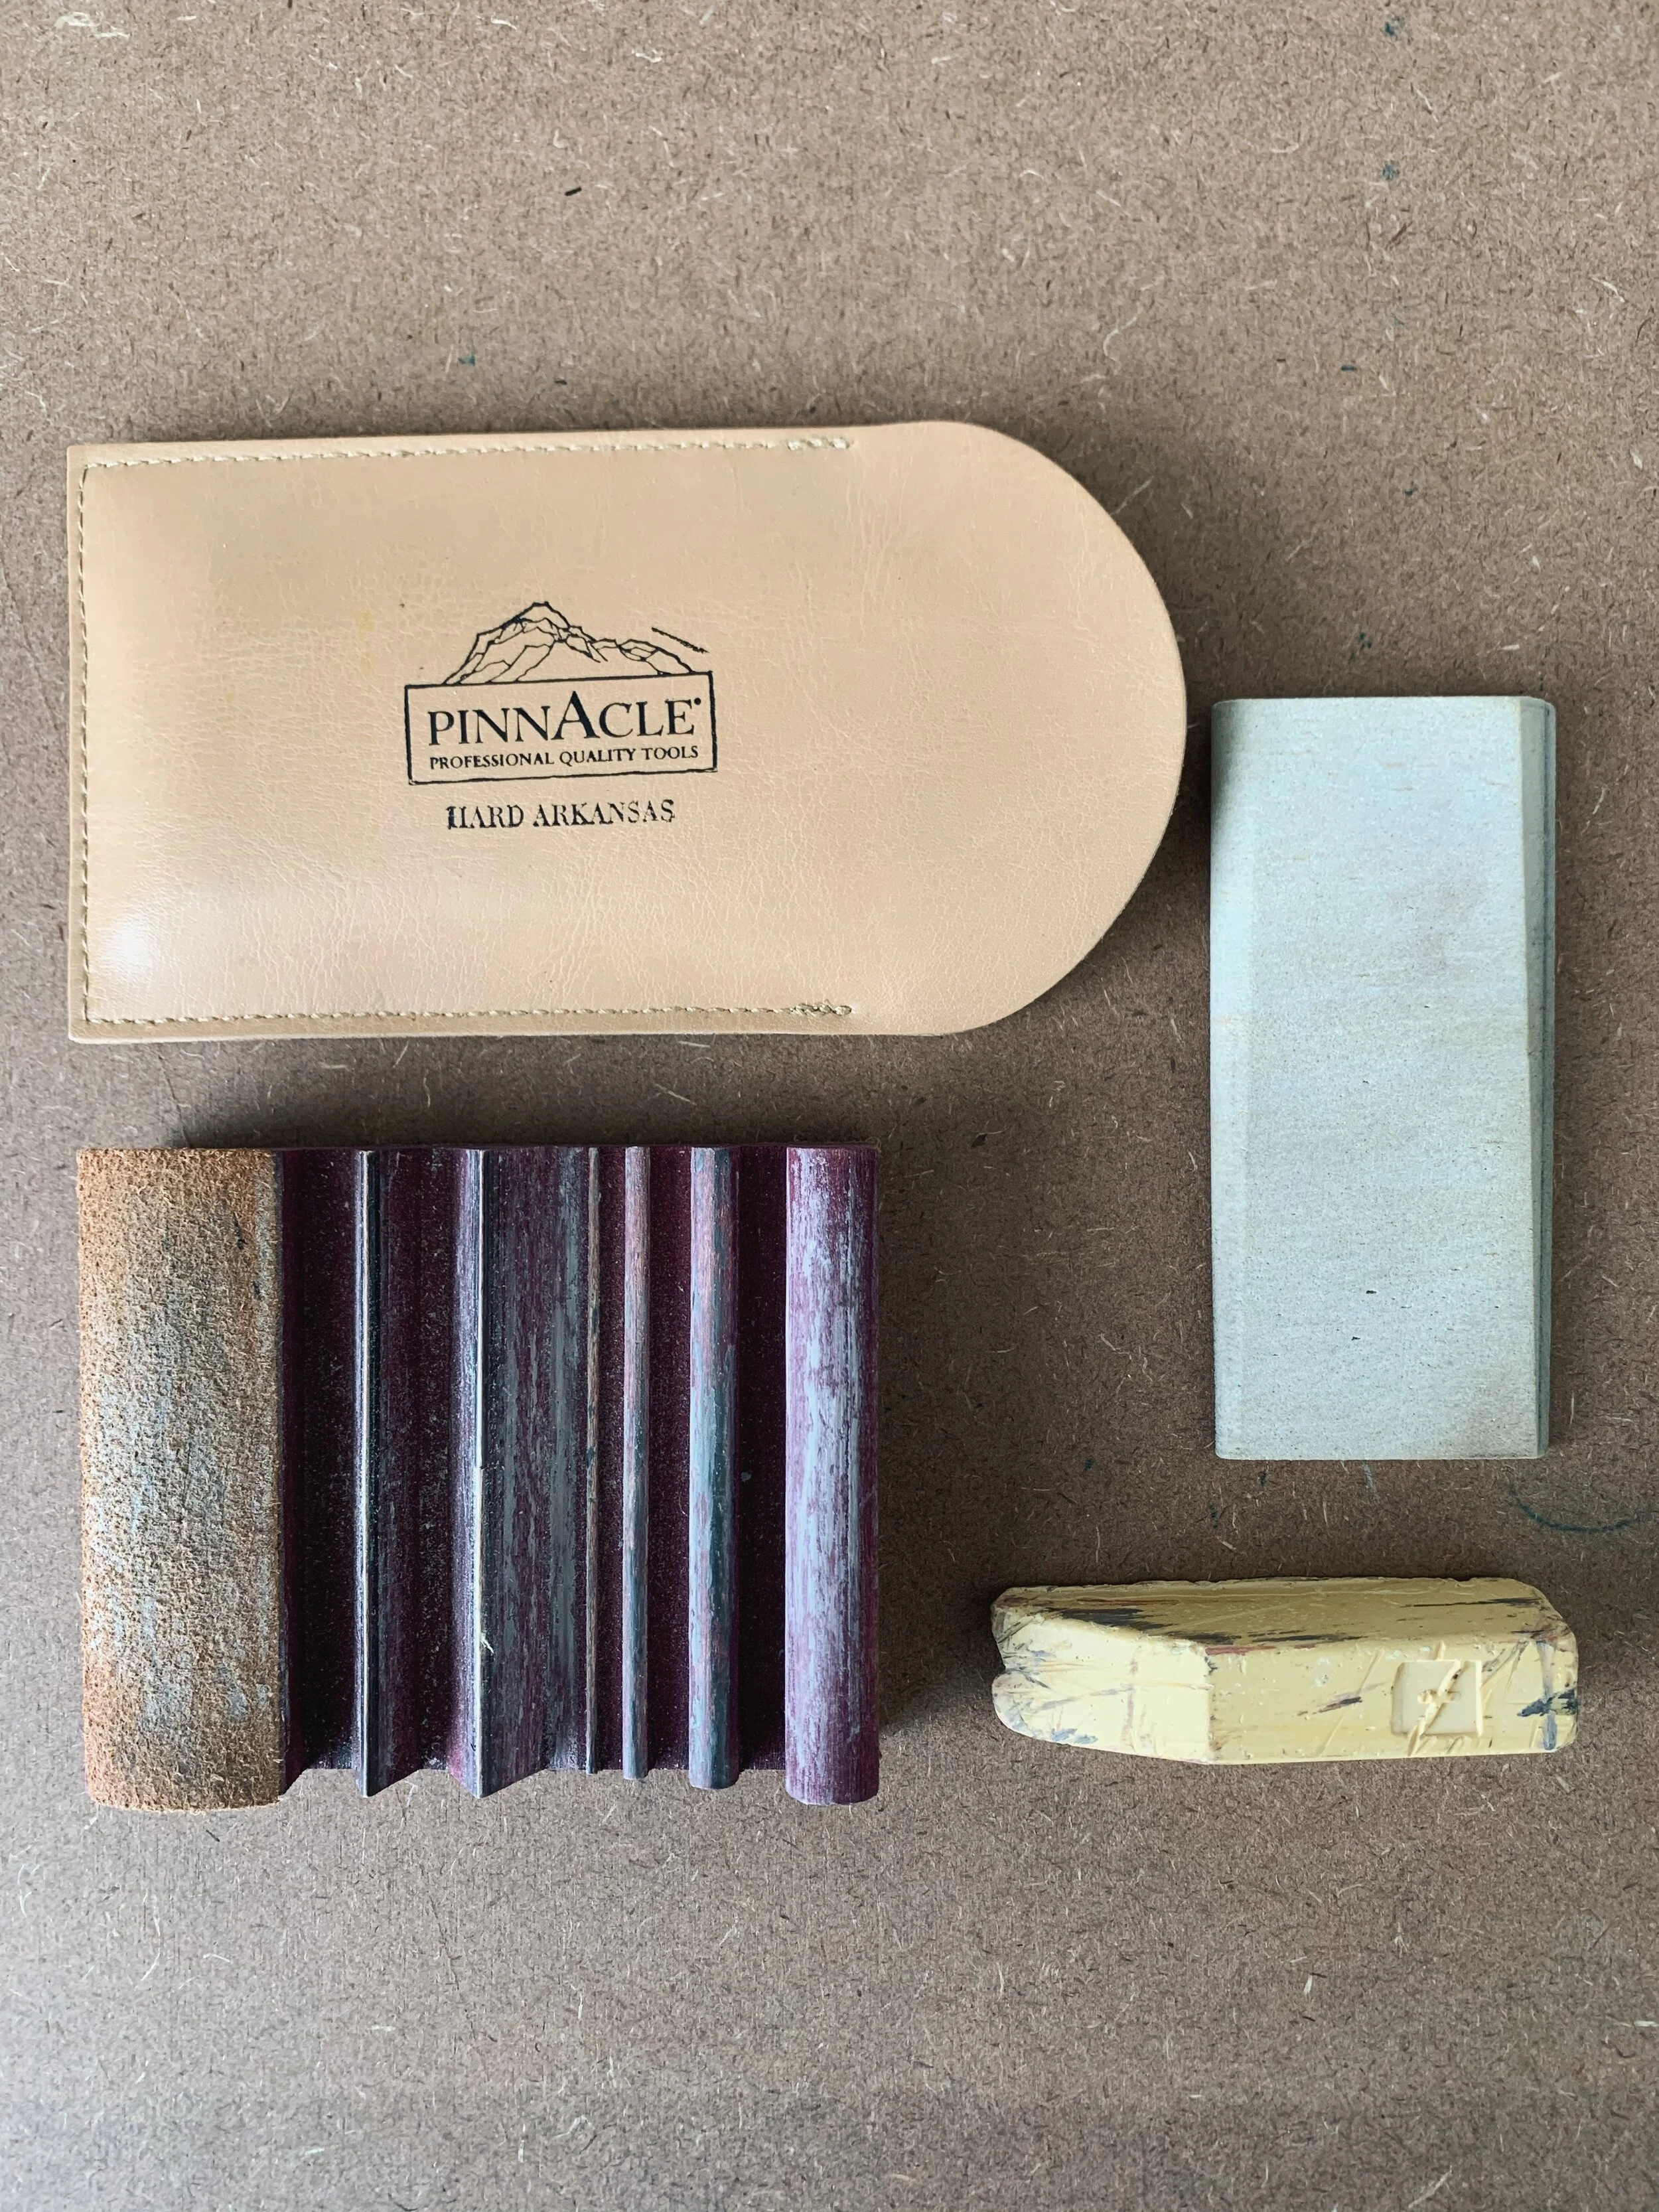
I also like to use a sharpening stone since I also have some carving tools that can be used with woodcuts. I use my stone with all my tools just to keep them in good condition. Before I put my linoleum carving tools away for the day I like to sharpen them with the stone first and end with the SlipStrop. The same professor who grilled us about sharpening, gave me a wet stone which is what I still have. I use Pinnacle’s Hard Arkansas stone with a little bit of honing solution.
Some carving tools for linoleum block printing
The most common carving tool for beginners is Speedball’s Linoleum Cutter. It comes with 5 blades and 1 knife. Now, I hate the knife and don’t really use it. If you need a knife or sharp edge, an art knife like an X-Acto knife is ten times better. The handle is plastic and at the end it has a little cap that unscrews to keep all your blades safe and secure.
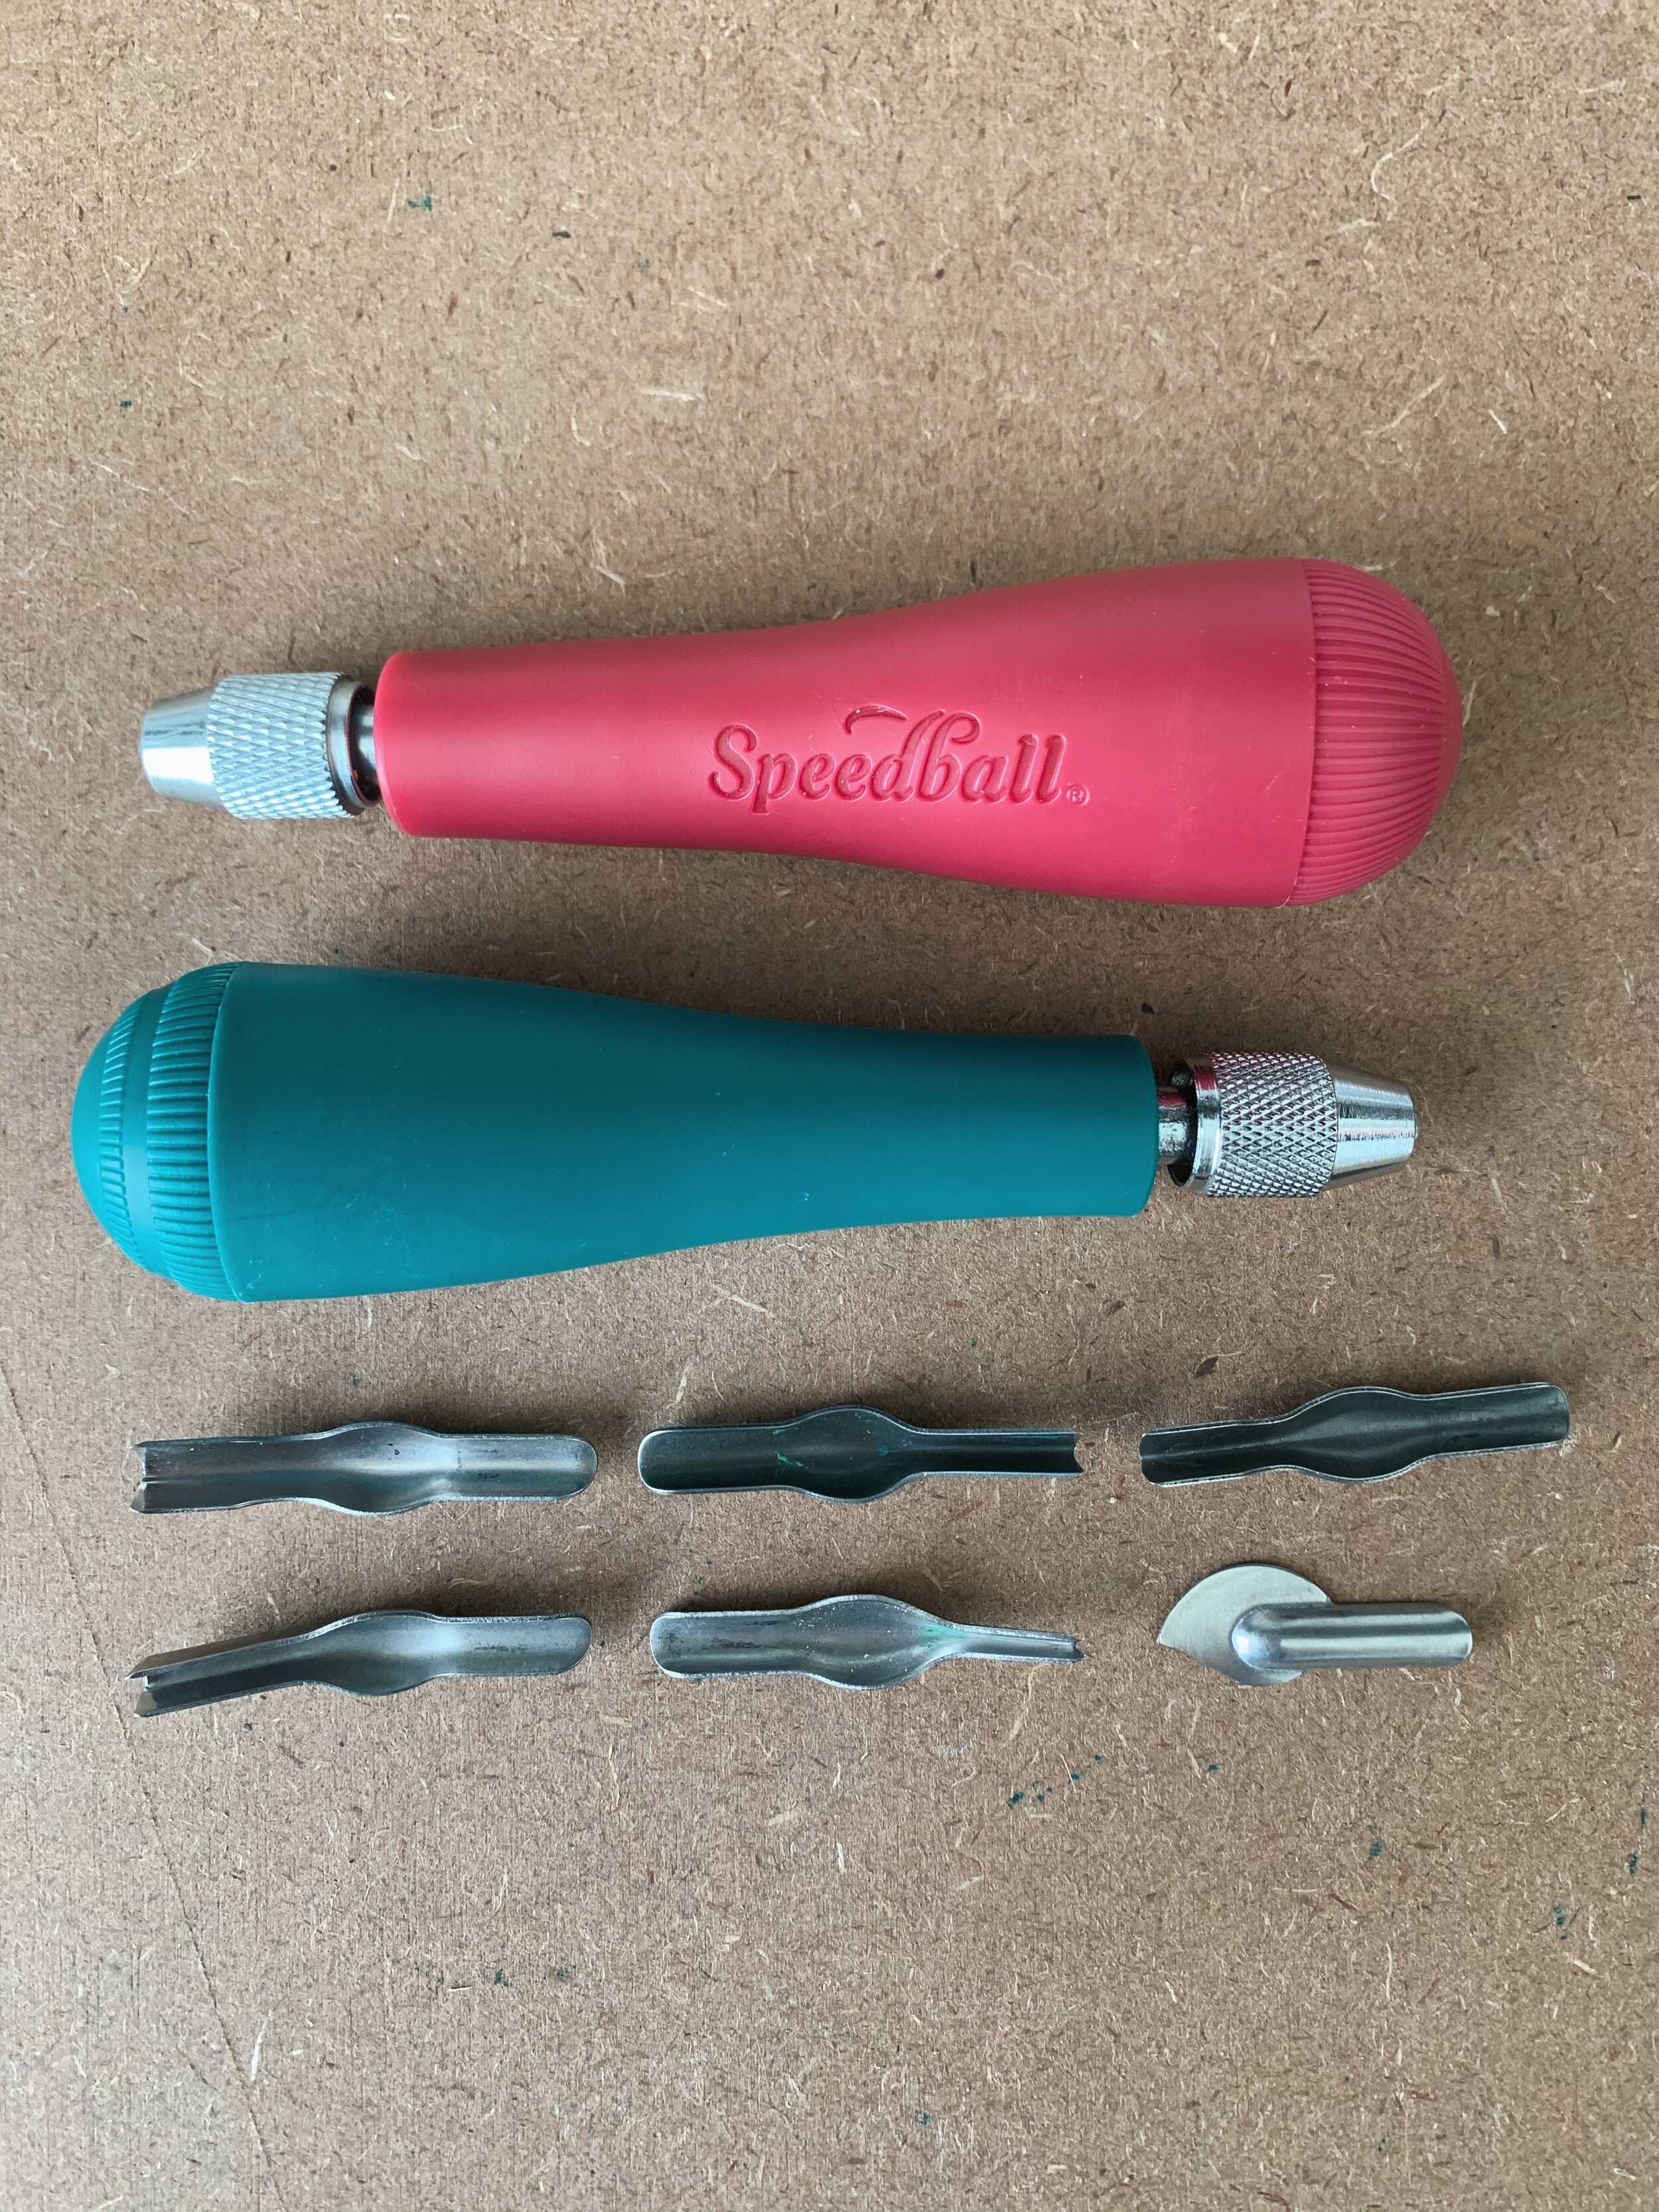
Dick Blick sells their own carving tool, aptly named Blick Lino Cutter, that is comparable to Speedball’s and comes with the same type of blades for a slightly cheaper price. Something to note is that the blades that come with Blick and Speedball are meant to be replaced. You can still sharpen them to keep them in good condition, but they will not last forever. They are meant to be replaced and you can buy each blade type in little packets.

Pfeil linoleum tools
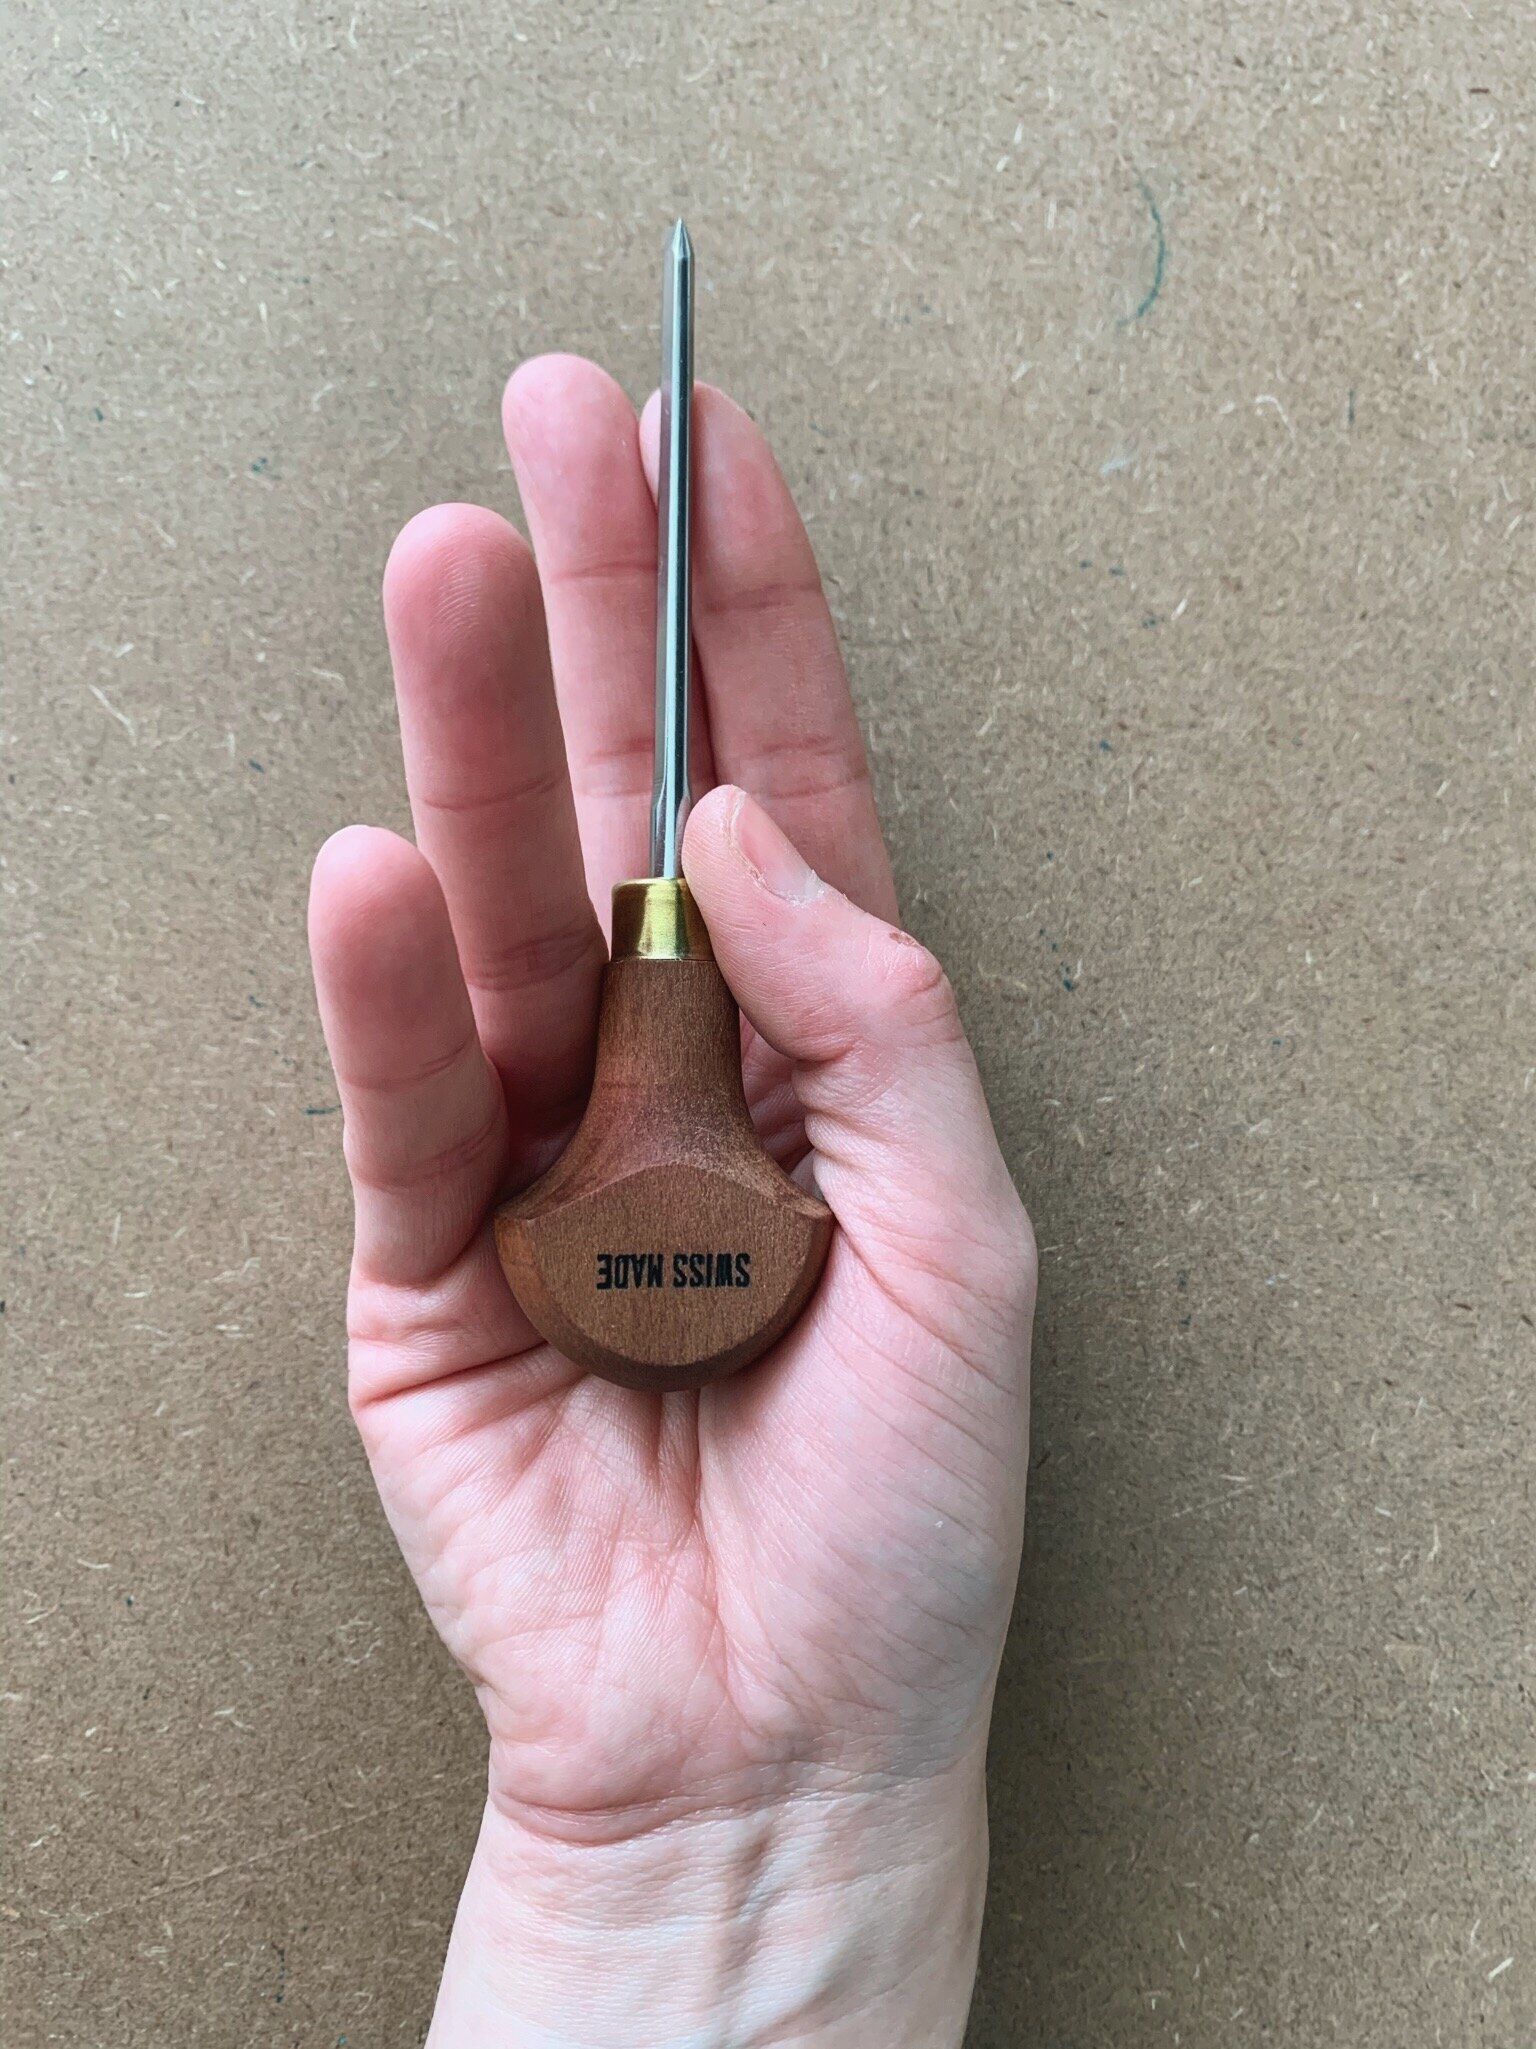
Maybe you have been doing linocuts for a while and you are ready to upgrade your tools. Without a doubt the most popular, coveted and used fancy carving tools are by Pfeil.
Pfeil are swiss made tools and can be used to carve linoleum and woodblocks. Before buying some of their tools, I was skeptical and thought they were overly hyped. Once I tried them out, they proved me wrong and I have never looked back.
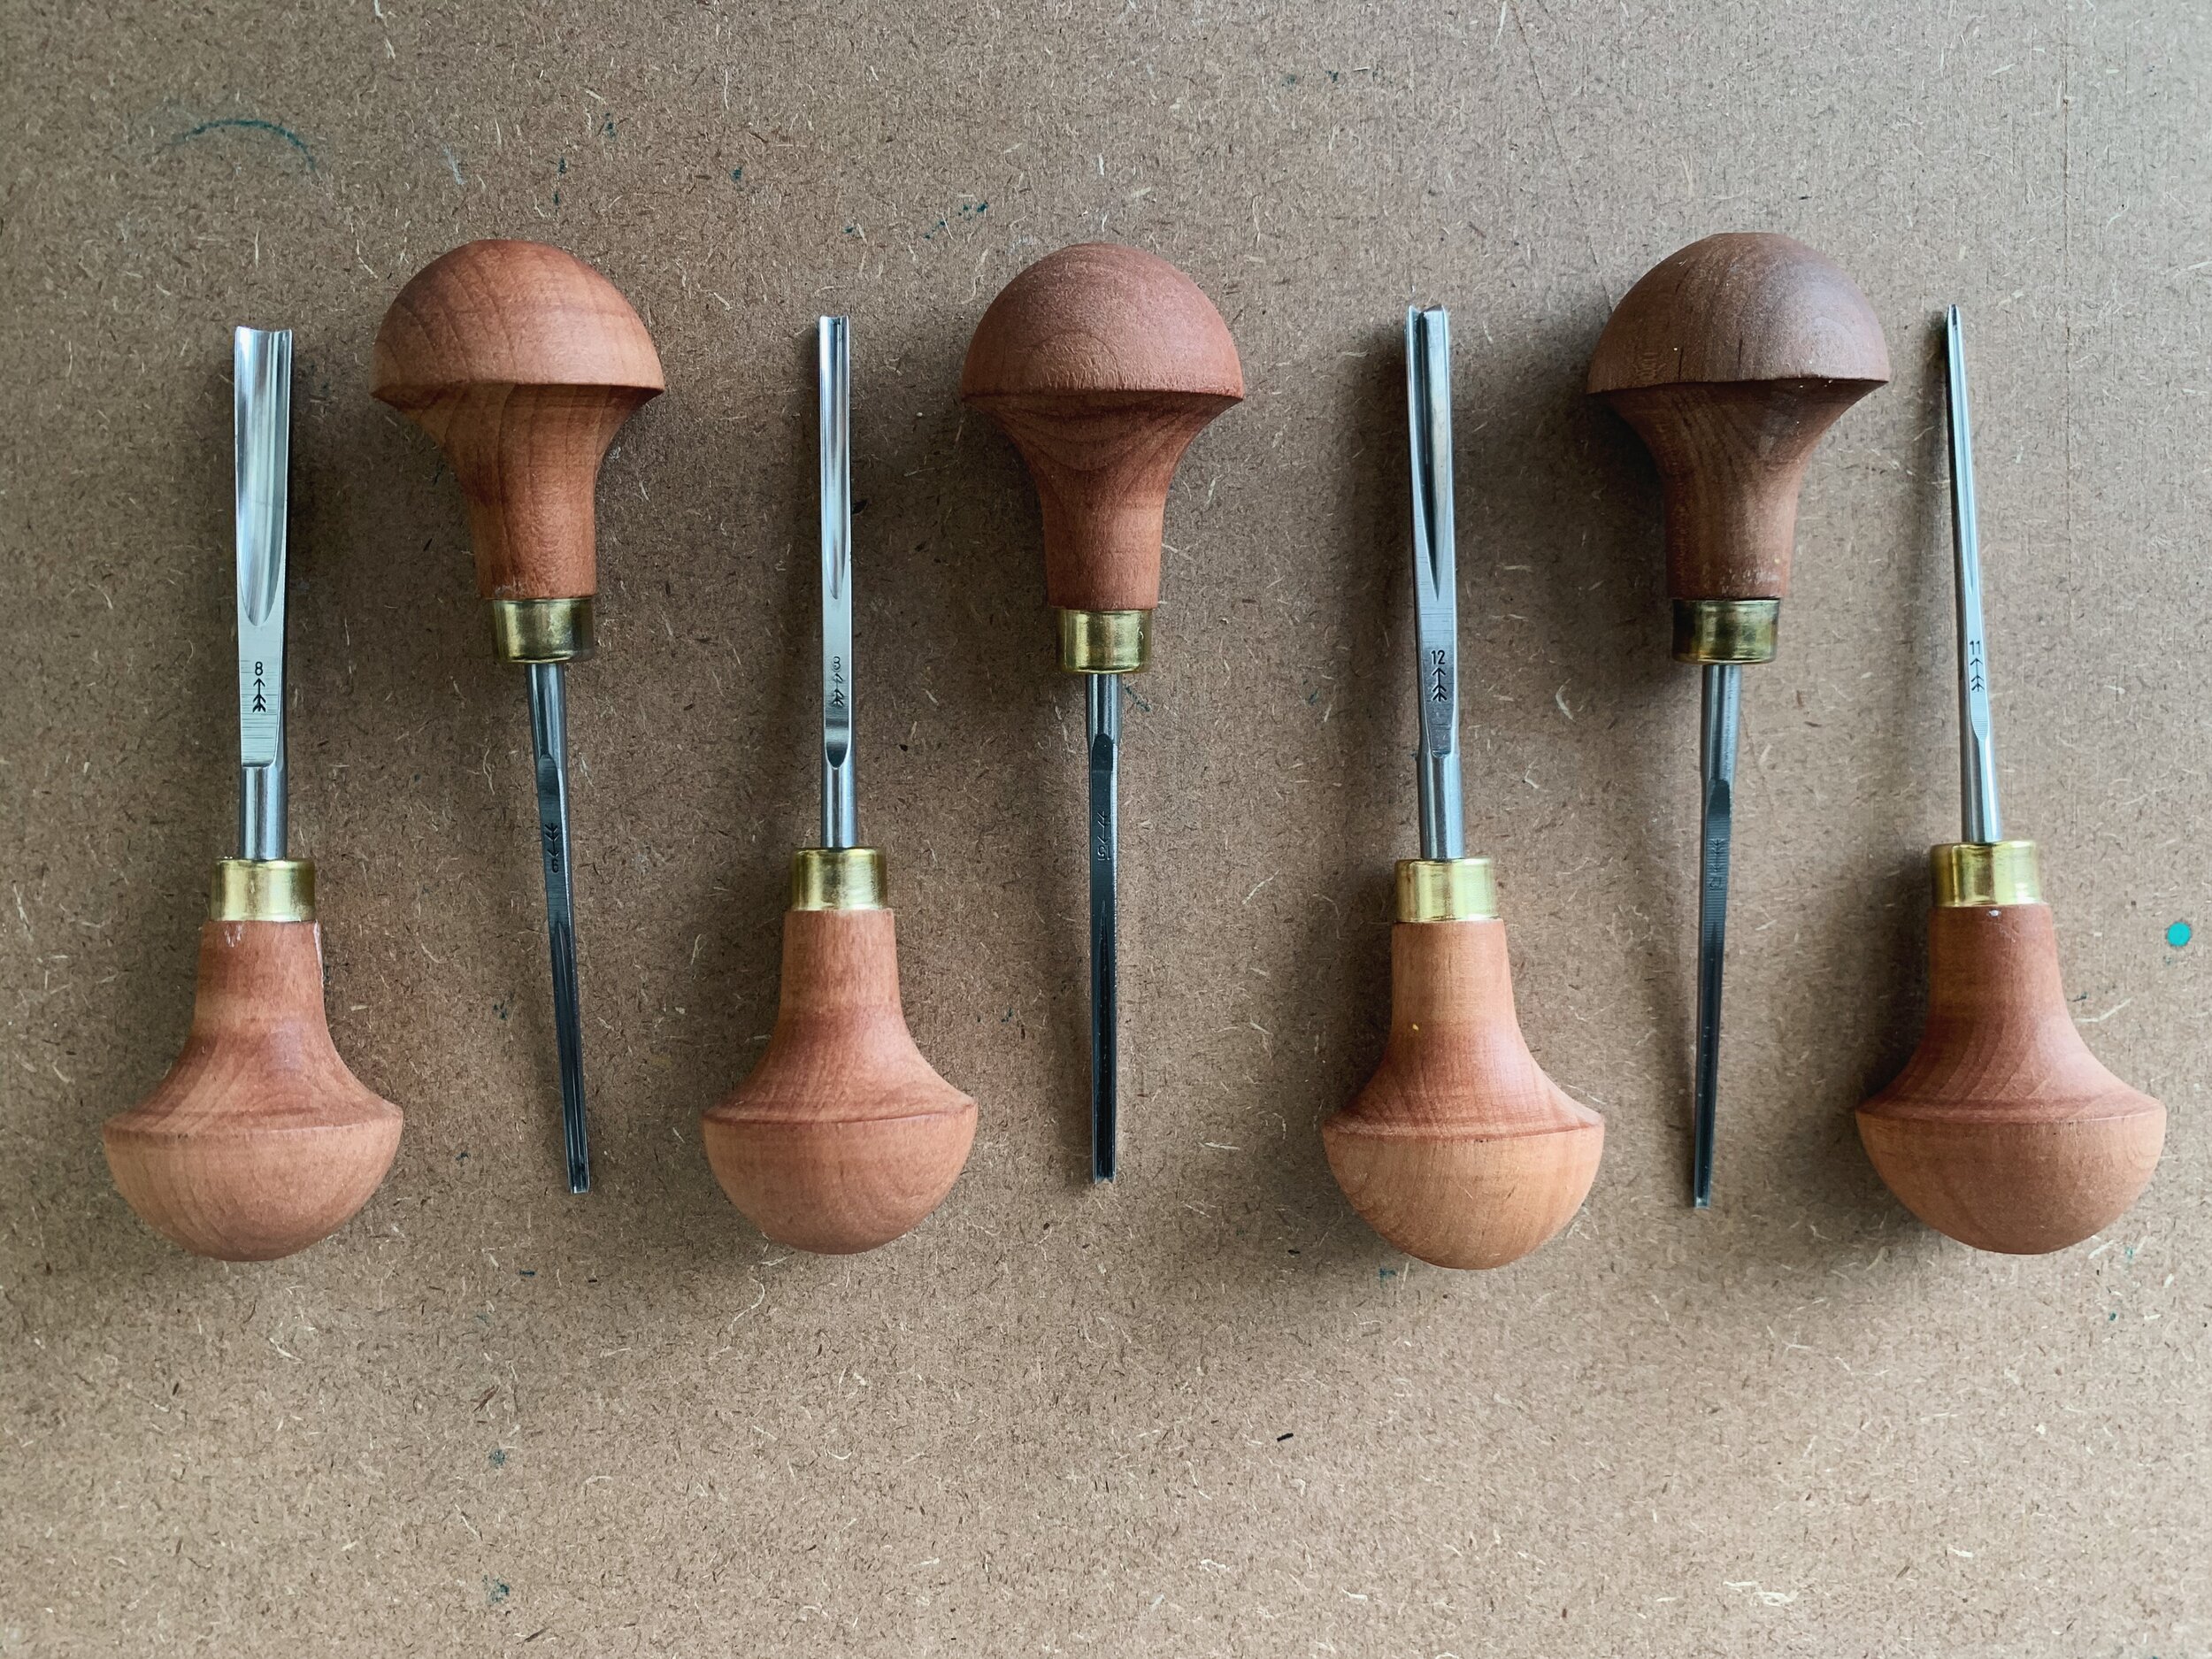
The first time I used a Pfeil tool to carve my design on my printing block I was dumbfounded. I literally gasped and carved with open mouth. I was so impressed that I even dragged my husband to the studio for him to try them out. If you have the budget, I would advise you to get some Pfeil linoleum carving tools.
Pfeil sells their carving tools in sets or individually. I wasn’t sure what I wanted, so I bought the Set C with 6 tools (4 U’s and 2 V’s) and then bought some individual ones later on. Apart from the fact that Pfeil has really high-quality tools, I like the range of sizes they offer. I can get some really fine lines with their small V L12/1.
I do have to warn you though, their sizing system is a bit confusing, so it is easier to look at the examples of the size in the pictures rather than go by the numbers. If you figure out an easy way to their system, let me know.
Woodcarving tools that can be used for linoleum
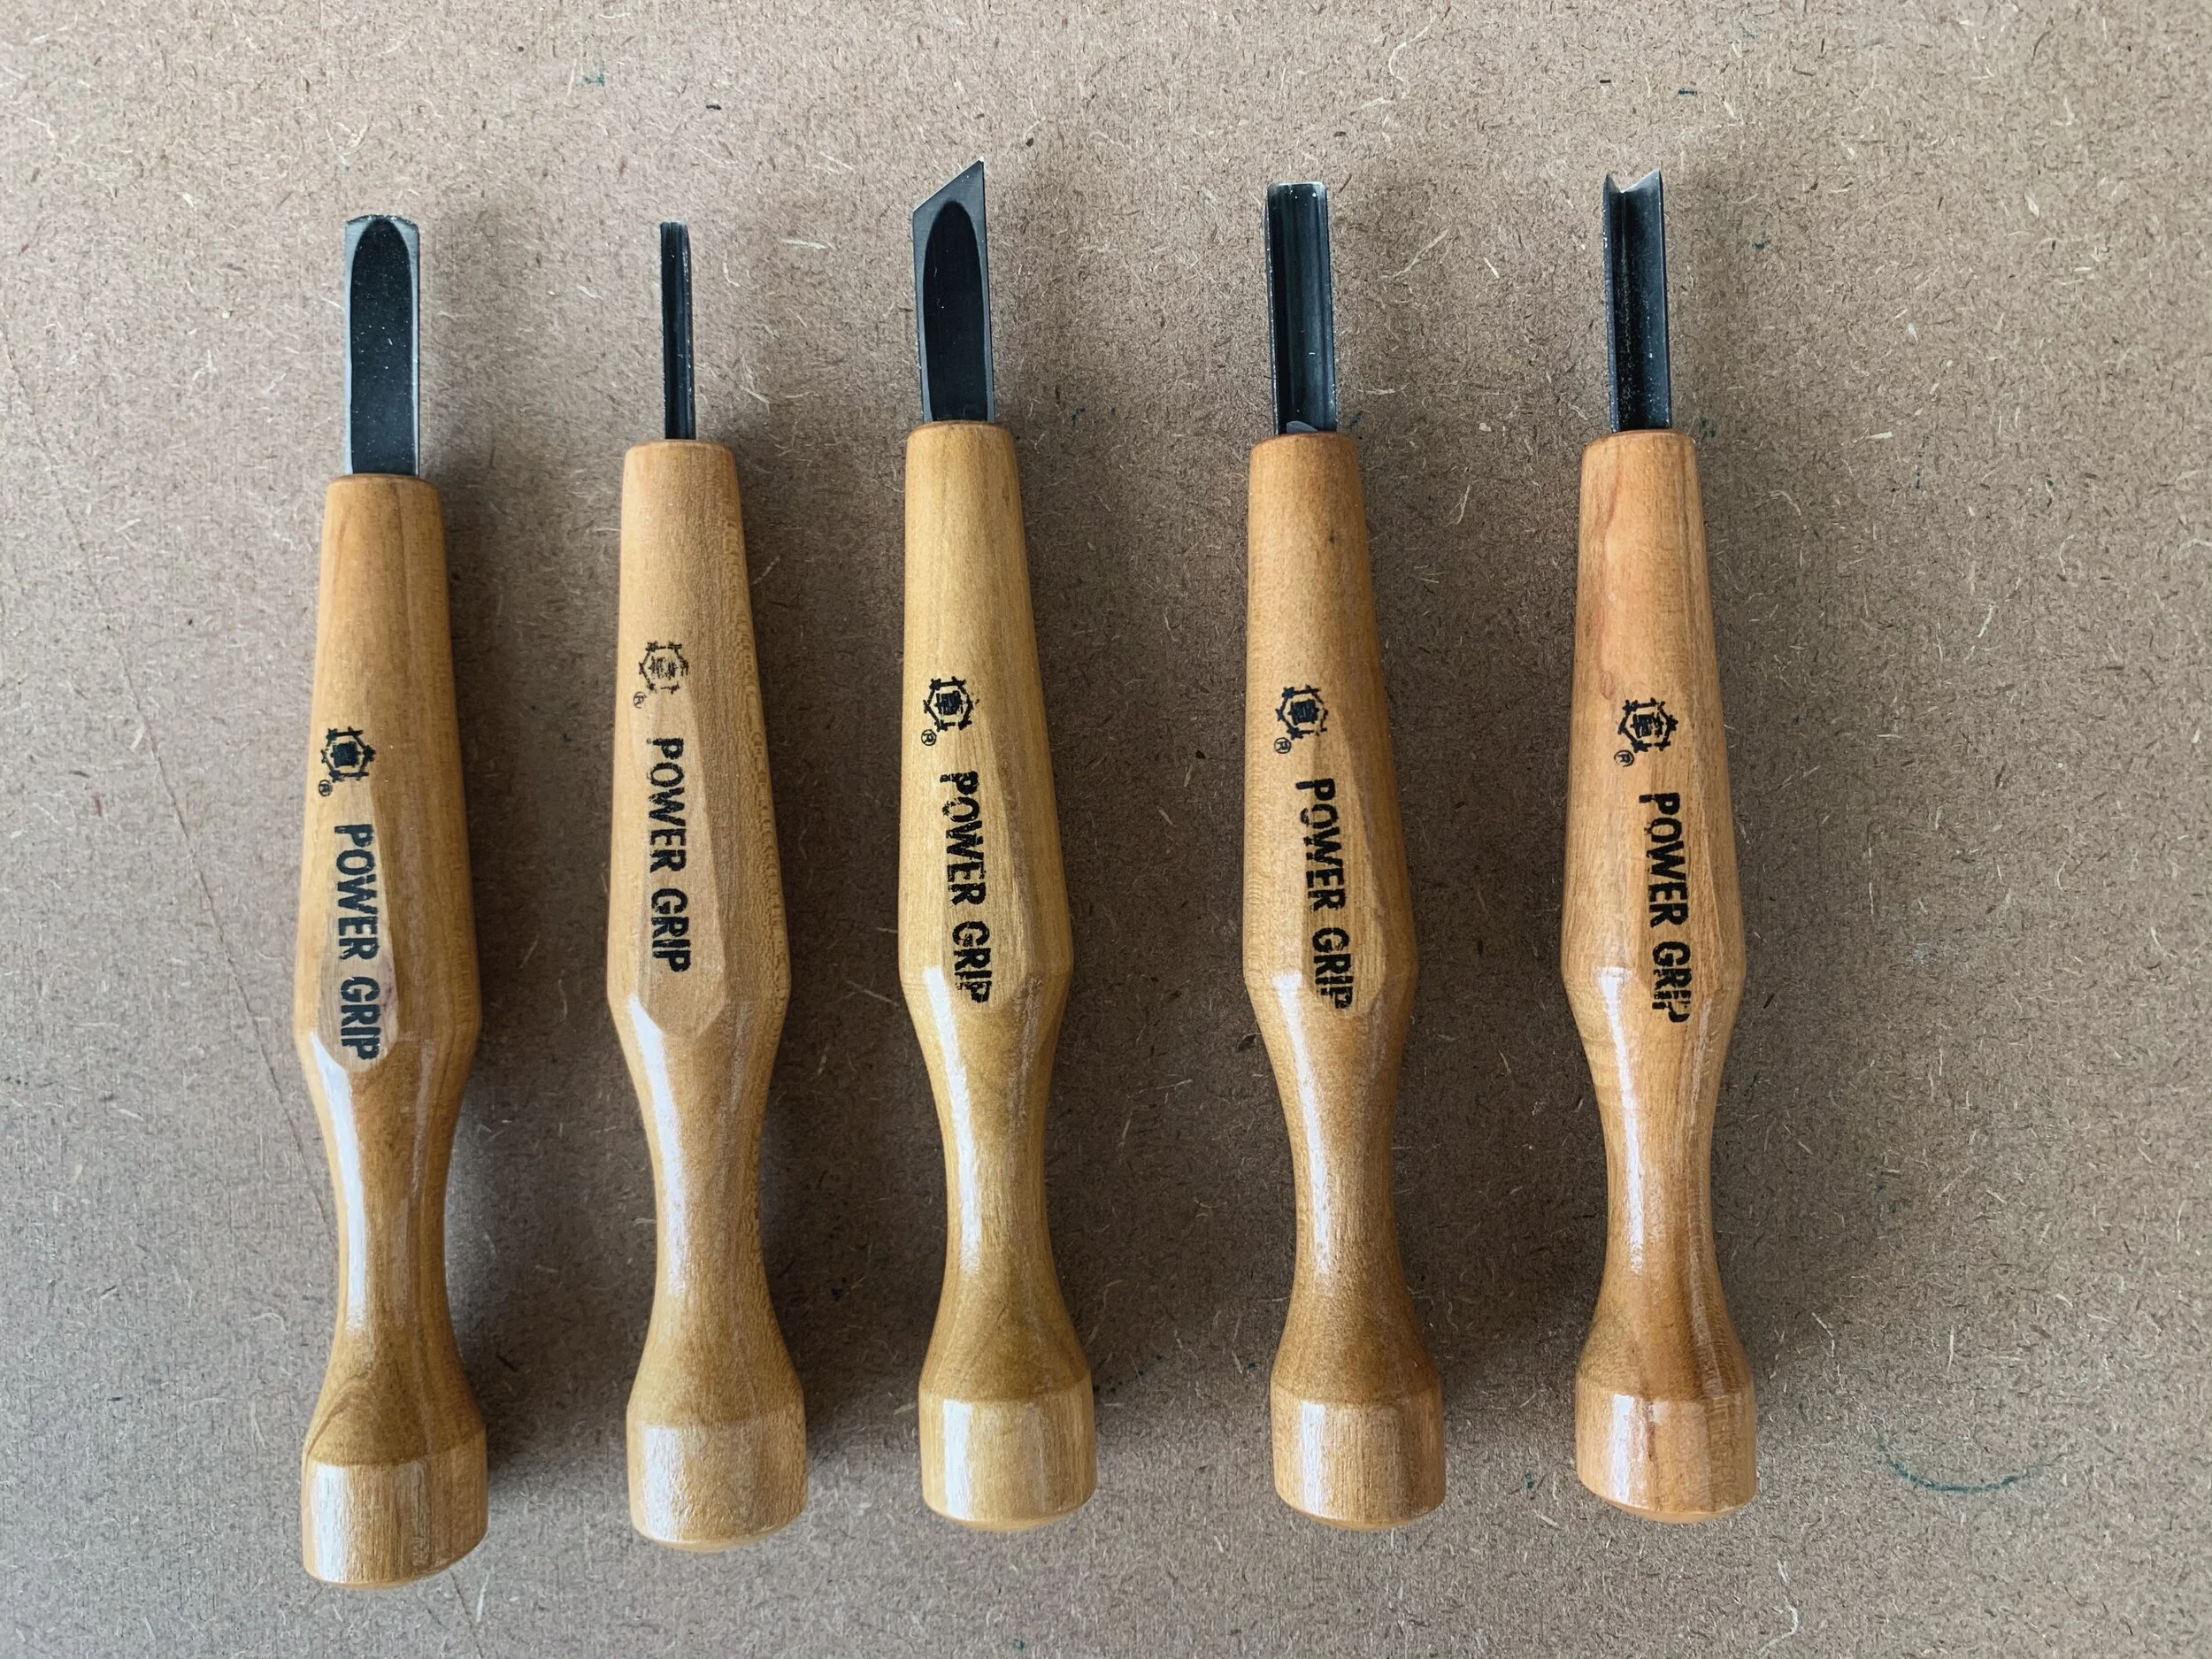
Before I fell in love with linoleum, I was doing woodblock prints. I was really obsessed moku hanga, which is the Japanese style for woodblock printmaking. I bought a Power Grip carving set to use for my woodblocks, but they also work great for linoleum. The handles are longer and thinner than Pfeil and Speedball’s but they also have a nice range in size.
During my moku hanga phase, I went to Mexico to take a course on the technique and found a local artisan that was making his own moku hanga tools. I really liked his craftsmanship and attention to detail so I bought myself a set. These tools are bigger than my Power Grip set, the handles are the chunkiest of all and I like to use them for bigger areas.
Okay, but carving tools for linoleum block printing do I get?
Honestly, this is all up to you. You should really use the carving tool that is best for your needs, your budget and your style. The reason why I love printmaking is because there are no right answers and more often than not, too many options. But this gives you the flexibility to make your own path. Some artist might say “Don’t buy the cheap stuff! Invest in your tools!” And while this might be attainable for some, it might not be realistic for many and expensive supplies should not be the reason you decide not to try at making your own linocuts.
I know that for me, I used the cheapest available tools for many, many years because it was what I could afford. I still created art and enjoyed the process, so don’t be afraid to not have “the right tools.” We learn by doing, so go and experiment!
Which linoleum printing block is the right one for me?
When I was looking for the best printing block for the type of designs I wanted to create, I felt overwhelmed. Which ones were too soft? Too hard? What about the line quality of the print? Could I use a baren or would I need a press? There were so many questions, but no real answers.
As an artist and educator, the best way to learn is to do and practice. So that is exactly what I did! I ordered a bunch of different printing blocks, carved designs and made prints.
It is important for me to say, that choosing the right block is entirely subjective. It is up to you and your preference whether this be the easiest to cut, the cheapest, the most accessible or the best for your designs.
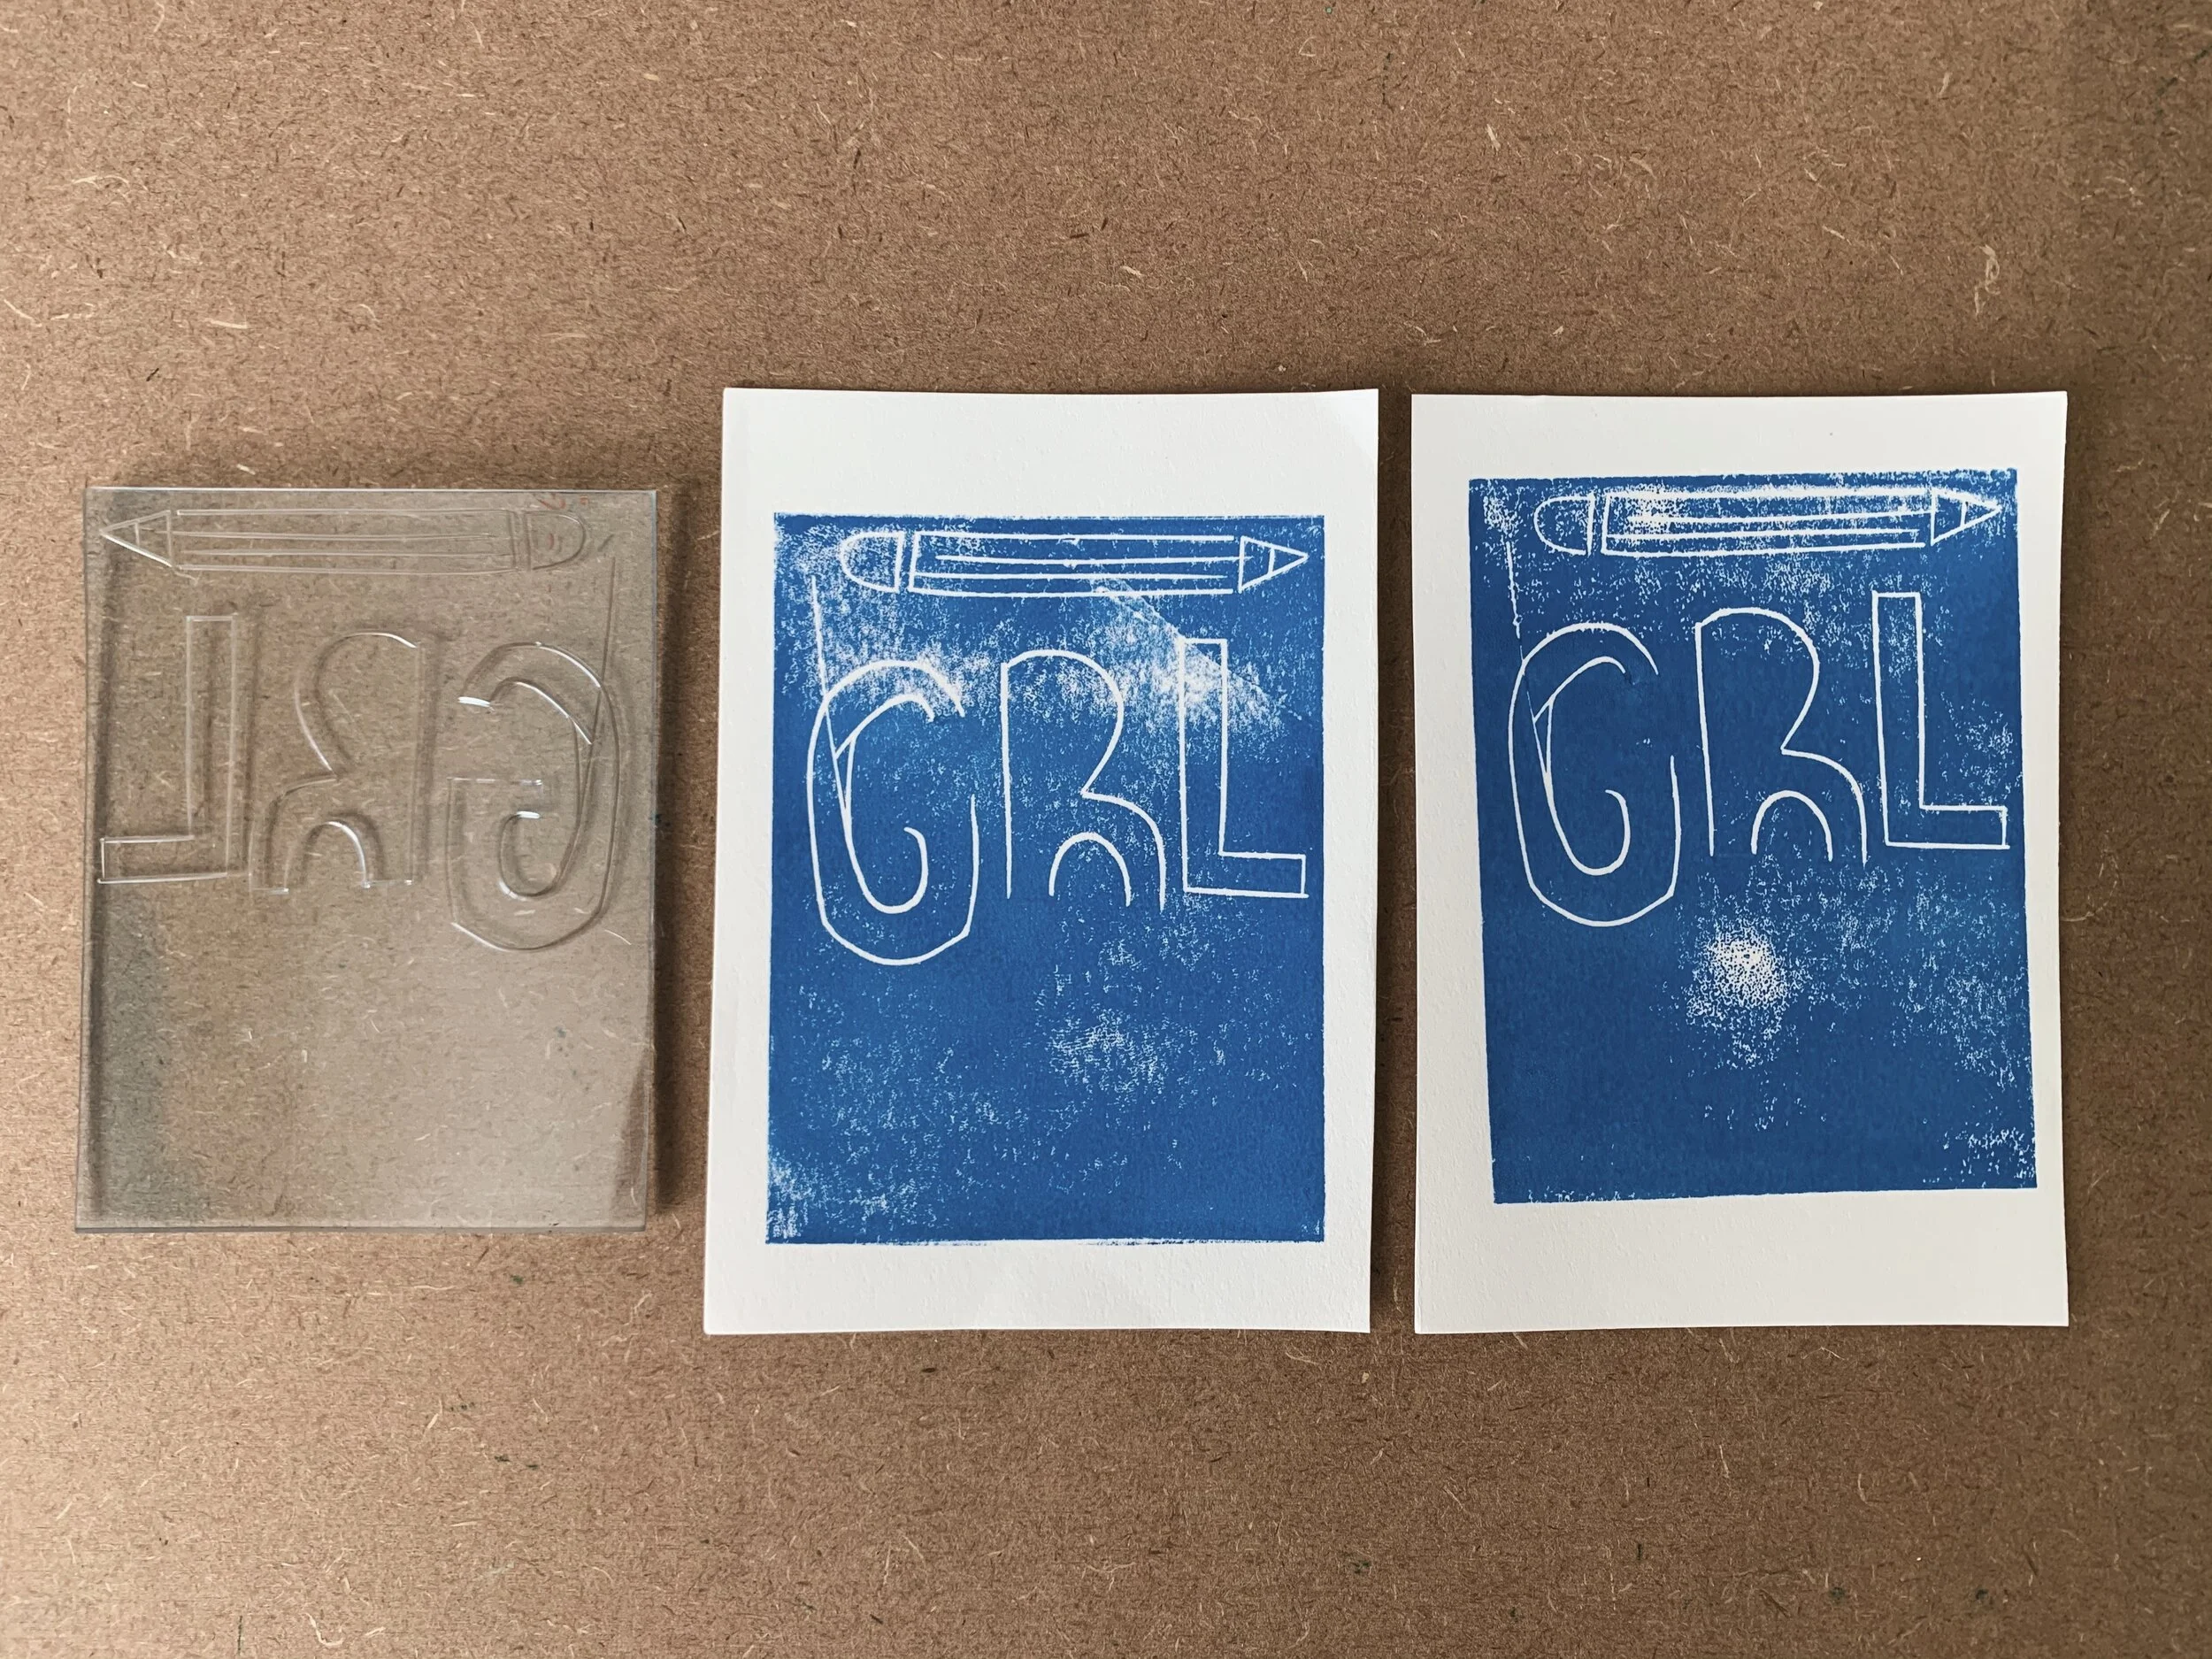
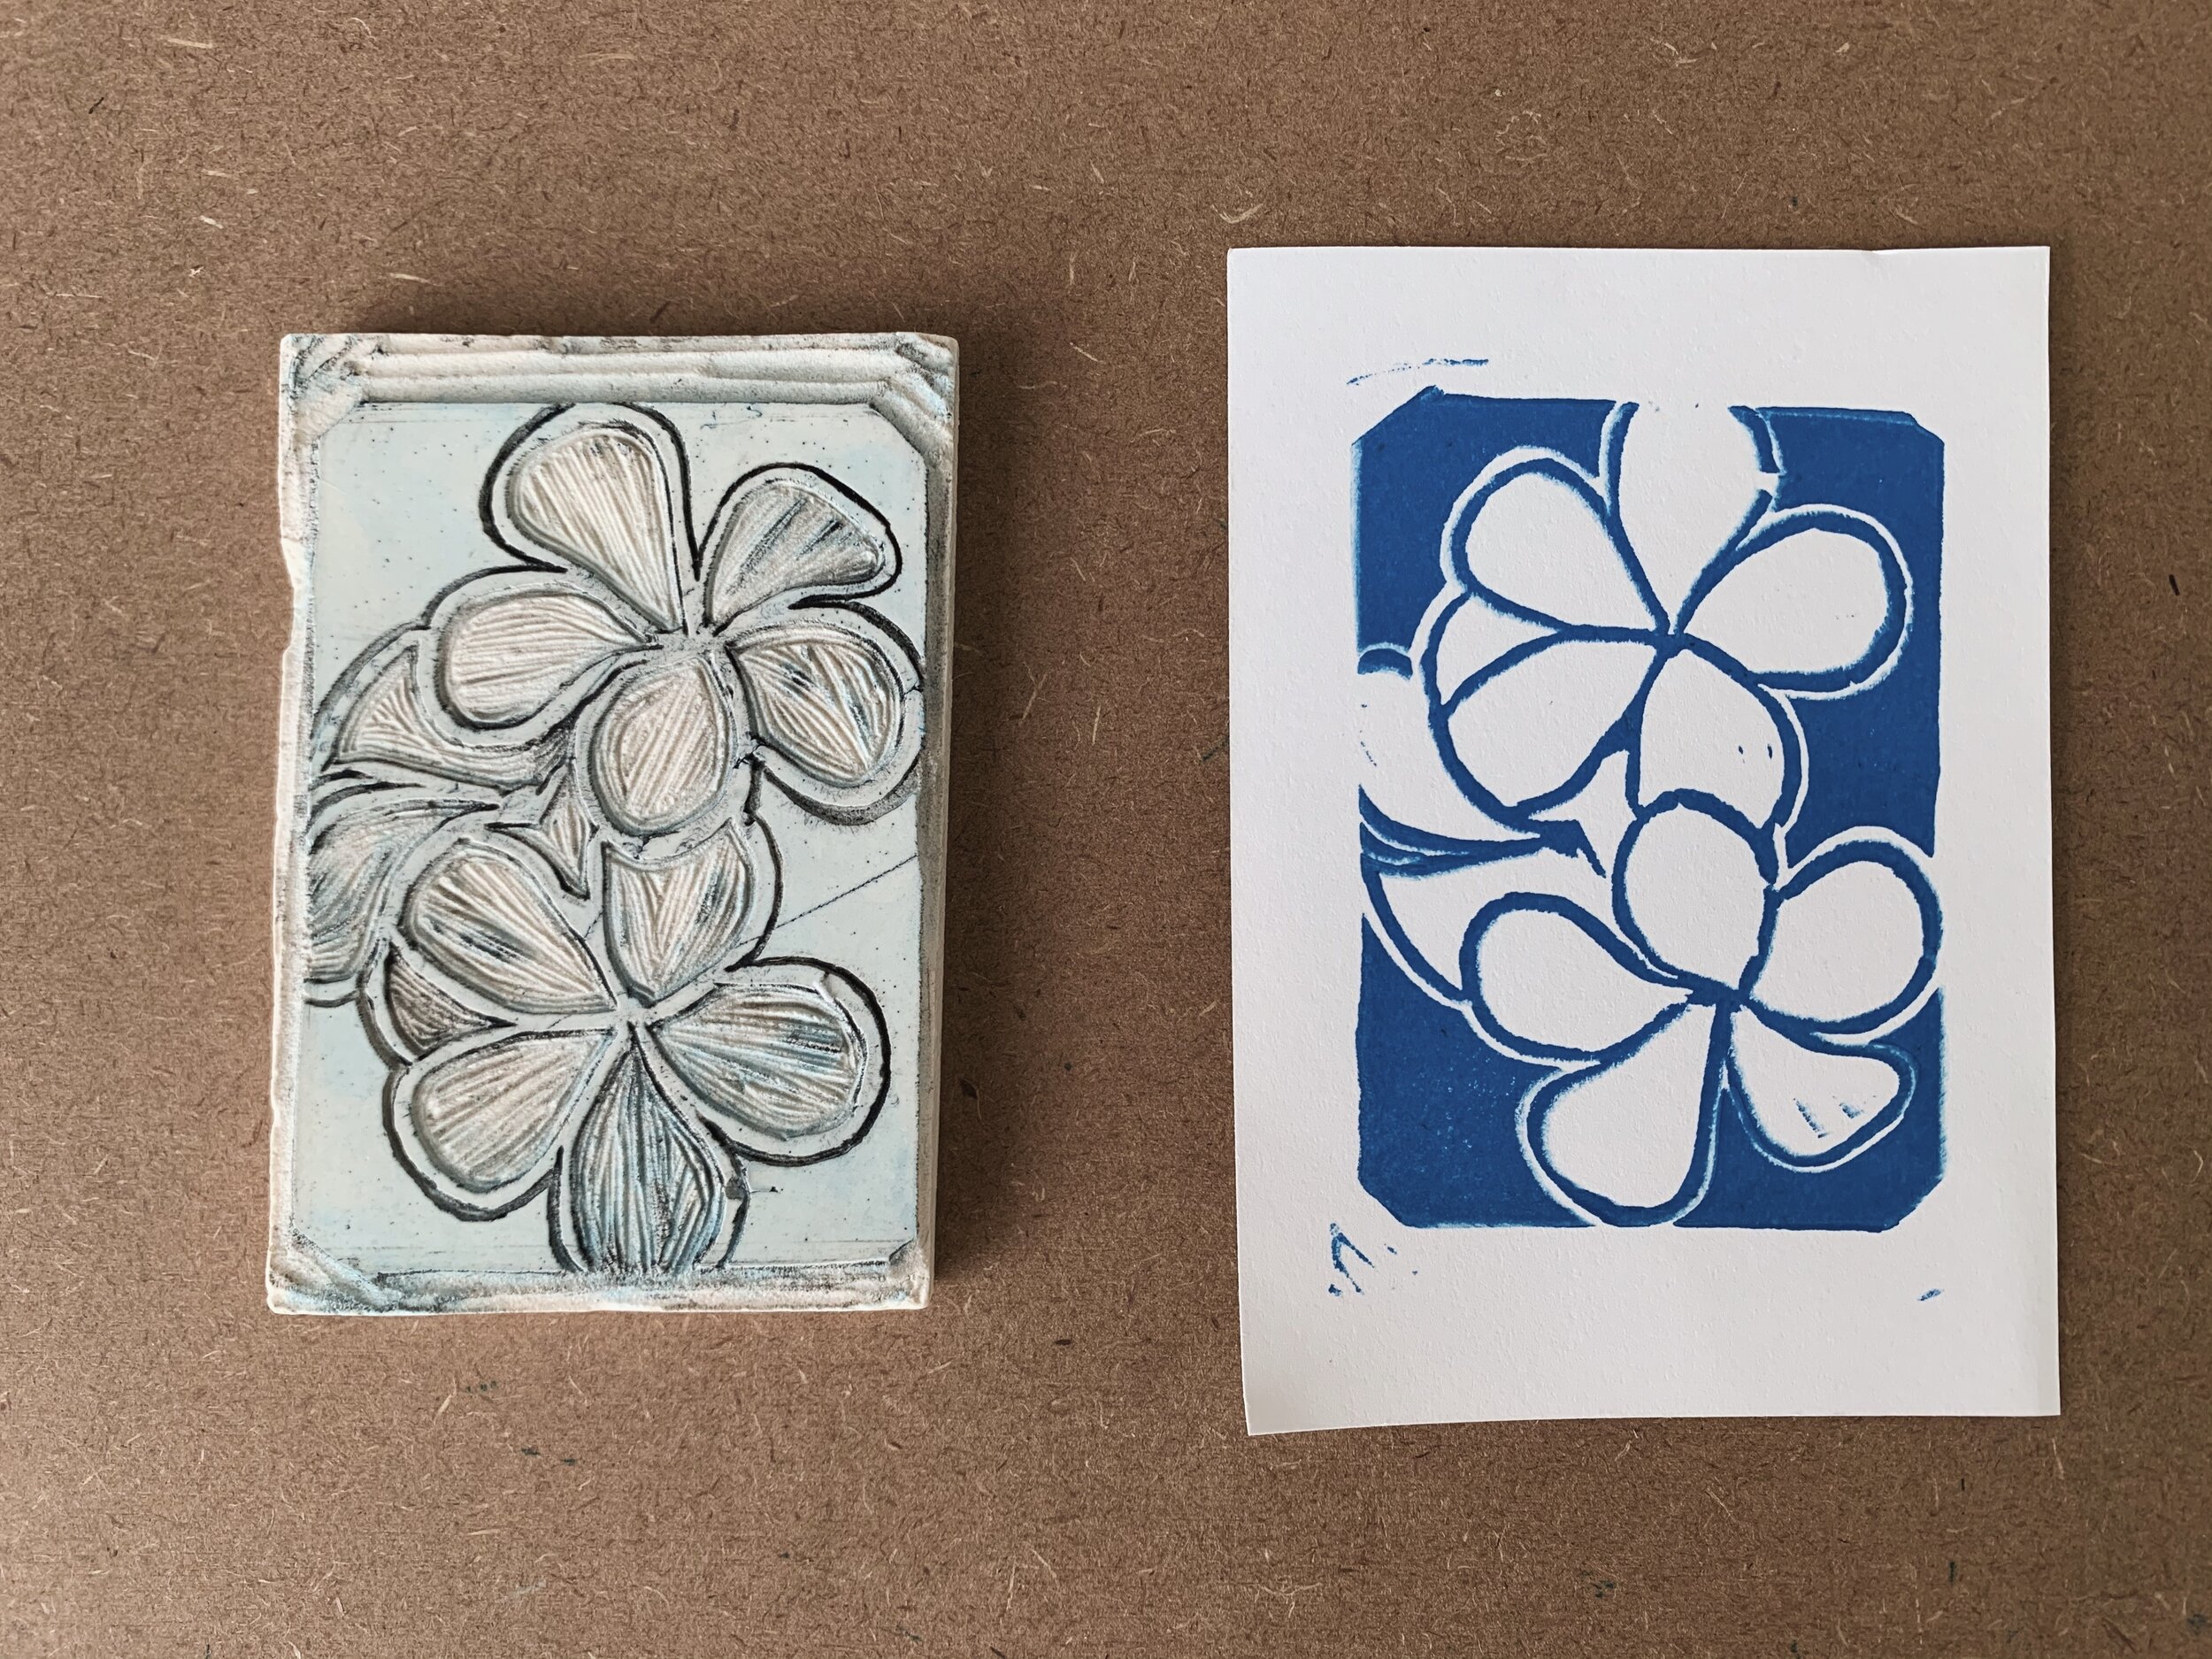
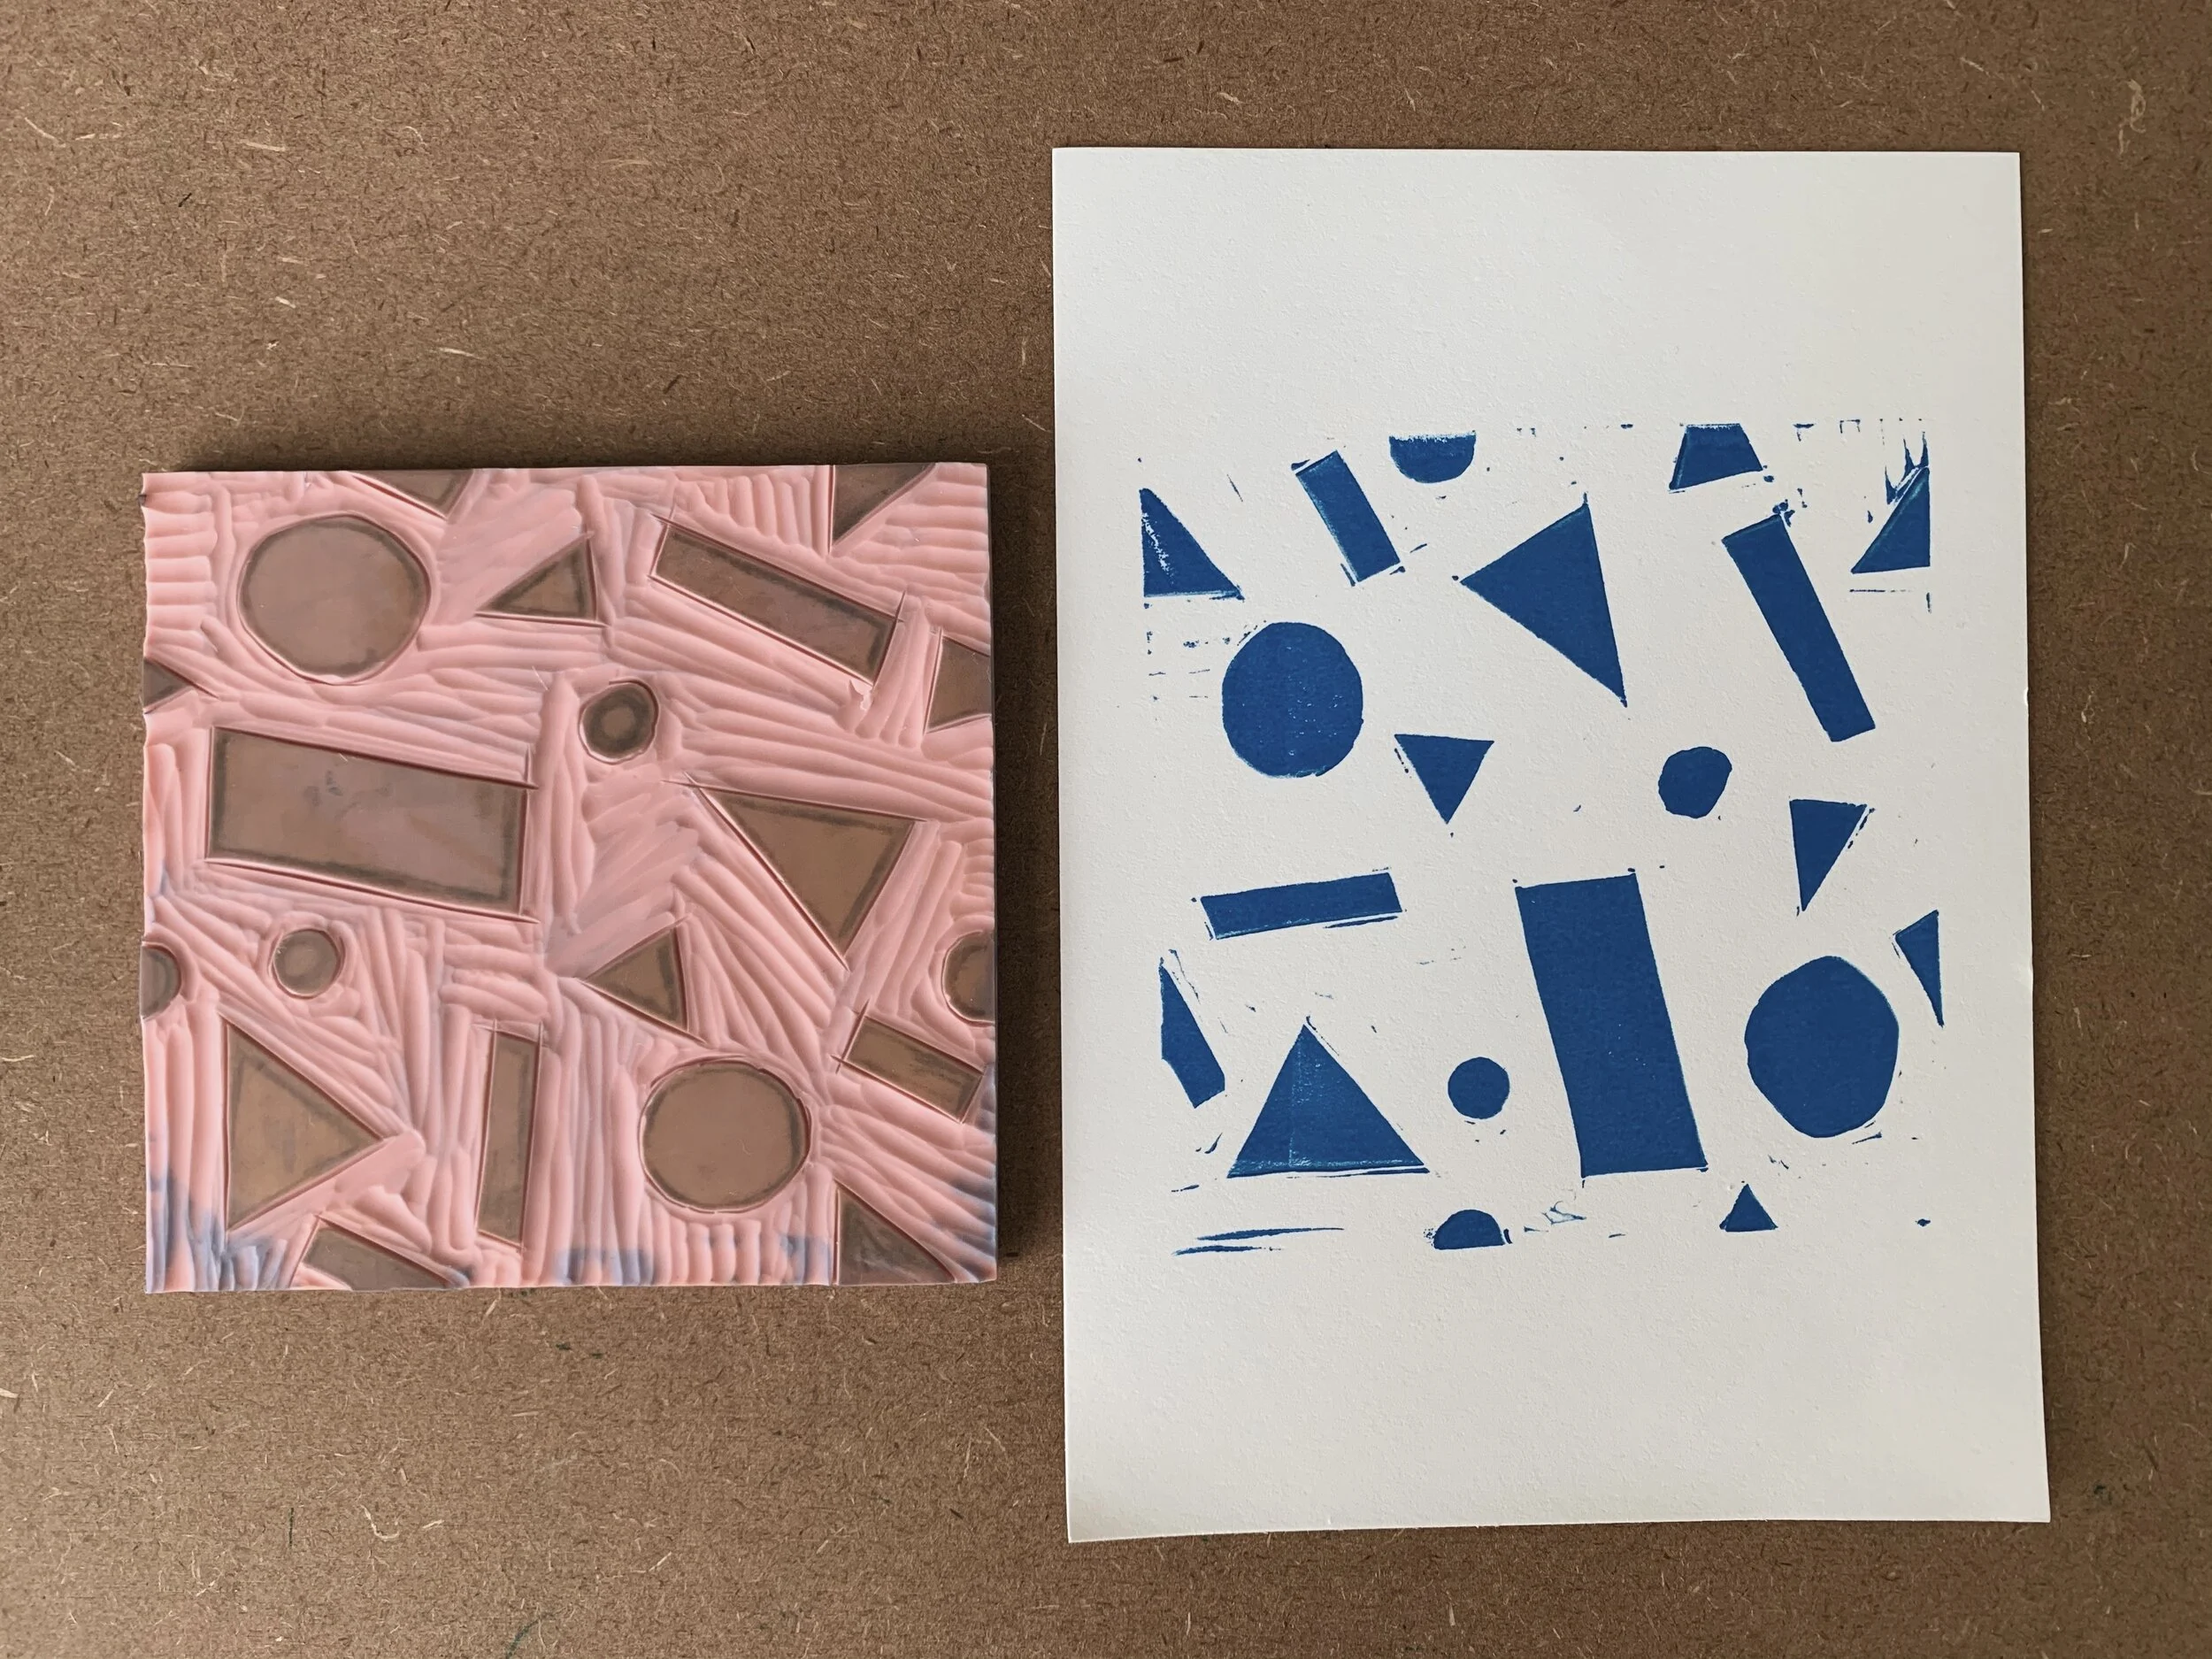
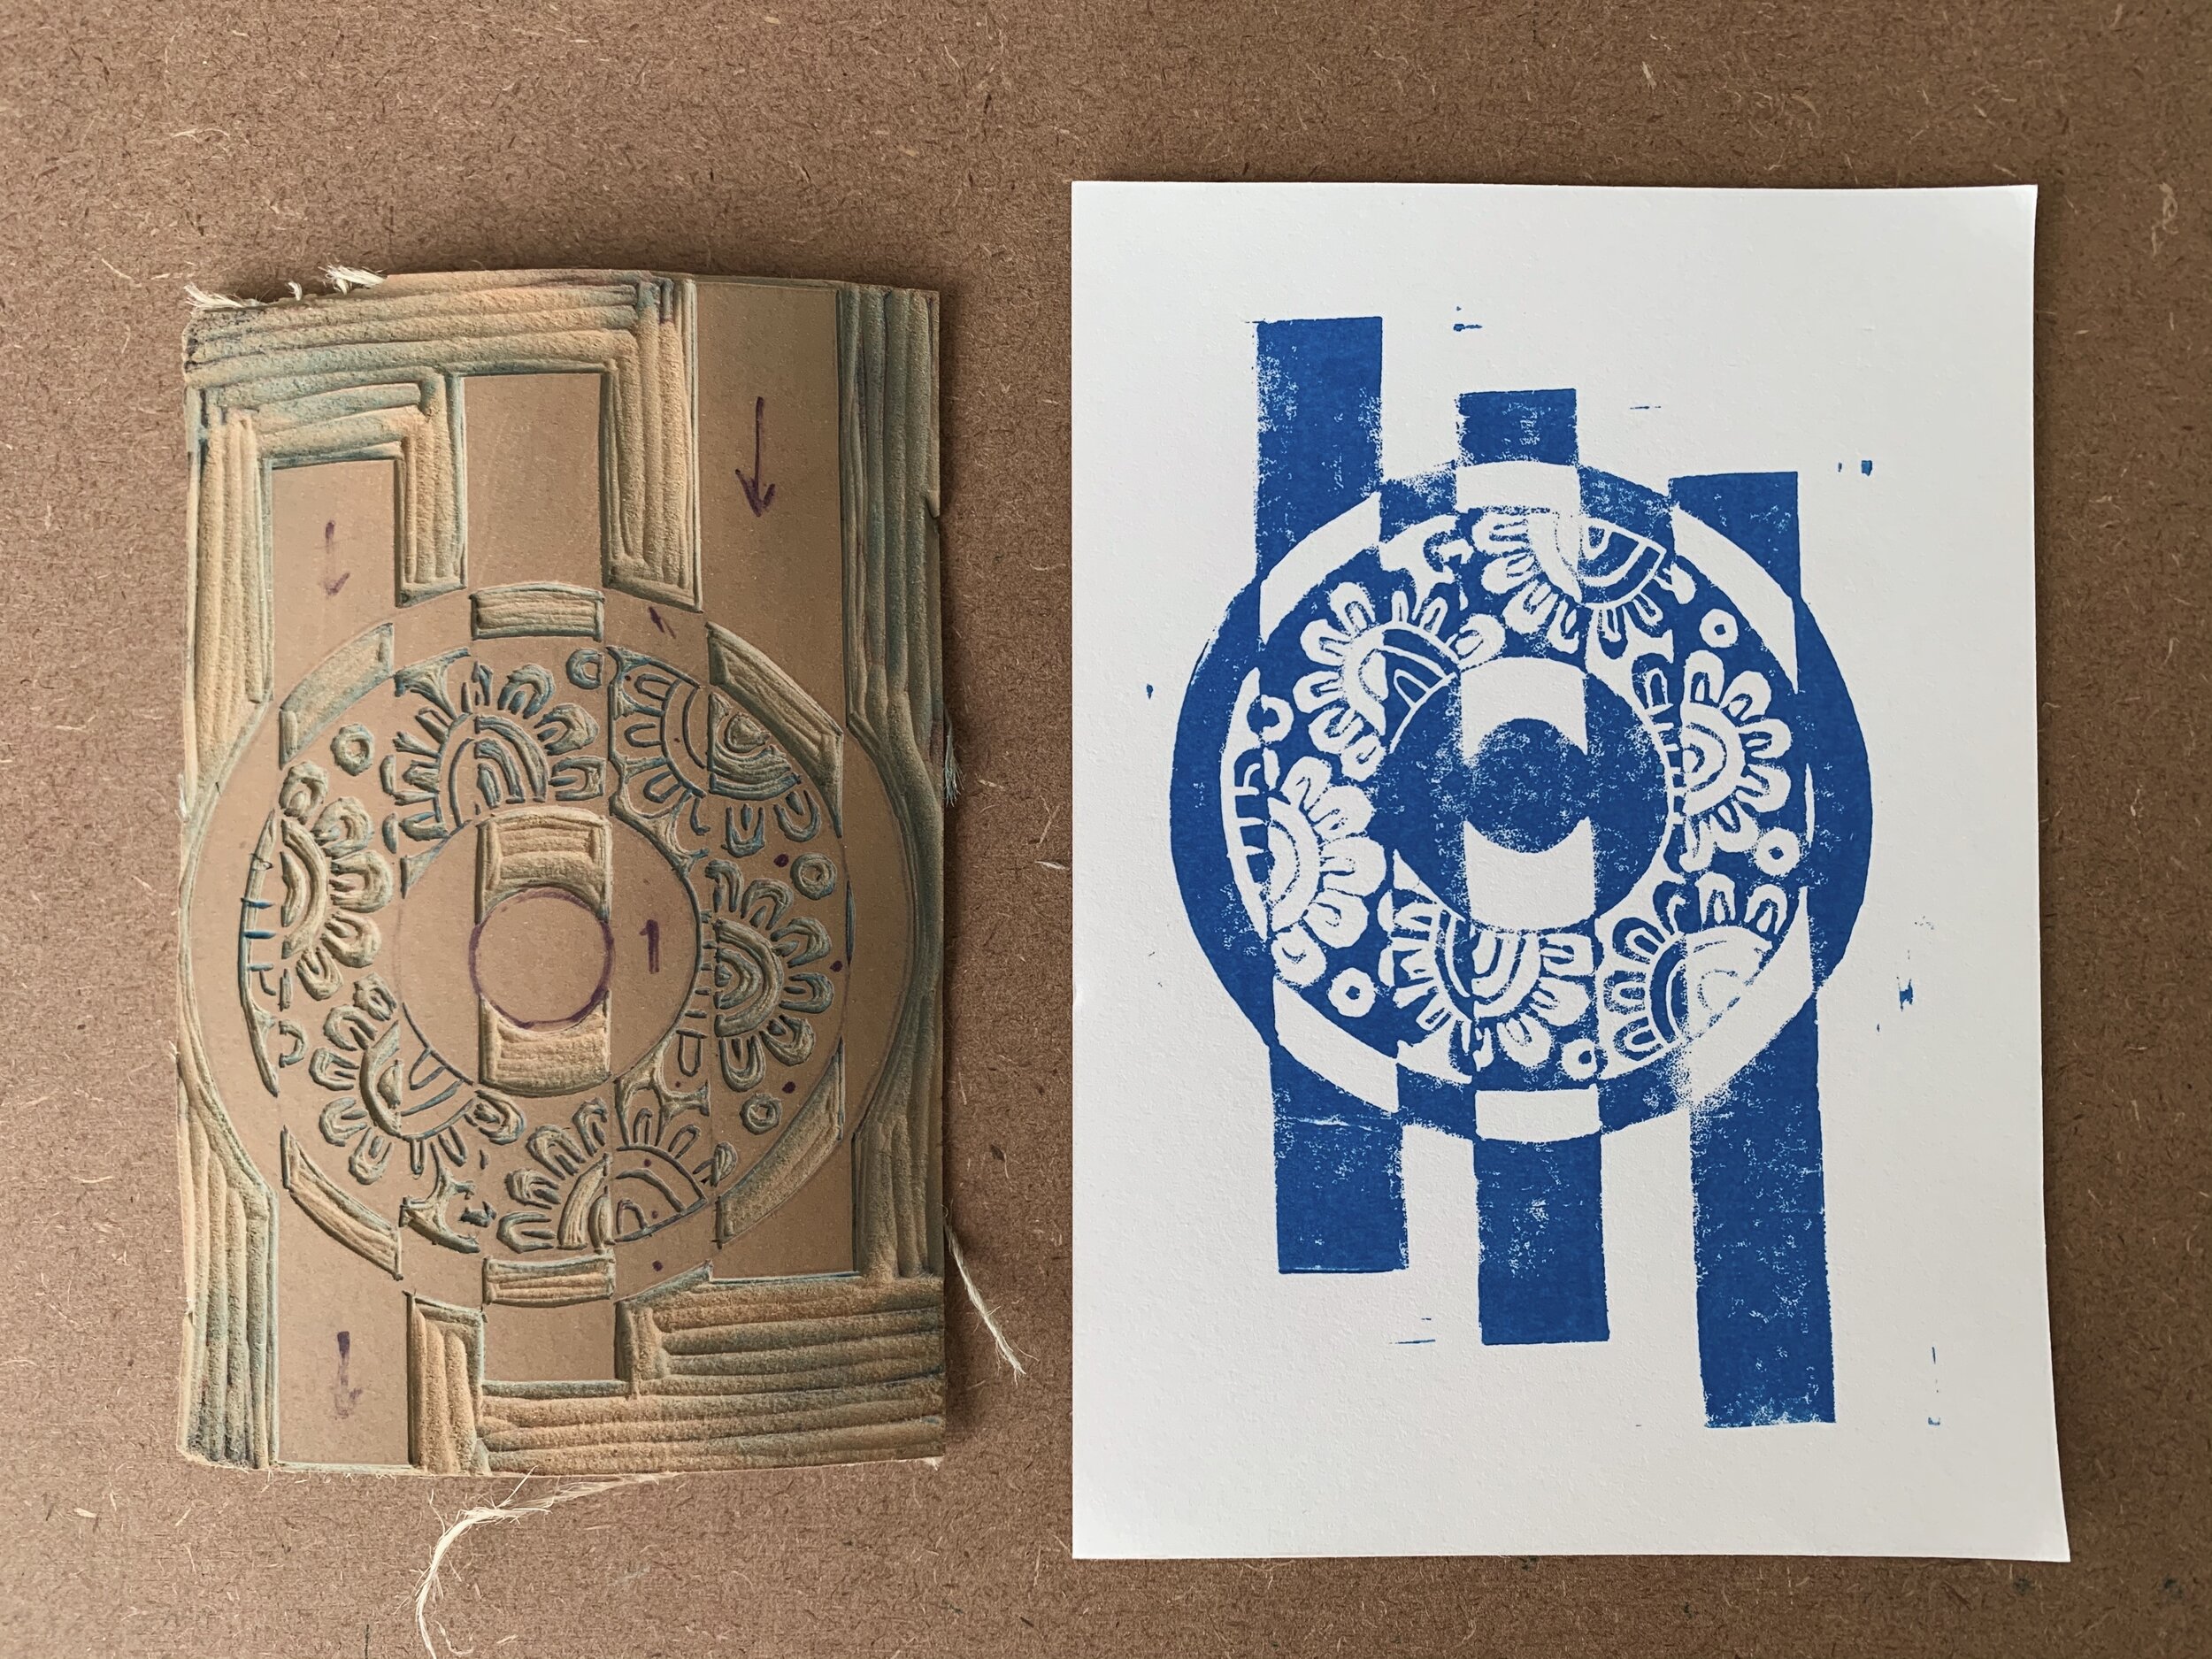
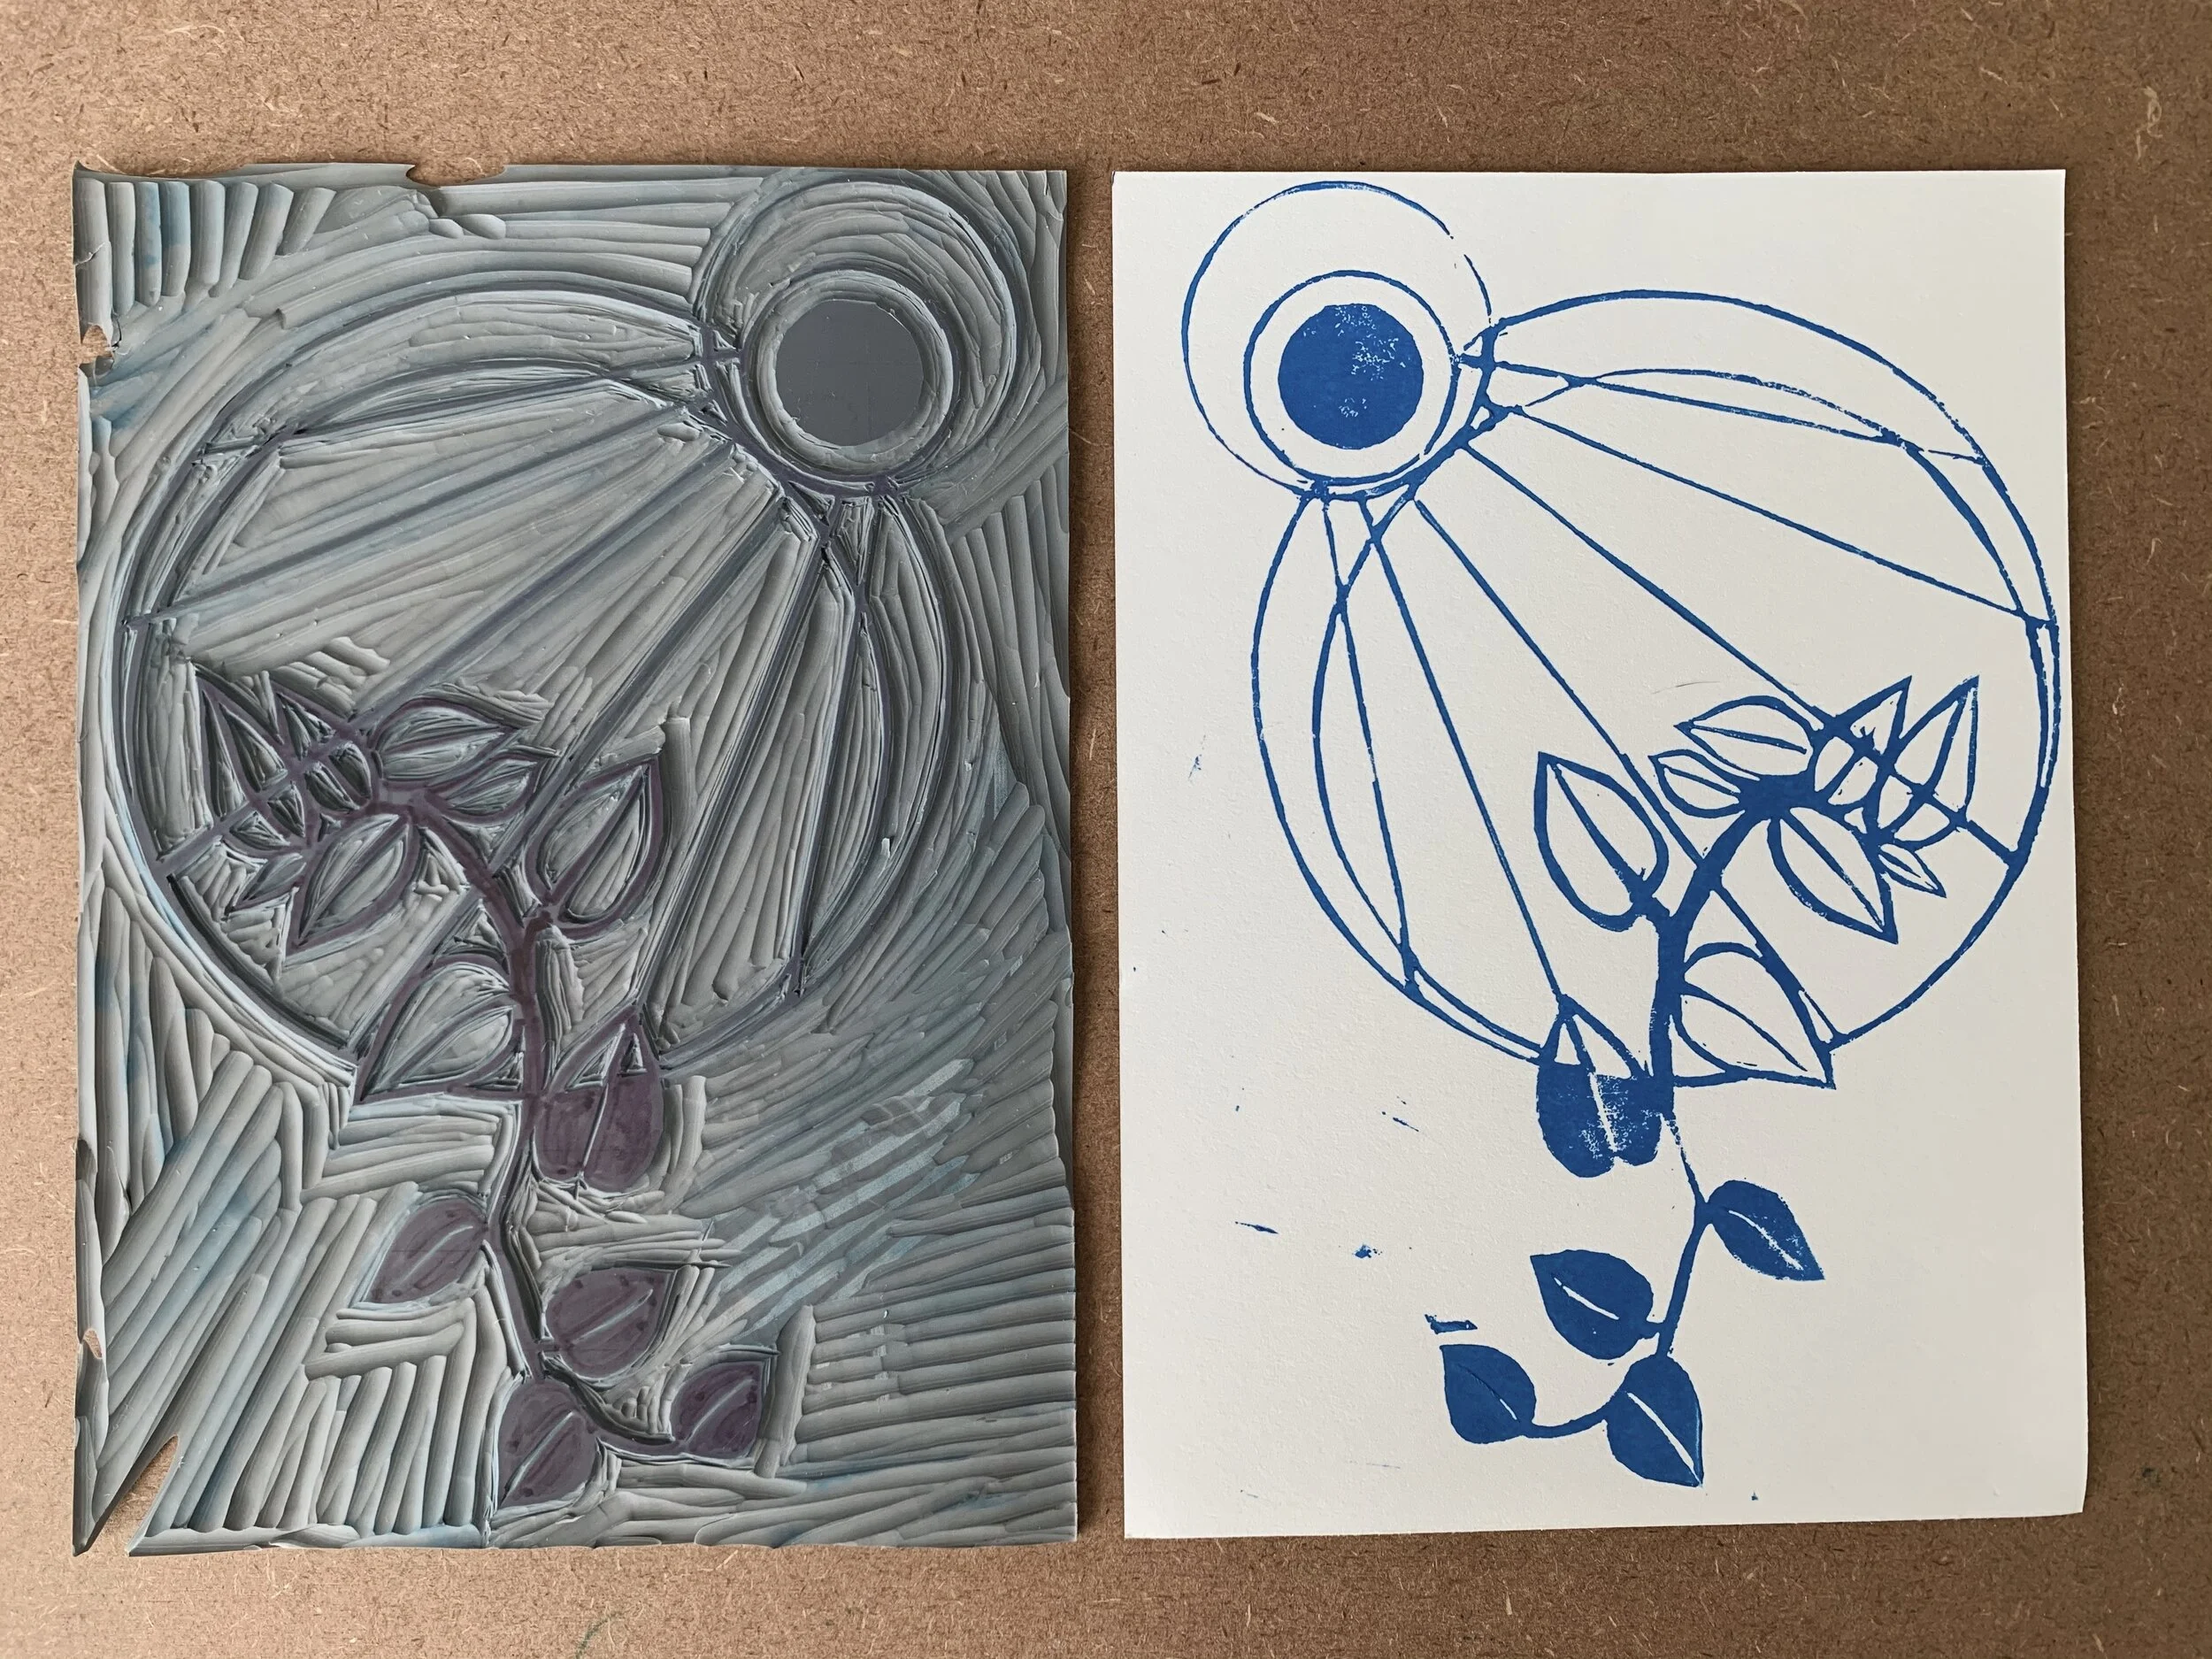
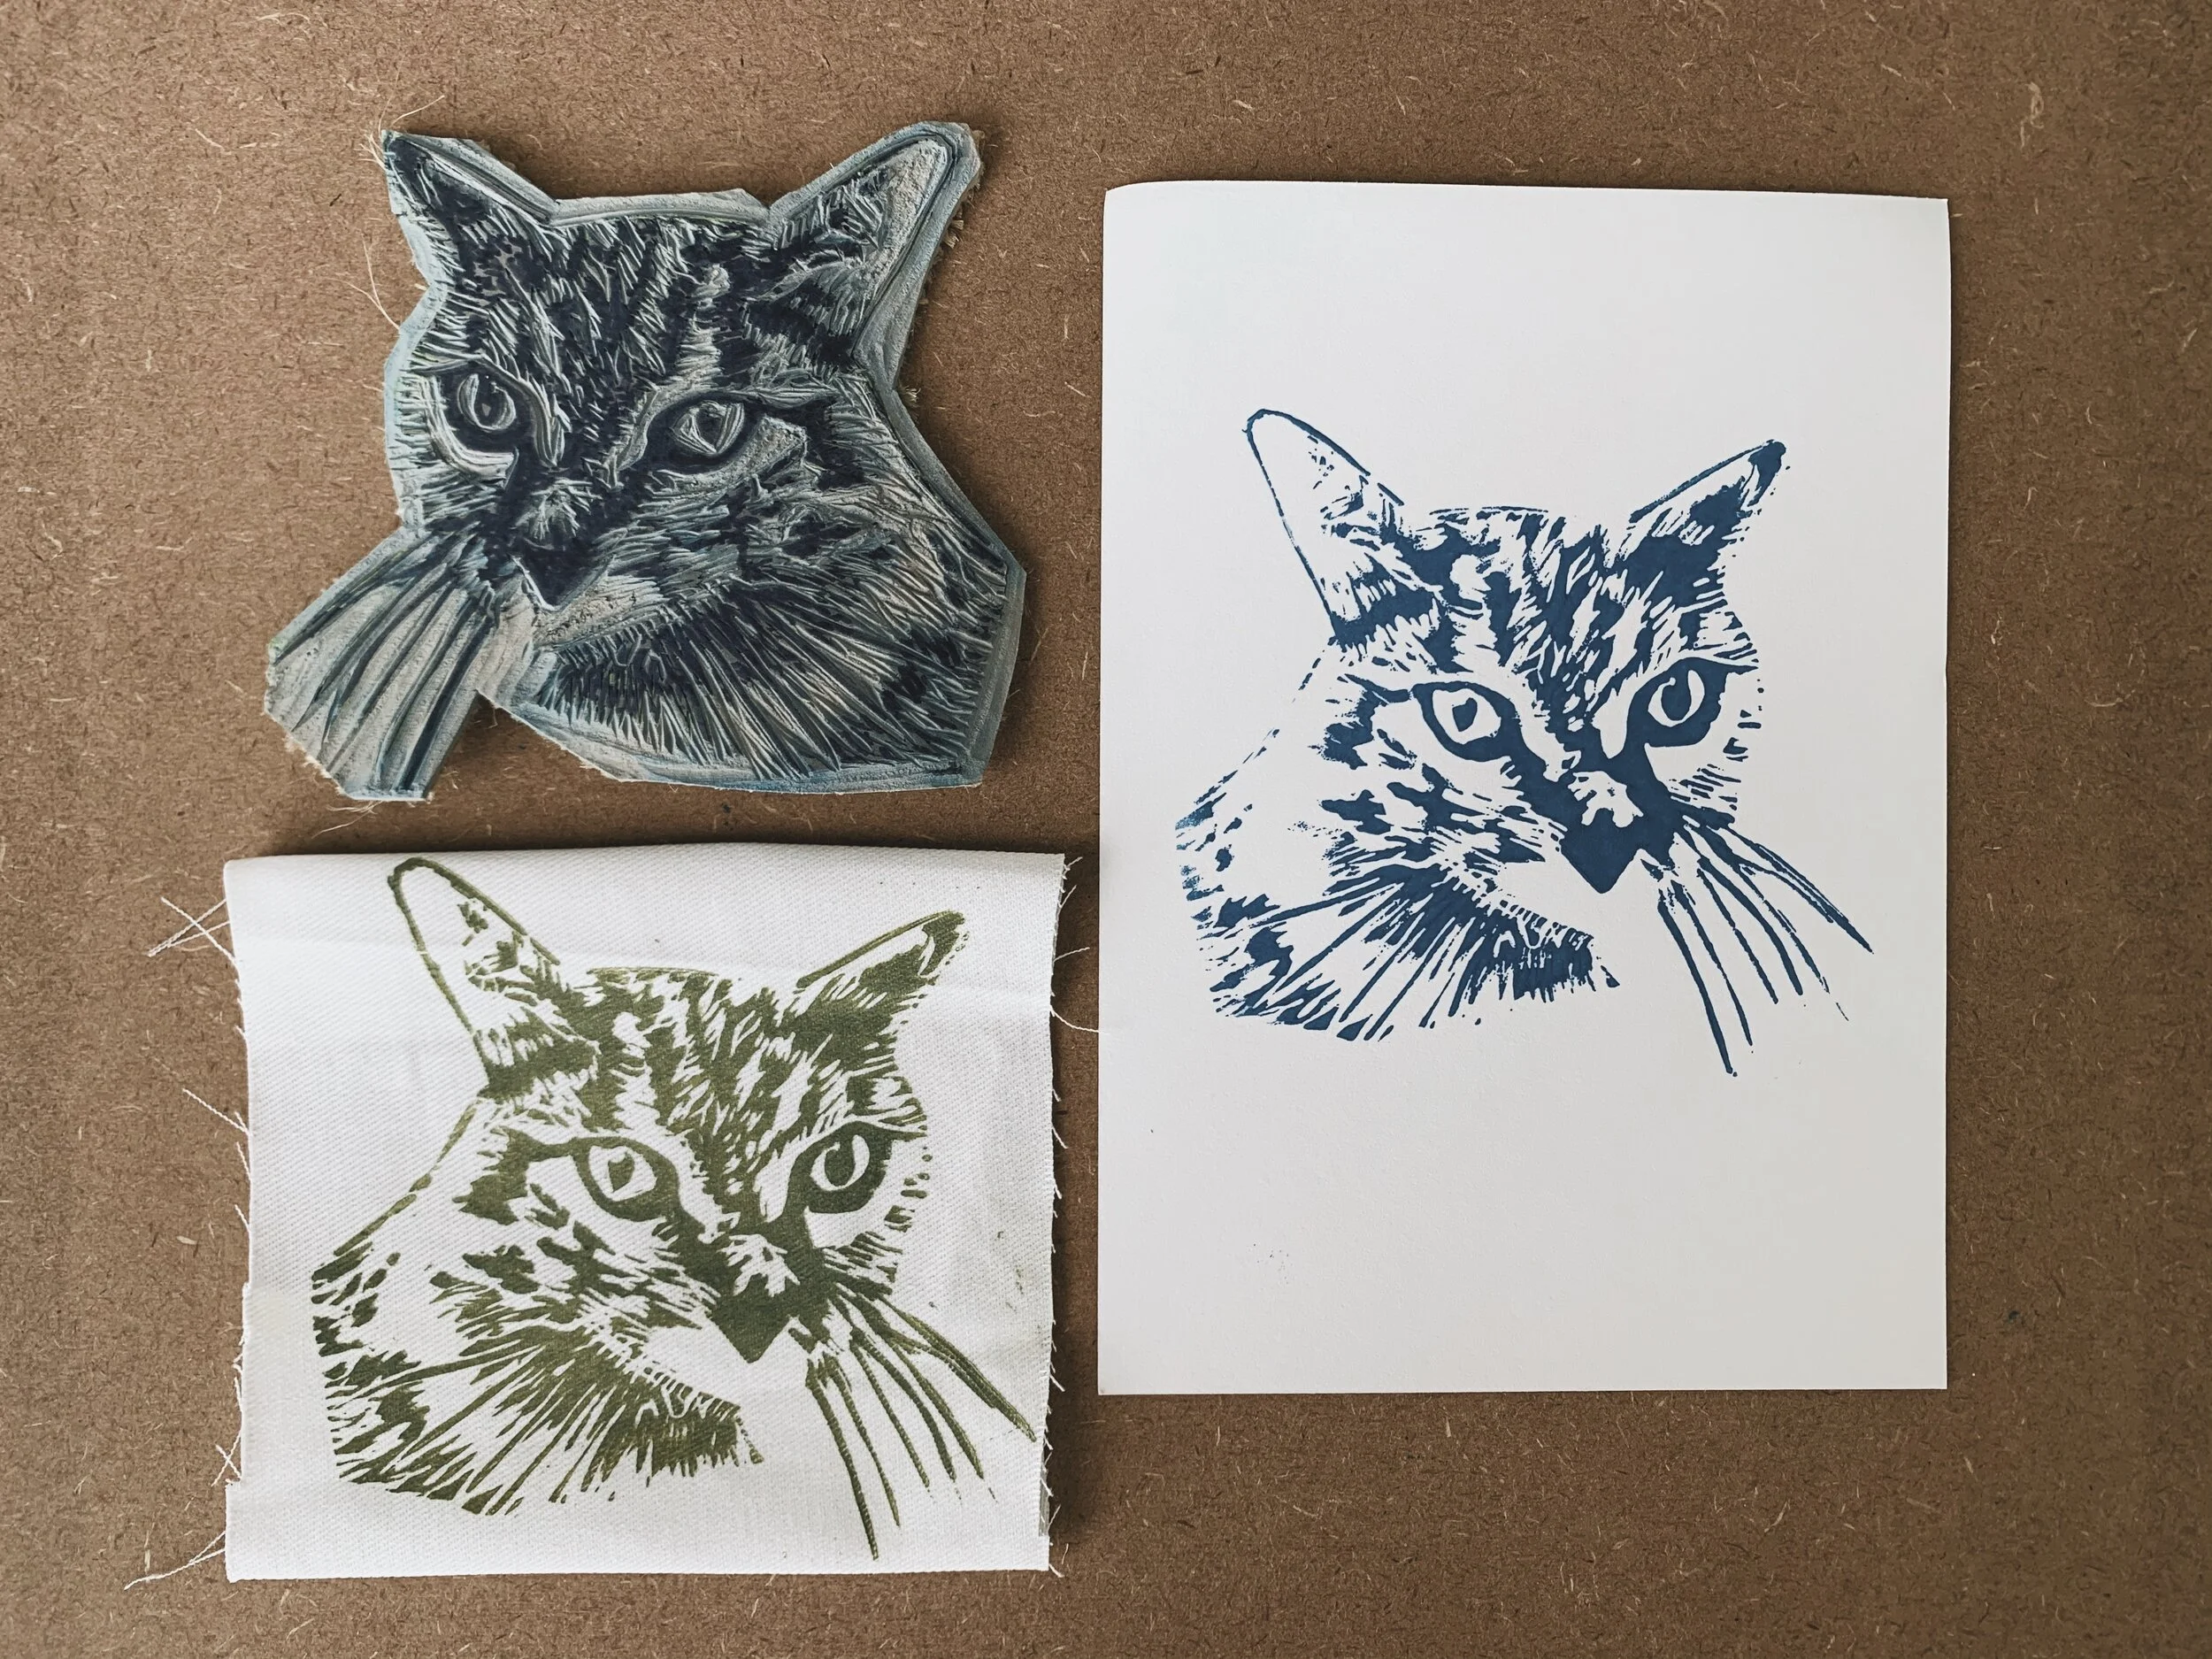
So, what are the blocks I tested and how did they print? I decided to use the same paper and inks for all the printing blocks so I could focus on the quality of the designs.
Clear Carve Linoleum by Jack Richeson
Let’s start by looking at the worst block for block printing I found. I really really hate this block. At first, I was excited. It is transparent and I thought having a printed design underneath to follow would be neat. But oh no, this block is the devil.
First of all, you cannot write on the block, the marker or ink pen just comes right off. If you have an image underneath, you cannot grip your block. So, it moves all over the place. But that is not the worst thing. This block is really hard to carve.
You can get really clear lines due to the plastic material, but because it is clear, I could not (for the life of me!) see where I was carving. And it is hard! Too much effort and time to try and carve a simple design. As you can tell from the picture, I gave up.
Oh, and don’t even get me started with trying to print this thing. Have I said how this block is the devil? I tried, I really really tried and also gave up. My personal opinion? Don’t waste your money, your time nor your hands on this.
Verdict: No, just no.
Blick Readycut by Dick Blick
On to my second least favorite block printing block. This block is 2-toned; there is a thin gray layer on top of a white layer. This means that if you carve deep enough, you can see your design pretty clearly. This is good if you struggle trying to envision how your block design will look like. However, this one also sucks.

At first, carving felt really easy. This is made out of soft material, so you don’t use as much force. However, I quickly found out that this is a trick. Yes, it is soft but my god my carving tool kept getting stuck on the material and my lines kept tearing.
I carved on and by the end I really wanted to throw this block into the garbage. I sharpened my tools and they were still getting stuck! I could not get a clear line nor clean the details around my little tool design. I also printed this block several times and I could not get it to give me a crisp print.
Verdict: Not as bad as the Clear Carve, but also not worth your time.

Blick E-Z Cut by Dick Blick
I used to have an old design made out of E-Z Cut but I decided to carve a new design just to get myself reacquainted with this printing block. And my memory served me right, it is not bad but not great either
This block is easy to carve, the material is soft, and the block is thick. This block is recommended by Dick Blick for students and young printmakers since the material and thickness make it to where it won’t slip. But for my purposes, this is not a good option.
I carved this block twice because I really wanted to give it a shot, but this printing block cannot give me a clear, crisp line. Every time I carve, there are little flecks of the material that stay really close to the edge or on the gaps. I felt like I was cleaning my lines and not getting anywhere.
I also don’t like the way the ink rolls onto the block. This block is recommended to be used with water-based inks, which I used for this experiment, and I still did not like it. I printed the design several times and because the block breaks down, my lines look fuzzy.
Verdict: Good for kids to try out, not good if you want a clear design.
Speedball Speedy-Cut Easy Blocks
Speedball manufactures really soft and easy to use block printing blocks. I like using this particular block with my students when they are preparing to test out their designs before carving on their project block.

This block is thick, sturdy and soft. However, it does have the same problem as Dick Blick’s E-Z Cut. When I try to carve really detailed designs, I find tiny pieces of the block inside my carved lines. Now, this may not bother you, but it drives me insane.
It generally prints clear, but on this block, I struggled getting a clear print. There is this area near the center where the ink just would not transfer cleanly onto the paper. I tried several times but did not manage it.
Verdict: Good to practice, easy to cut but may not yield clean lines, prints ok.
Speedball Speedy Carve
This is the most popular block out there, and I think the best block by Speedball.
This printing block is easy to carve and prints perfectly. It is made out of a rubbery material like an eraser. If you follow a lot of printmakers (like I do) you will see this block a lot. It works well with paper and fabric and it comes in a really good range of sizes. It is also soft enough to where you can cut your block down to whatever size you need.
Now, I really like this block, but it is not for me. I need a little bit of resistance when I carve because I get into the zone. This is sometimes too soft for me (depending on the design) because I have cut straight through my designs before.
Verdict: Great block if you want a soft block printing block. It prints really well, and you can get really clean designs.
Speedball Unmounted Linoleum
This is more of a traditional linoleum. It is unmounted which means that it has no backing and you can see the burlap. Mounted linoleum, attached to wood, mdf, etc, doesn’t buckle and keeps its shape better. However, if you buy unmounted linoleum, you can buy it in bigger sizes or a roll and cut it down.
I originally bought this linoleum block because I had seen it used in a Facebook group where printmakers all around the world share their work. I wanted to try it out since the artists that use it really like it.
It is a pretty good block; it gives you crisp lines and prints well. The particular design I chose, for some reason, would not print evenly. But I have used this block with other designs, and I did not have this issue. It gives me enough resistance for my preference, but I don’t love it.
I used it for a while but at some point, I got really tired of carving on it. Sometimes it helps to heat your linoleum to make carving a bit easier. I just never got into this one.
Verdict: Could be a great block, lots of printmakers like it. There is nothing inherently wrong with it, I just don’t love it.
Unmounted Easy-to-Cut Linoleum by Richeson
I used this block out of desperation one day. I had to work on a design and went to my little supply closet only to find out that I did not have any block printing blocks left. So, I went to my local crafts store and bought this linoleum.
This linoleum is advertised as being double sided. I am not sure how they think people carve but this block is too thin. You can get really thin and crisp lines which I love but the material itself is horrible. It is hard to carve, and the ink doesn’t roll well either.
Verdict: Does Richeson know how to make blocks? Don’t waste your time nor money (unless it is an emergency like mine).
Blick Battleship Gray Linoleum by Dick Blick
Just like Speedball’s Speedy Carve is one of the most popular soft blocks out there, the Battleship Linoleum is one of the most popular linoleum blocks and for a good reason. It comes mounted and unmounted. I recommend always buying unmounted because you can cut it down. But if you really want it mounted, go to your local home improvement store and buy some MDF.
I bought Dick Blick’s Battleship Linoleum when I was working on my master’s thesis. Part of my thesis was to create a work of art and I was (obviously) doing block printing. When I first used this block, I had to sit on my balcony and let the linoleum get warm with the sun. This thing was so hard to carve!
I recently purchased more Battleship Linoleum and I think they changed their formula because it was a lot easier to carve than I remember. Now, this is a hard linoleum, don’t be fooled. You need to have really sharp tools for this one (they even recommend you do so in their product description) but it is soooo worth it.
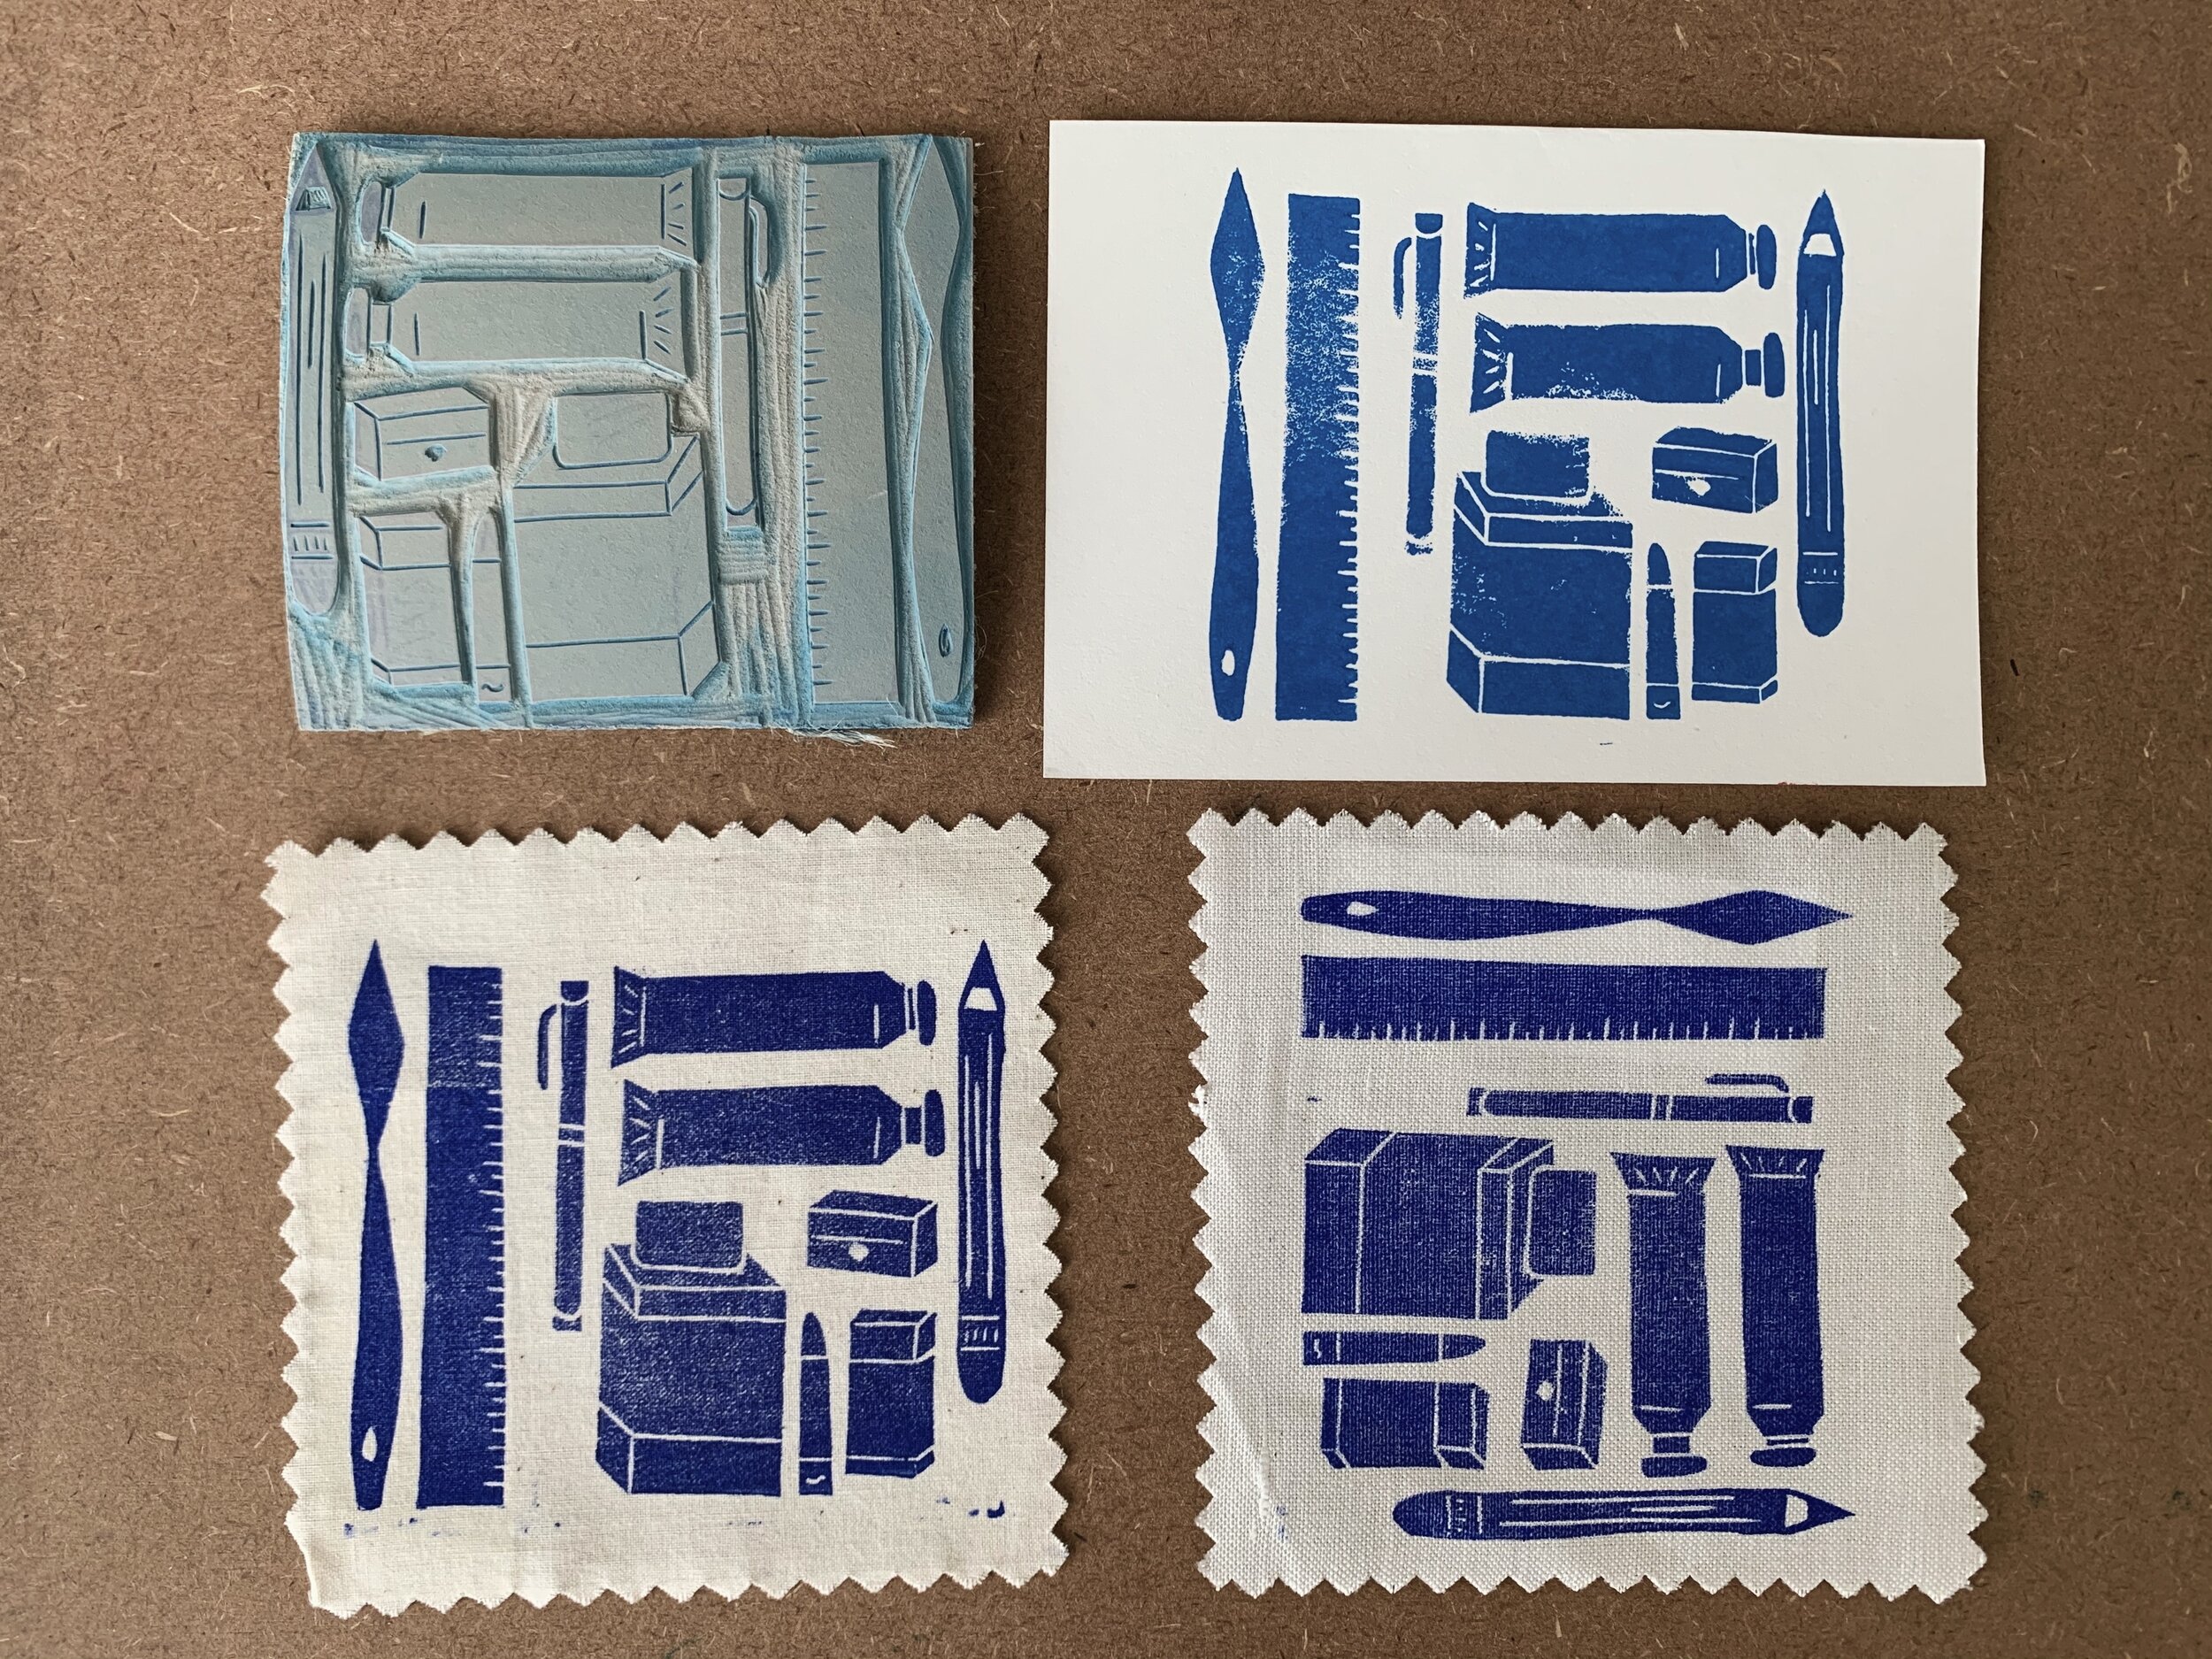
Can you tell yet this is my favorite block printing block? I love this block, it gives me the resistance I need, the lines are clear cut and it prints perfectly. I also tested the block on paper and on fabric and it works amazingly on both!
Verdict: My top choice! I usually have small lines on my designs, and I like to have crisp details. This linoleum, although hard to carve, gives me what I need.
Final Thoughts
If I had to buy tools, I would do the following:
For beginners
Speedball’s Linoleum Cutter or Blick Lino Cutter
Speedball Speedy Carve
To upgrade
Pfeil carving tools
Blick Battleship Gray Linoleum
Now, keep in mind that whatever linoleum printing block and carving tools you decide to try, you should choose the tools for linoleum block printing that are right for you! These are just some of my personal preferences but I hope my experience is helpful in helping you decide what block printing tools to get.
