Canning Chicken: Raw or Hot Pack
This page may contain affiliate links. More Information.
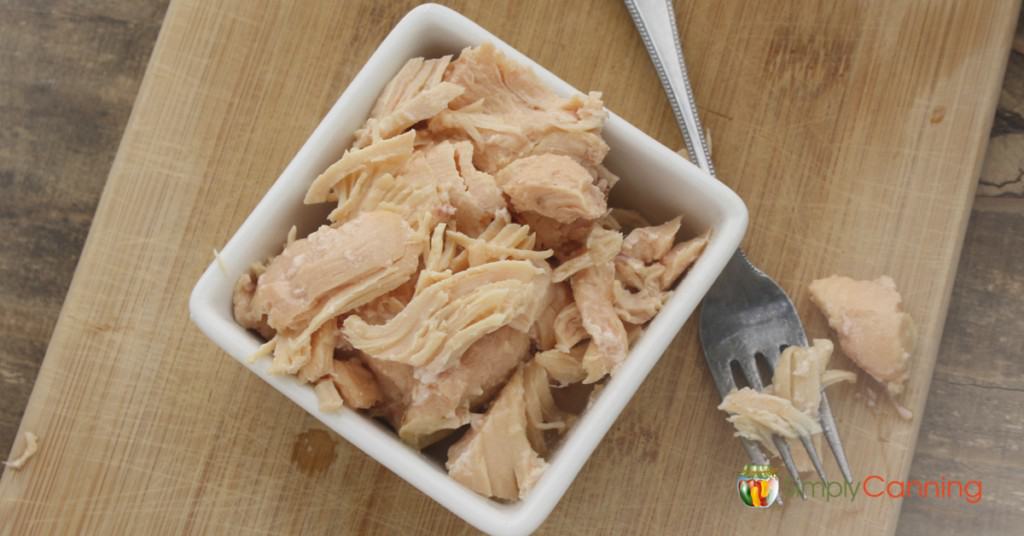
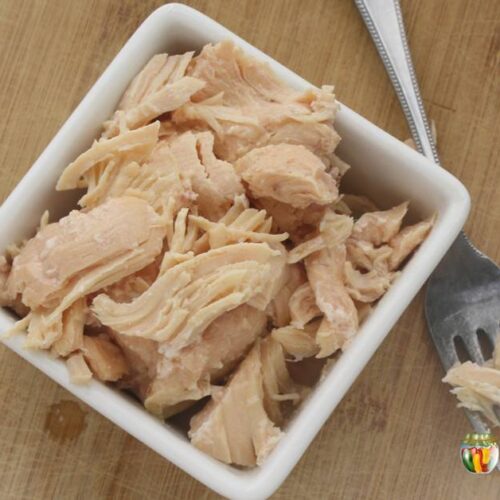
These canning chicken directions work for chicken, rabbit, duck, goose, turkey, or wild game birds too. Canned chicken is great for homemade soup or casserole recipes.
Learn how to can chicken raw pack, bone-in or boneless chicken with the extended instructions on this page. Please note: The recipe card below also includes directions for hot pack, which I now prefer because it has a better quality.
Either way, hot or raw pack…
…when canning chicken, you must use a pressure canner.

This Page Includes:
Canning Chicken: Extended, Step-By-Step Directions
Gather your canning supplies:
- pressure canner
- canning jars
- canning seals and rings
- jar lifter
- canning funnel
- tea kettle or pot to boil water
- sharp knife or kitchen shears
- towels, dish cloths, and potholders
Ingredients:
Chicken – Your choice of boneless or bone-in. Separate meat at the joints. Remove the skins.
Depending on the size of your chicken pieces, quarts will hold 6 or 7 small drumsticks or 5 to 6 thighs. These estimates are bone-in. For chicken breasts, I’d generally estimate about a pound of chicken per pint jar, 2 lbs of chicken per quart jar. But that is an estimate.
Canning Fresh Chicken
Before you start this project if you are working with home butchered or fresh chicken check this section for some special instructions. Not a hard step, just an extra step to be aware of.
I always can commercially purchased chicken that has already been dressed and chilled.
If you are butchering your own birds or have fresh birds, you should dress them out and chill them for 6-12 hours before canning. I have not found a clearly stated reason why they need to be chilled first, but I did find this note…
Note: Remember that spoilage and disease-causing microorganisms thrive on meats and poultry. Following the four “C’s” (clean, chill, don’t cross contaminate, and pressure can properly) is critical to producing safe, high quality canned meats. Source: Clemson Edu.
Editing to add: A reader offered this reason for the chilling step when canning fresh chicken. And it makes good sense. Thanks, Patricia!
“Chilling fresh killed poultry or game is to let the rigor mortis settle or relax in the meat. (I was raised on a ranch.) Canning or even cooking meat that is fresh kill and not chilled causes it to be tough or elastic. So it is important to chill all fresh meat 6-12 hours before canning.”
Meat is a place where microorganisms would thrive. Fresh meat needs to be processed and stored with care, so follow all instructions. Be sure the meat has been chilled for 6-12 hours.
And here’s a tip: A larger bird will have better flavor for canning. You can process fryers, but the bigger chickens are a better quality.
How to Can Chicken
Start by preparing jars and getting water in your canner heating. (See pressure canning for full directions.)
Prepare your chicken for either the raw or hot pack. Separate pieces at the joints and de-bone if you prefer. I can chicken breasts without the bones, but I like canning drumsticks and thighs with the bone in. You can leave skin on or remove it according to your preference. Some say that the skins add flavor.
I don’t care for soggy chicken skins, so I remove mine. It still has good flavor!
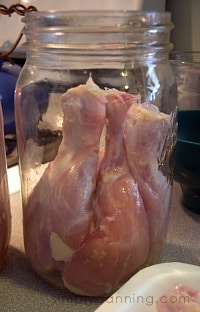
Raw Pack – Fill your jars loosely with meat pieces, leaving a 1 1/4 inch headspace. Add salt to the jars (1 tsp. per quart or 1/2 tsp. per pint). Do not add liquid.
Hot Pack – Cook the chicken until about 2/3 done. You can boil, bake, or even steam the chicken for this step. I prefer to boil or bake. Fill your jars with lightly cooked chicken, leaving a 1 1/4 inch headspace. Add salt (1 tsp. per quart or 1/2 tsp. per pint) and top off the jars with hot broth or water.
Packing Tips for Canning Chicken
I love canning chicken drumsticks on the bone. I then open the jar to make soups. The bone is so well cooked, it will crumble in my hand. All the the nutrients have gone into the broth. I don’t actually use the bone in my soup! (I had someone ask me about that.) But that bone is well done by the time it is cooked. The same would go for chicken thighs.
I truly enjoy serving this to my family.
- For drumsticks, it works well to pack 4 legs with the meaty sides down. Then add 2 or 3 to the top, meaty sides up. This way, the drumsticks nestle together and fill the jar nicely.
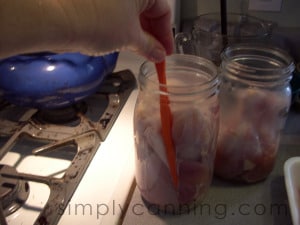
- Another packing tip if you want to add water is to pack half the jar and add a little boiling water. Then top the meat off and fill the rest of the jar with hot water or broth. This makes it less likely that you will have large air pockets stuck between your chicken pieces. You’ll still need to remove air bubbles. Use that bubble tool, don’t skip it.
Processing in a Pressure Canner
After you have filled your jars, remove any air pockets by sliding a narrow, non-metallic item between the jar and the meat. I like to use an orange peeler. A small spatula or other instrument would work also. Do this even if you’ve filled half of the way and added water, then filled the jar the rest of the way.
Add salt if desired. I highly recommend it. Add a teaspoon salt to pints, 2 teaspoons salt to quarts.
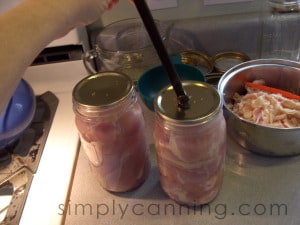
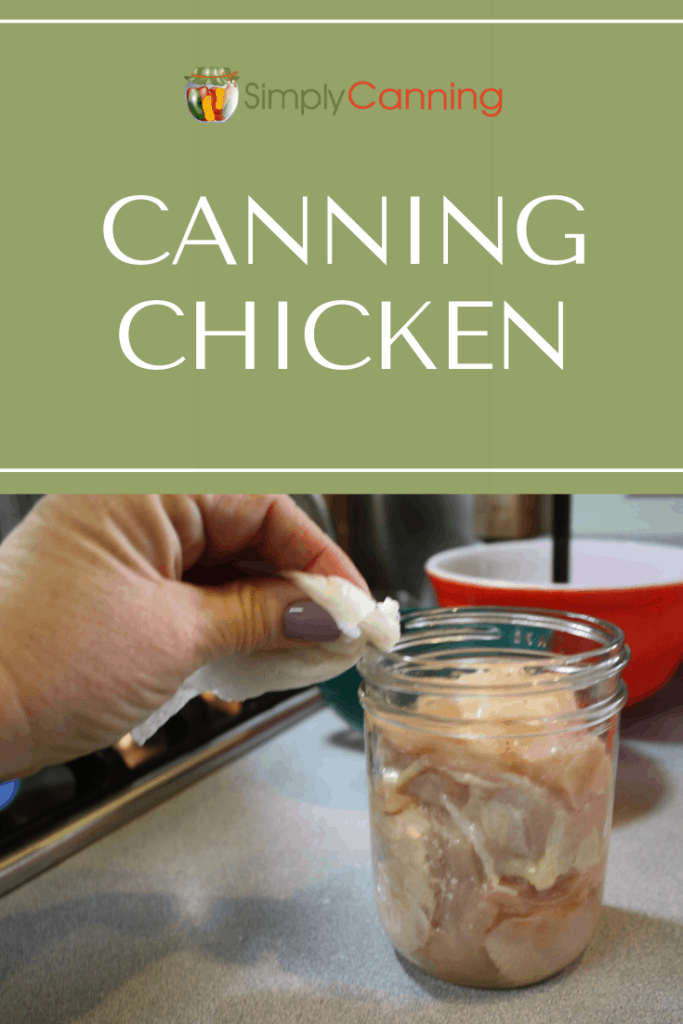
Wipe the rims of the jars clean with a damp cloth or paper towel. This prevents any food particles or grease from interfering with the seal.
Add your lids and screw bands.
Place jars on a rack in your pressure canner and process according to pressure canning instructions.
How Long Do You Pressure Can Chicken?
Either the hot pack method or the raw pack method has the same processing time. However, boneless chicken has a different processing time than bone-in chicken.
Be sure to read carefully and get the correct time requirements.
- Bone-In Chicken (Raw Pack or Hot Pack) – Process Pints for 1 hour 5 minutes, Quarts for 1 hour 15 minutes.
- Boneless Chicken (Raw Pack or Hot Pack) – Process Pints for 1 hour 15 minutes, Quarts 1 hour 30 minute.
If you want to can in half pints, use the time for pint size jars. Do not reduce the time even though the jar is smaller.
Make sure and adjust for your altitude using the charts below. For more information on why this is important, see this altitude adjustments page.
Recipe Card
Canning Chicken or Rabbit
Equipment
- Sharp Knife or kitchen shears
Ingredients
- Chicken or Rabbit boneless or bone-in
- Canning Salt optional
- Water or broth
Instructions
- Start by preparing your jars and getting water in the canner heating. You want the canner hot, but not boiling, when the jars are ready to be processed. If you are new to using a pressure canner, see this article for full pressure canning instructions. This includes more detailed information and step-by-step instructions on how a pressure canner works.
For a Raw Pack
- Prepare chicken.
- Pack raw chicken into hot jars, leaving 1 1/4” headspace.
- Add salt (1 tsp. per quart or 1/2 tsp. per pint) if desired.
- Remove bubbles, wipe the rim clean, and place on seal and rings.
- Place the jar in the warm canner. Proceed to fill all jars. Process according to below directions.
For a Hot Pack
- Prepare chicken.
- Simmer chicken until 2/3 cooked.
- Pack chicken into hot jars, adding boiling water or broth. Leave 1 1/4” headspace.
- Add salt (1 tsp. per quart or 1/2 tsp. per pint) if desired.
- Remove bubbles, wipe the rim clean, and place on seal and ring.
- Place the jar in the warm canner. Proceed to fill all jars. Process according to below directions.
Notes
Adapted from: The National Center for Home Food Preservation
Last Updated: 5/21/2021
Canning Chicken Tips & FAQs
If you raise meat rabbits and want to can rabbit, you’ll follow the same instructions on this page with the addition of a salt water soak. Soak dressed rabbits in a saltwater solution (1 tablespoon of salt to one quart of water). Rinse and proceed with canning instructions.
I can’t seem to get past that cuteness factor! I suppose if I’m starving, I could do it. But for now, I’ll stick with chicken. 🙂
“I canned cooked cubed chicken today and I didn’t have quite enough to fill that last two quarts up to the inch headroom. They were probably about 1 1/2 inches below the top. I filled each quart with boiling water and processed it for 90 min. Now that they have settled it looks like the jars are only a little more than half full of meat, plenty of water though.
Answer – Hi Carol, Yes, as long as the jars sealed and you used the correct pressure for your area, your chicken should be just fine! It is good that you added the liquid to the correct headspace. It sounds as if you did it just right!
The general recommendation for all home canned food is that the shelf life is 1 year. However it is a quality issue, not a safety issue. After one year the quality and nutritional value does start to reduce more quickly. Please don’t toss your food after a year! Just make a plan to use it up.
I’ve been asked this question many many times. But my answer is and will always be, you should always use a pressure canner for any meat. It is a safety issue. If you google it you’ll find instructions on using a waterbath to can chicken. But I ask you to really consider the consequences. The chicken may be fine… or not. Botulism is not something to mess around with. We’ve got the equipment to do better. Here are a couple articles for you to consider.
Botulism
Canning safety : are we on overkill?
And if you don’t want to use a pressure canner because of fear of the canner, you should be more afraid of making someone sick. PLUS You don’t have to be afraid of the canner! It seems intimidating but it really is not hard. Check out this workshop.
Canning confidence, getting over the fear of your pressure canner.
No. Pressure Cookers and Canners are different. A cooker has not been tested for preserving. It is great for making dinner. If you want to can jars for storage on the pantry shelf you need to use a canner.
Home canned chicken can be used jsut like you would a commercially canned meat. It is great for chicken salad. Open a jar, add some broth, add chopped veggies, some noodles and you’ve got chicken soup.
Related Pages
Related Pages
Canning Meat – Index page with links to all posts related to canning a variety of meat.
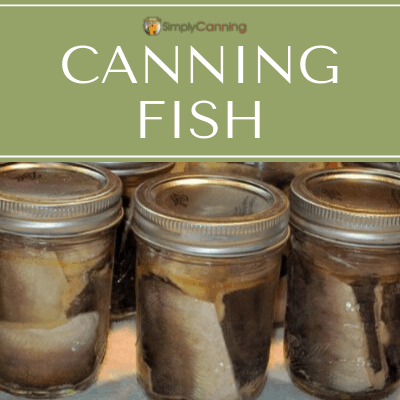
Canning Fish – Salmon, Blue Mackerel, Trout and more. Ever wanted to try canning fish? Here’s how to pressure can fish safely!
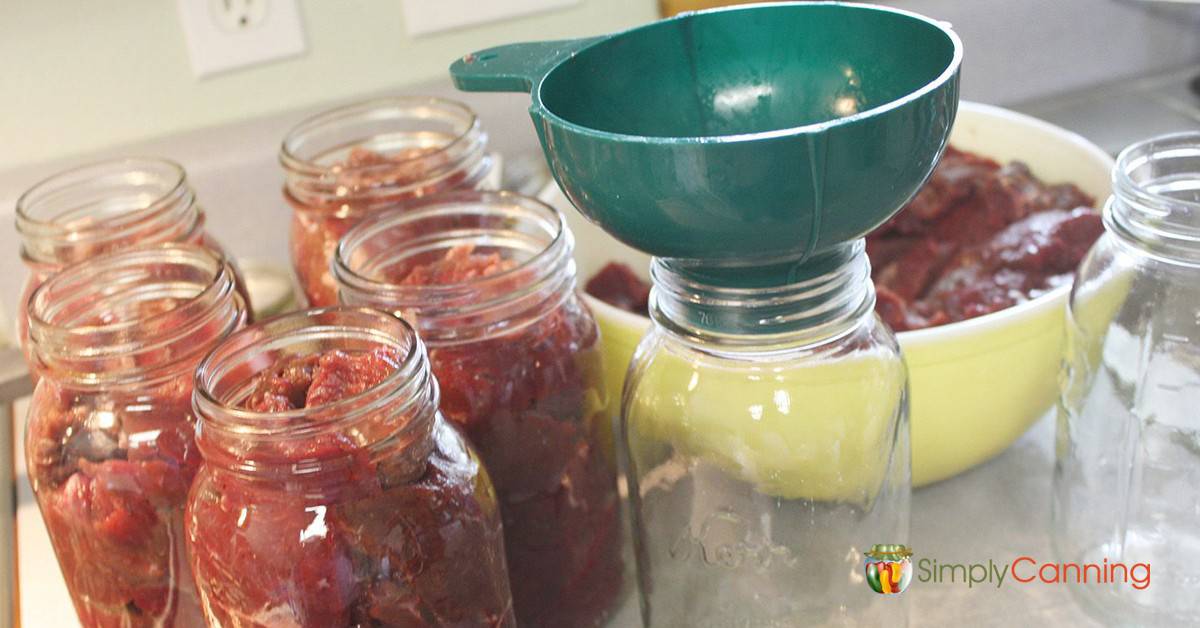
Canning Ground Meat – Home canned ground venison, beef can be used for tacos, chili, casseroles, and more.
Pin This to Find Later:
Source: The National Center for Home Food Preservation
Page last updated: 7/26/2022
You mention that you prefer to hot pack because of quality. In what way is the quality different.
The hot pack will have the jar full of liquid. Especially with chicken breast the meat is more juicy with a hot pack. The raw pack can be dry.
The reason I chill my fresh butchered birds is because the sudden death throws the birds muscles into rigamortis. So waiting a minimum of 24 to 48 hrs after the kill putting bird into fridge will relax the muscles when you take it out to room temp the bird should be limp not stiff. If it’s still put it back into fridge for another 12 hrs. The bigger the bird the more time is needed for the muscles to release from the rigamortis.
Love this. I have had some good help with canning chicken but you have added even more. I saw an offer for a free class but can not find it now. Would you be able to help me find the information .
Was it perhaps this one? Canning Quick Start
We also have this course on canning meat. It is a paid course however. The quick start will get you started with an introduction to canning.
I’m interested in canning leftover turkey. I think you mentioned that it is the same directions as for chicken. Question, my turkey will be baked first, so is there a special way to can it? Are there any hints for taking it off the bone? especially the drumstick? Thank you
Hi, I did raw pack chicken breast in pints and added a little water. After pressure canning, the chicken was clumped together… Is it safe to consume? Just found your site and I love it!
Yes,as long as you followed proper instructions, then the chicken is fine. It will tend to clump together as it is processed.
Looking for how to “can” meats, hopefully I found the source for that information.
Regarding the first cooking of the chicken, it says to cook until 2/3 done. Would just calculate that using a instant meat thermometer? Thank you.
Hi Margaret. You could use meat thermometer but I never do. I just cook it until not quite done.
Can I marinate my chicken and then raw pack for pressure canning?
Audrey
I don’t have a pressure canner, I do a hot water bath method when canning tomatoes and such. Can that be done with the chicken as well?
No. Chicken and any meat must be processed in a pressure canner. Sorry.
Can you add seasoning to the jar before you put the chicken in? Like garlic and onion powder or seasonall, or even pepper? Also, could you grill chicken and then pressure can it?
Yes just be sure you are using just plain seasonings. Sometimes those seasoning packets will have fillers. You don’t want that. But a bit of onion or salt and pepper or seasonings is great. If you grill it you’ll want to use the hot pack method. Just a thought for you to consider… skins will get soggy. I don’t care for soggy skin. So even if you grill your chicken and it has crispy skin, it won’t remain crispy.
Thank you so much for your help, thank you !