
Worms in Dirt Graveyard Cake

Halloween preparation is in full swing around our house already, and I am not mad about it one bit! Who can be mad at any reason to keep your house stocked with candy? Not me, I’ll tell you that.
Baking for Halloween is so much fun because there are just so many things you can do! Like this graveyard cake, for instance!
Take your normal, average, every day chocolate cake and add a few worms, bone candy, and tombstones and you have your self a worms-in-dirt graveyard cake. These days, you can find candy worms, bones, and tombstones at a lot of party or craft stores so you don’t have to make your own. All you have to do is make the cake!
What you Will Need
First, you will need two or more layers of your favorite chocolate cake. You can certainly use a boxed cake mix. Or, like me, you can use my favorite chocolate cupcake recipe. I just doubled the recipe to make enough batter for a cake.
You will also need some chocolate frosting. While I will never discourage the use of cake mix, I always discourage the use of store bought frosting. It just tastes so artificial! Plus, making your own chocolate frosting at home is actually pretty easy! Here’s my favorite recipe. One batch of frosting should be enough to frost 2-3 layers of cake (no matter what size).
In addition to the actual cake, you will also need:
Gummy worms (the smaller the better)
Tombstone molds (or a tombstone shaped candy)
Candy melts in white or grey
Chocolate cookies, smashed

How to Make It
Before getting started on the cake, I recommend making the tombstones (if you didn’t buy candy already shaped like tombstones). It will give them time to set and time for you to add some distressing if necessary.
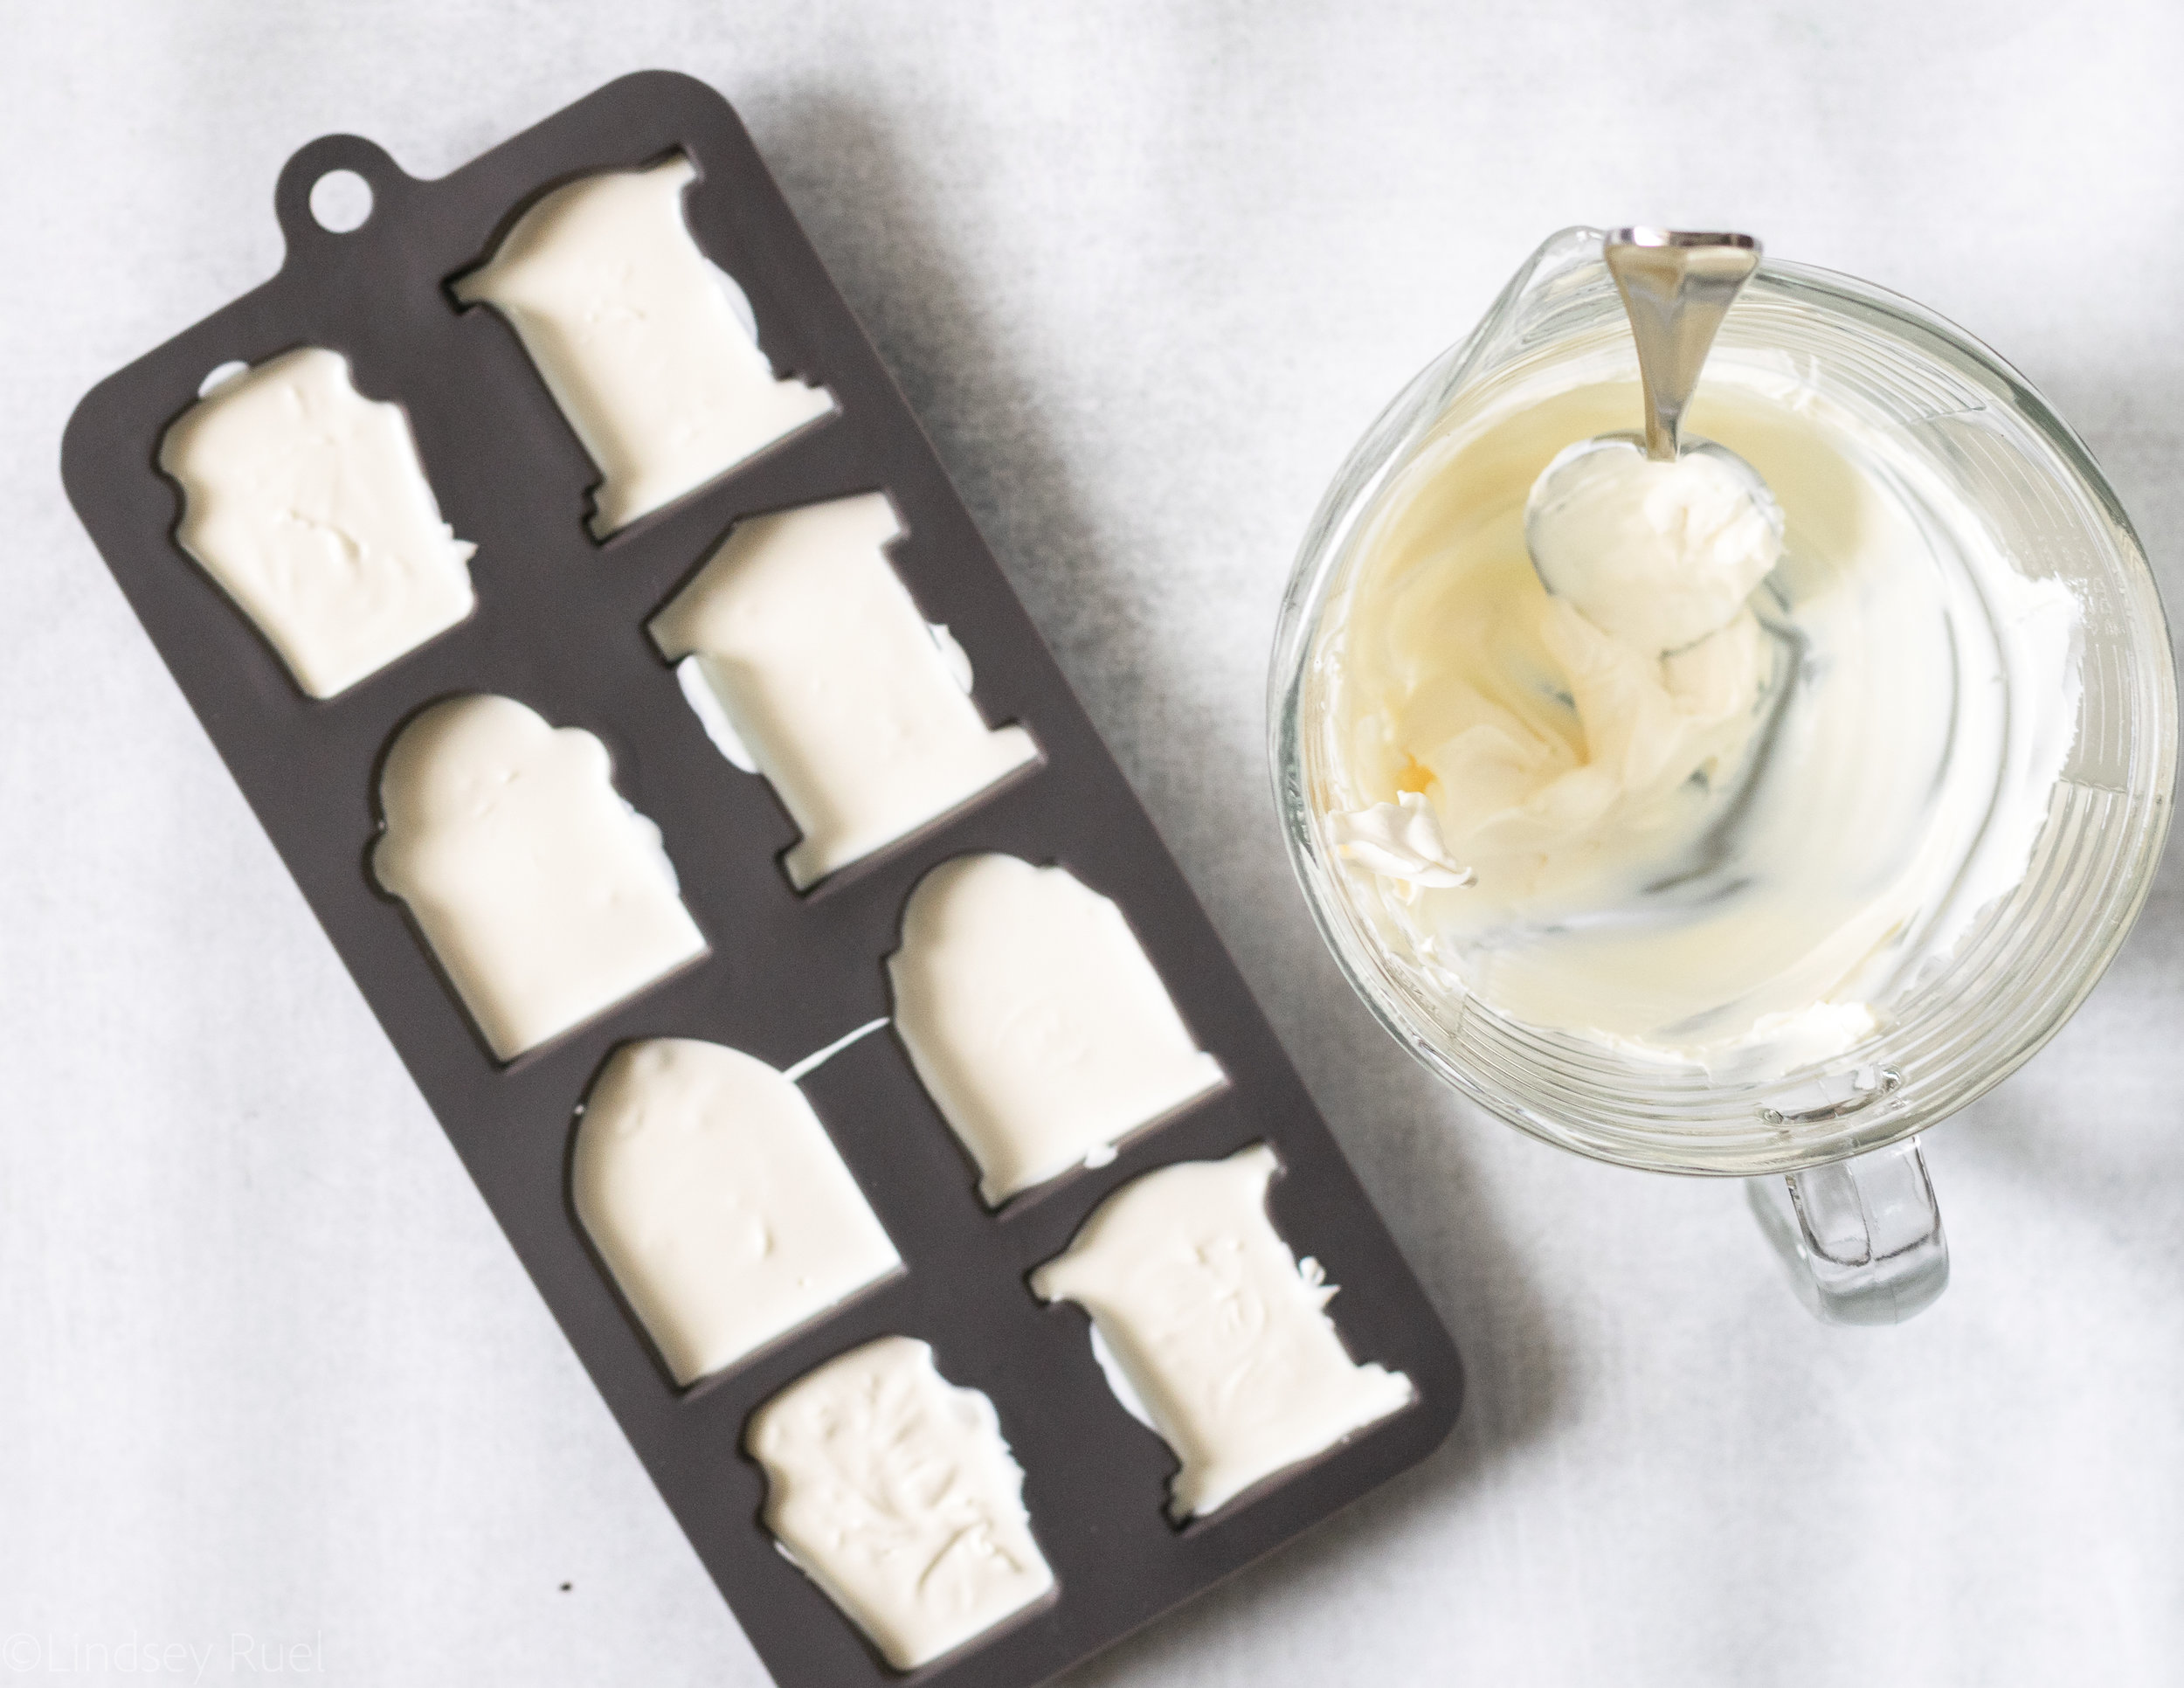
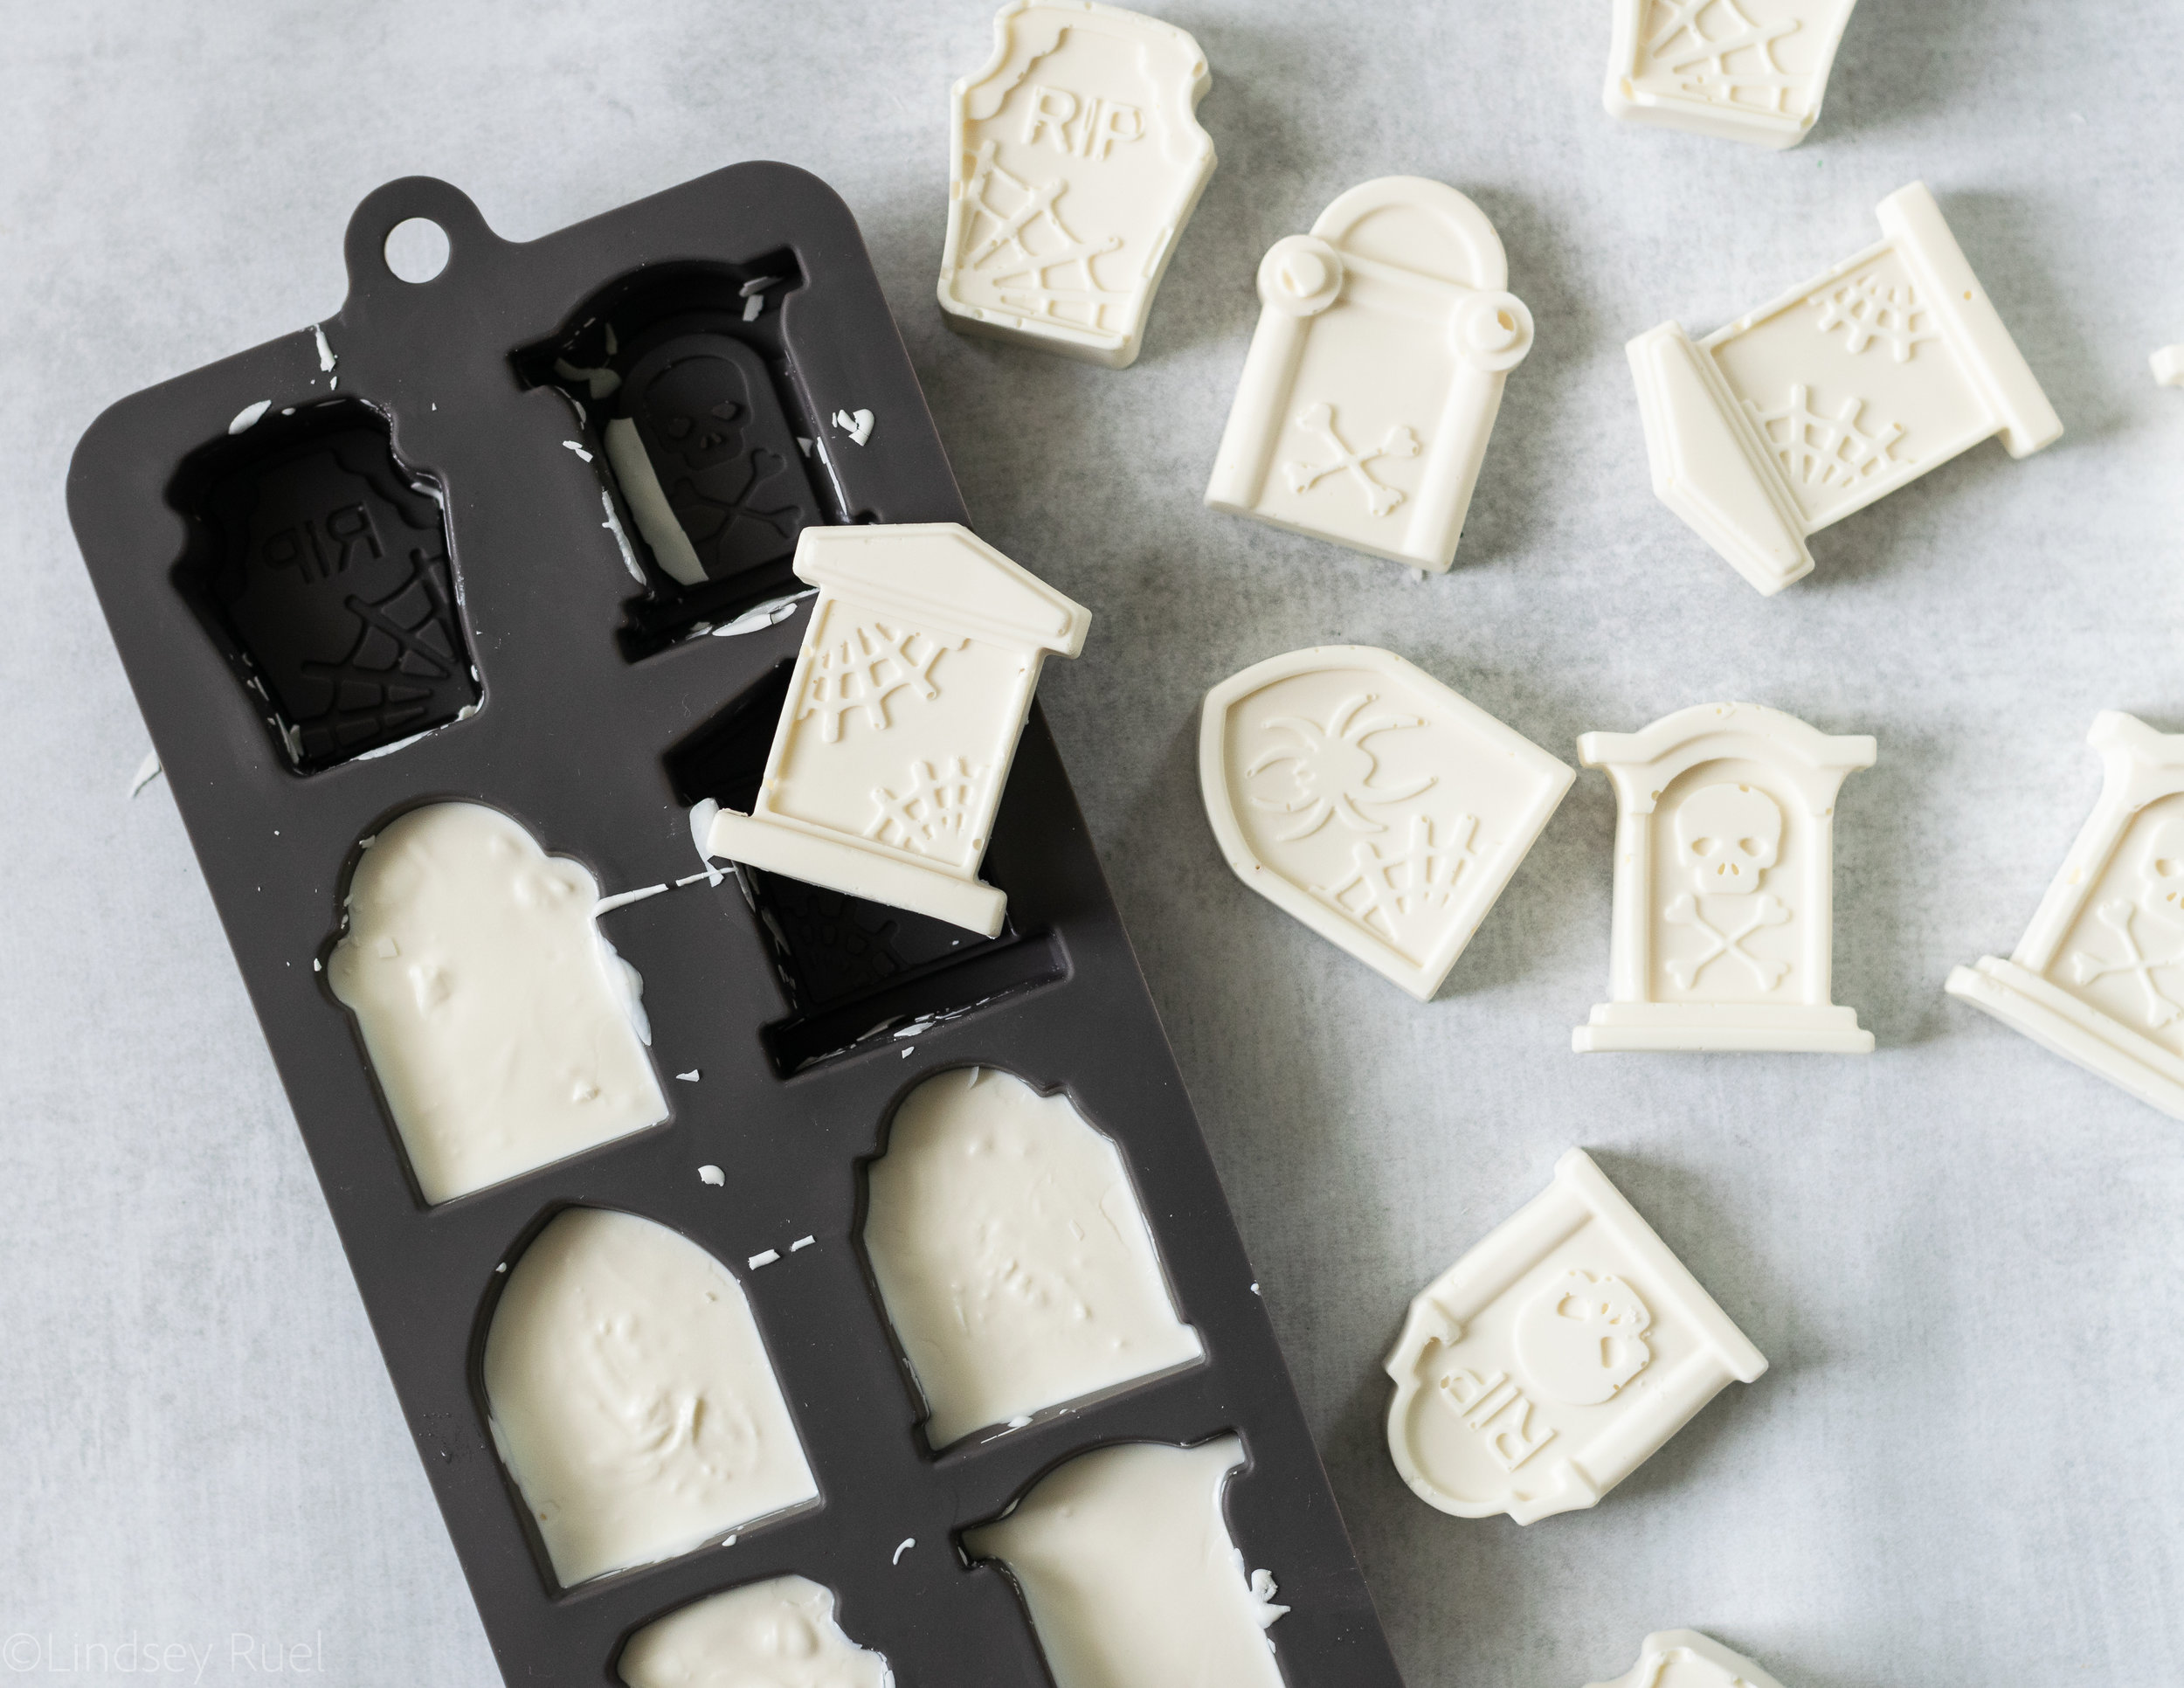
To make the tombstones, melt the candy melts until completely melted and pourable. Spoon, pipe, or pour the melted candy into the mold. Tap the mold a few times to shake out any bubbles or unevenness. Then pop them in the fridge or freezer to harden.
Once they are hard, you can just pop them out of the mold and add any distressing you’d like.
Because mine were so white, I brushed over them with some grey gel food coloring and cocoa powder (to make them look dirty).

Now onto the cake!
First, of course, bake and cool your layers of cake and make your frosting. Then to assemble, top the first layer with a good layer of frosting. You will want enough that you can stick worms and bones into.
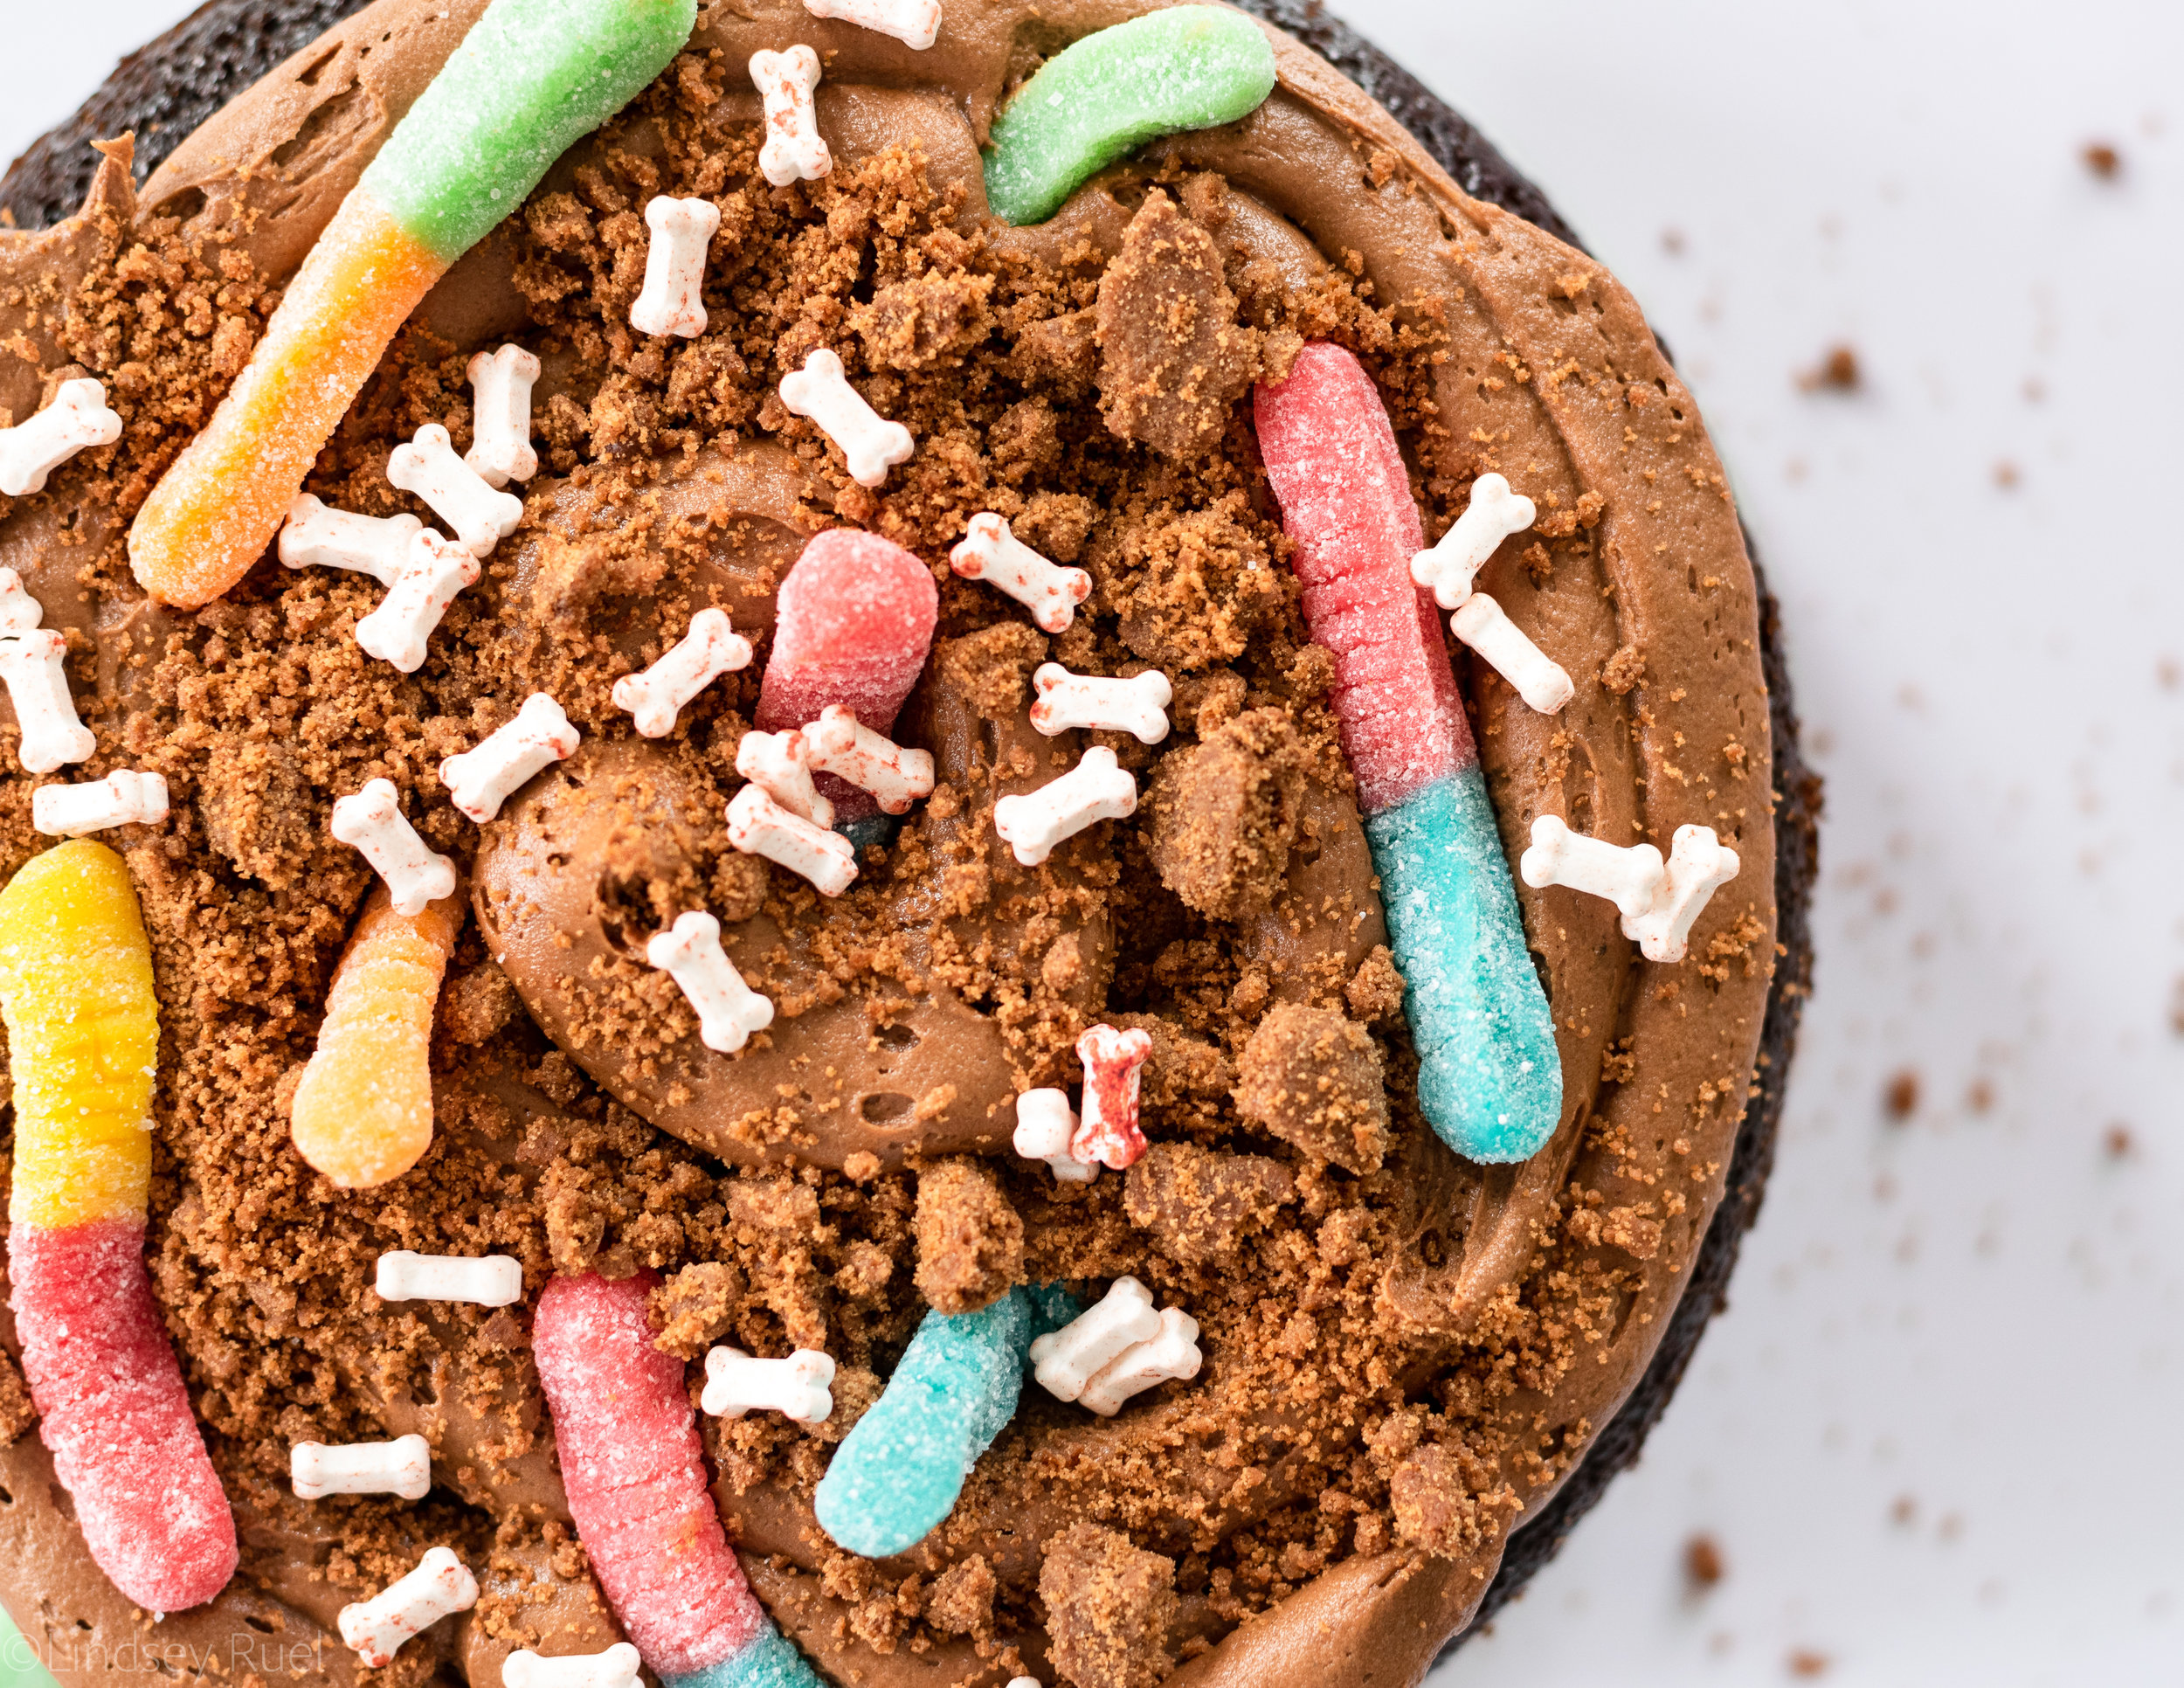
Then add your worms, bones, and some “dirt”, or the crumbled up chocolate cookies. If you can, stick the worms and bones into the frosting so they are disbursed throughout.
Before adding the next layer, add a couple dots of frosting on top of everything to help adhere the next layer of cake.

If you have more than one layer of cake, repeat these steps for the next layer. Then finally top it off with the last layer.
I like to add my last layer on upside down so that I know the top is perfectly flat!

Then cover the entire cake with frosting. I either pipe or spread a bunch of icing around the sides, then I use an offset spatula to smooth it all around the sides of the cake. Once I’m happy with the sides, I do the same to the top.
Since this cake is covered with crumbs, the top and bottom of the frosting doesn’t have to be perfect.
To add the crumbs, pat a handful at a time around the bottom. Then sprinkle any extra on the top of the cake.

Next, add in your tombstones. You may want to move some crumbs out of the way so that you can press the tombstone down into the frosting to make sure they stay in place.
Then sprinkle on some extra bone candy to make your cake graveyard extra creepy.

And that’s about all you need to know to make this worms and dirt graveyard cake! Isn’t it fun!?!
My favorite part?

When you cut into it and the gummy worms poke their little heads out! You could even serve some extra gummy worms with each slice if you want even more worm action.

And now you are all set for Halloween!