
Stained Glass Snowflake Cookies
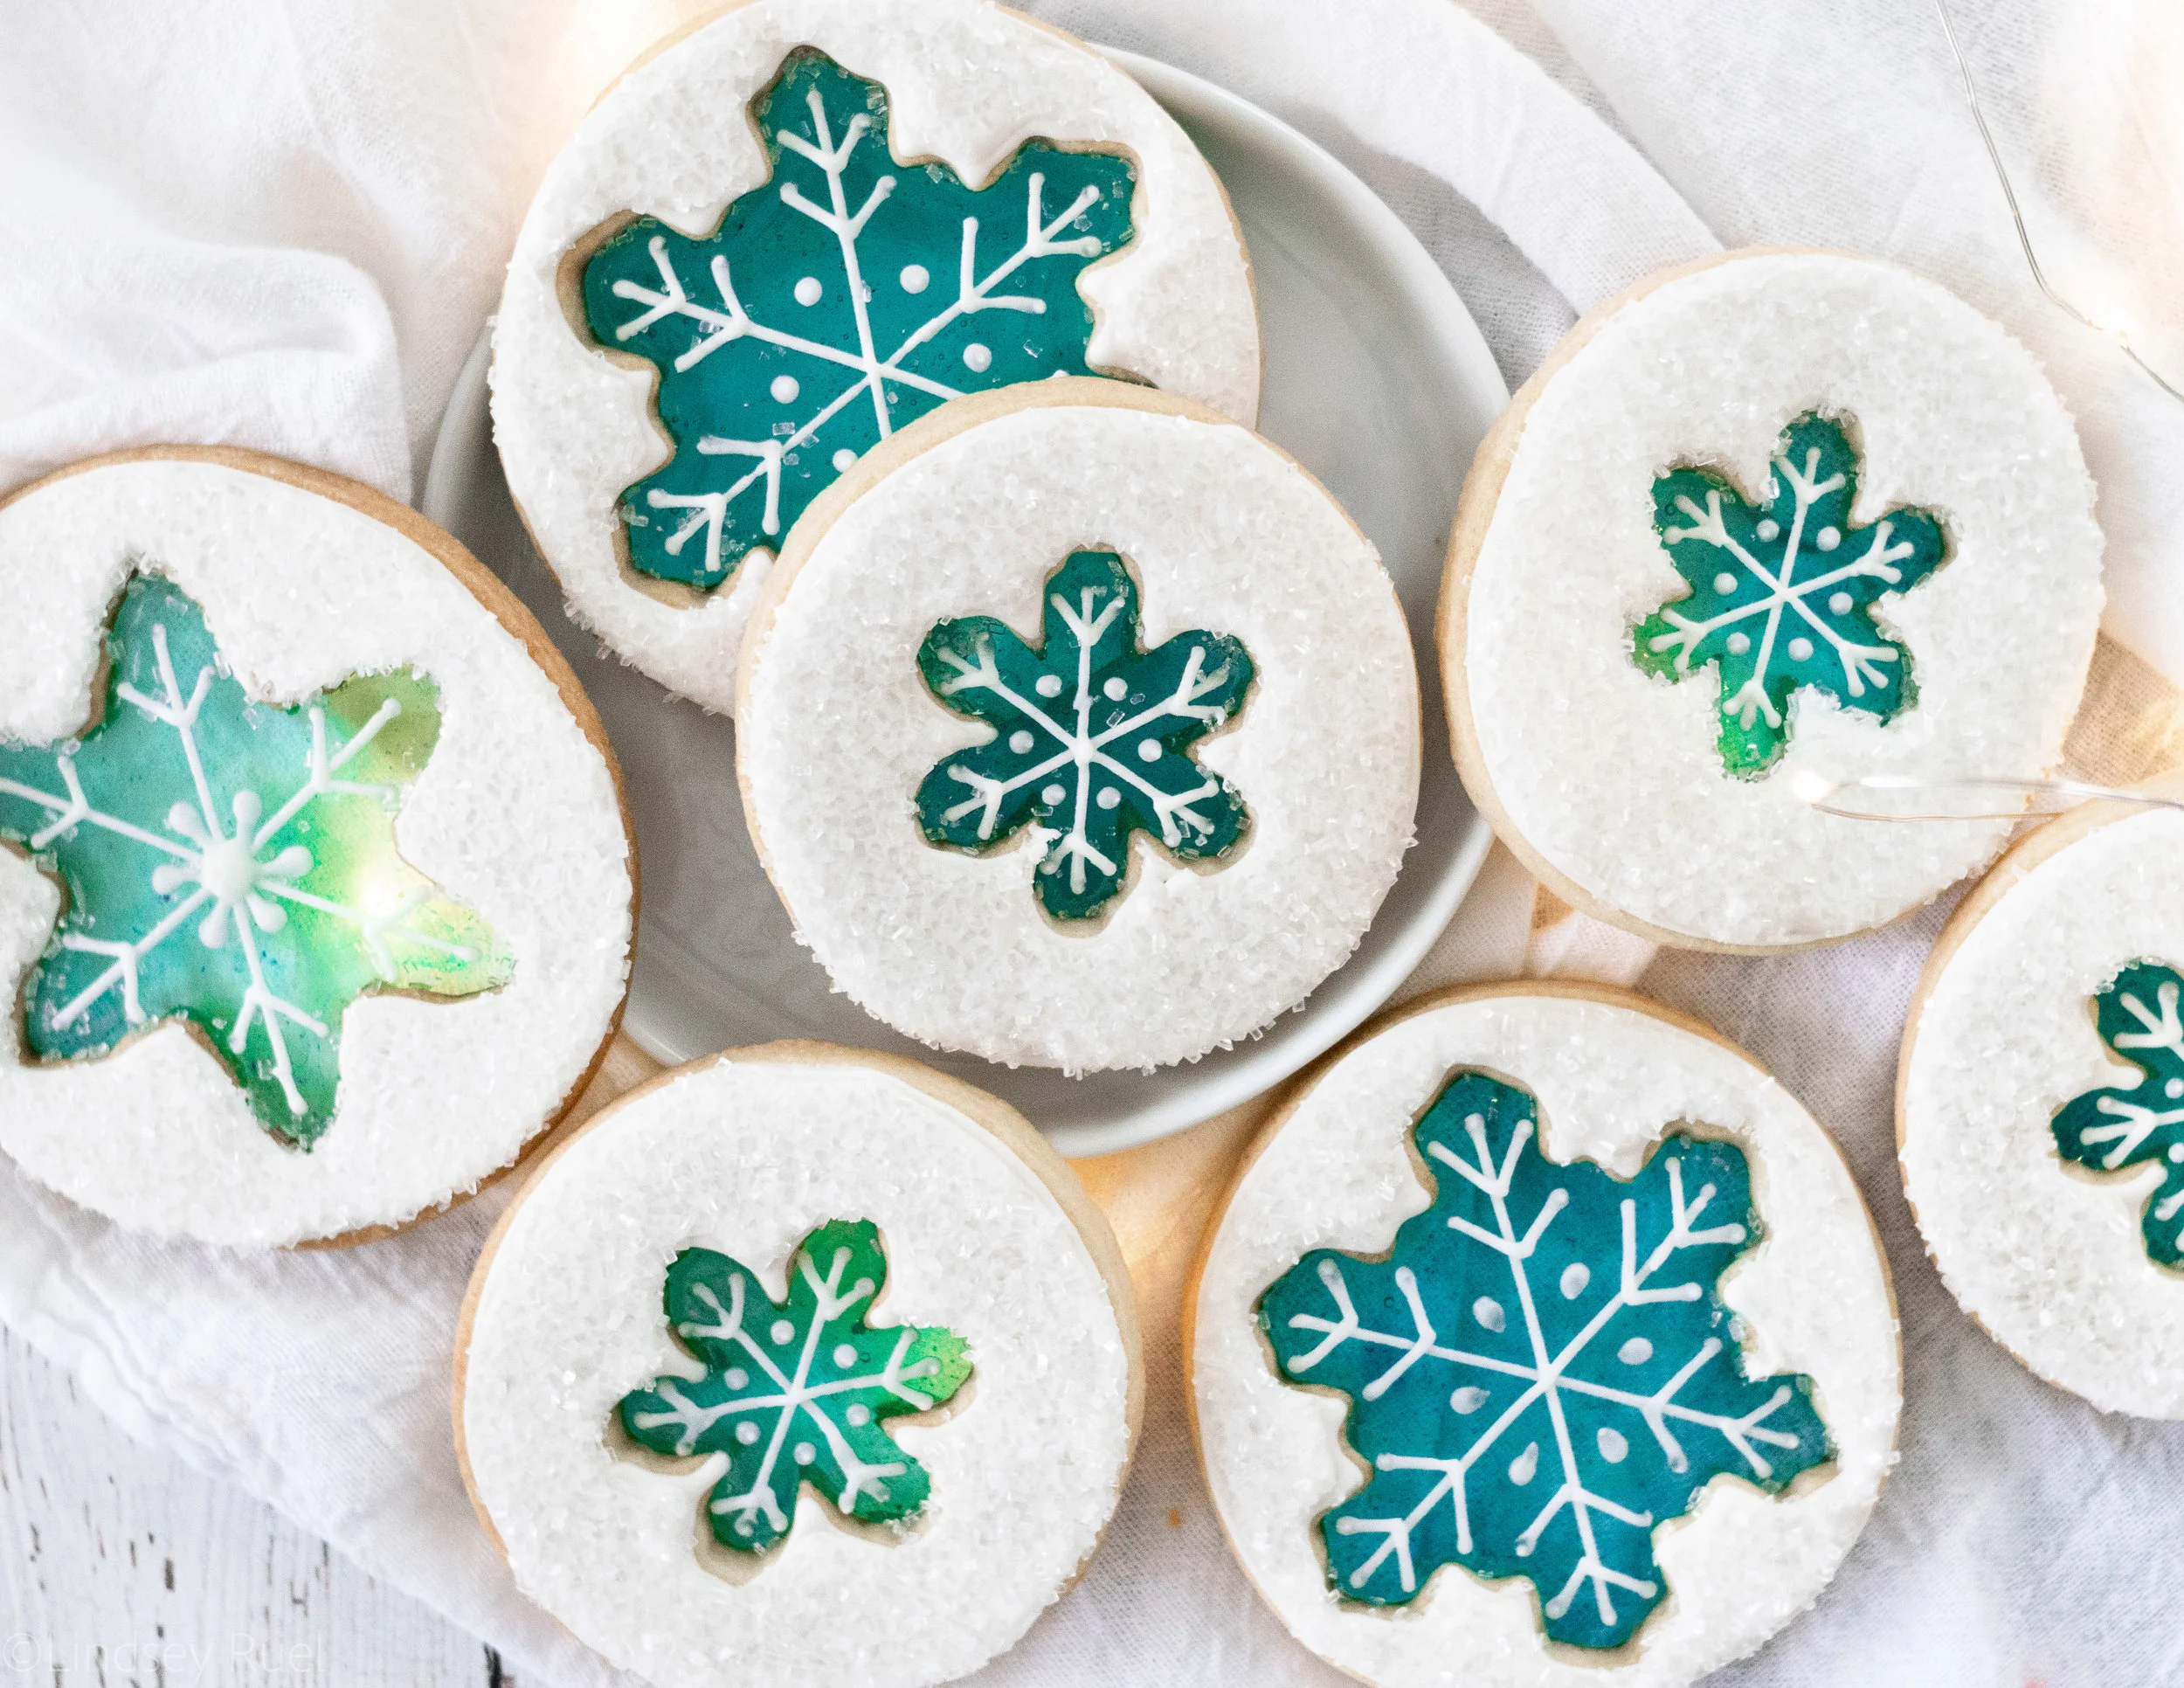
These cookies just make me so happy! My favorite thing about them is how little decorating is involved to make these beauties!
The magic of these stained glass snowflake cookies is the stained glass effect that is achieved with a little colored candy. But I also love the pop of the blue candy from the white icing and sprinkles. It really makes you think you are looking an icy snowflake in the snow, doesn’t it!?
How to Make Them

These cookies start by cutting circle cookies in various sizes then cutting a snowflake out in the middle.
You can see I cut different shapes and sizes of snowflakes in the circles.
Then spoon the liquid candy (I used the same technique to make the candy as I did in this post) into the void left by the snowflake.

Let the candy, or sugar glass to set for a few minutes before removing from the baking sheet.
Its easiest to line the baking sheet in foil and spray it lightly with baking spray. The candy just pops right off from the foil.

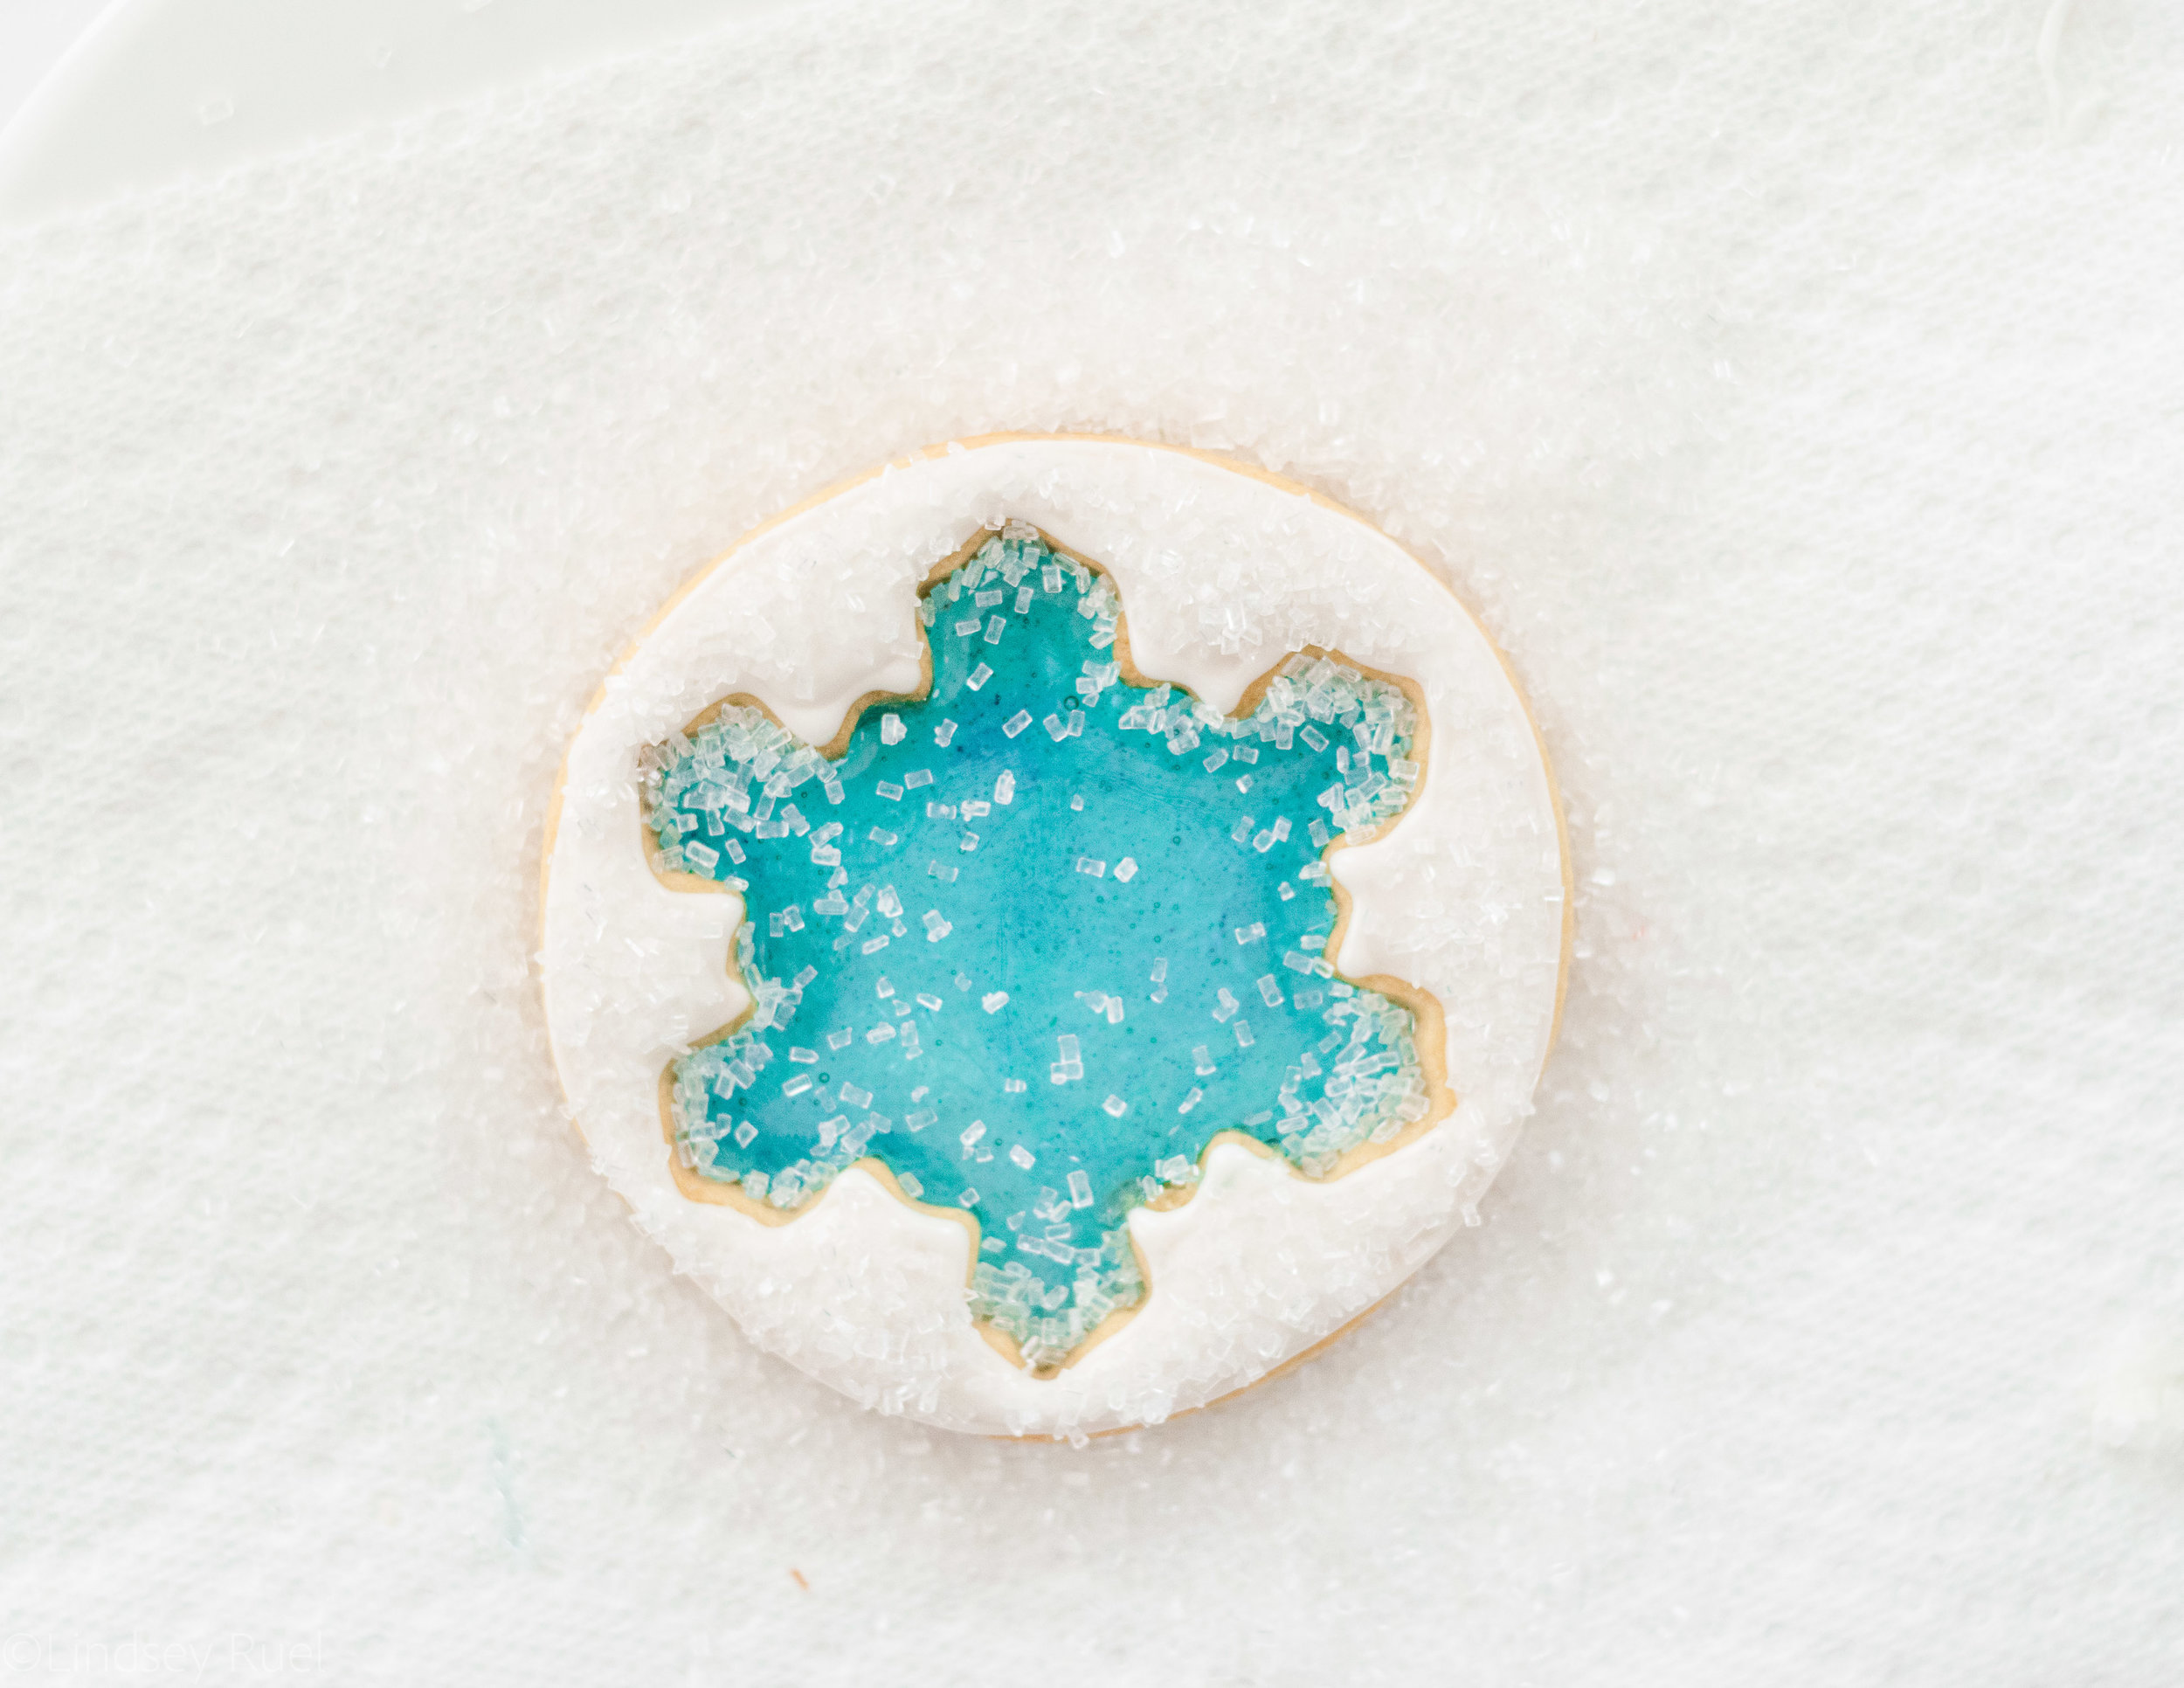
Once the candy has hardened, cover the rest of the cookie with icing and sanding sugar.
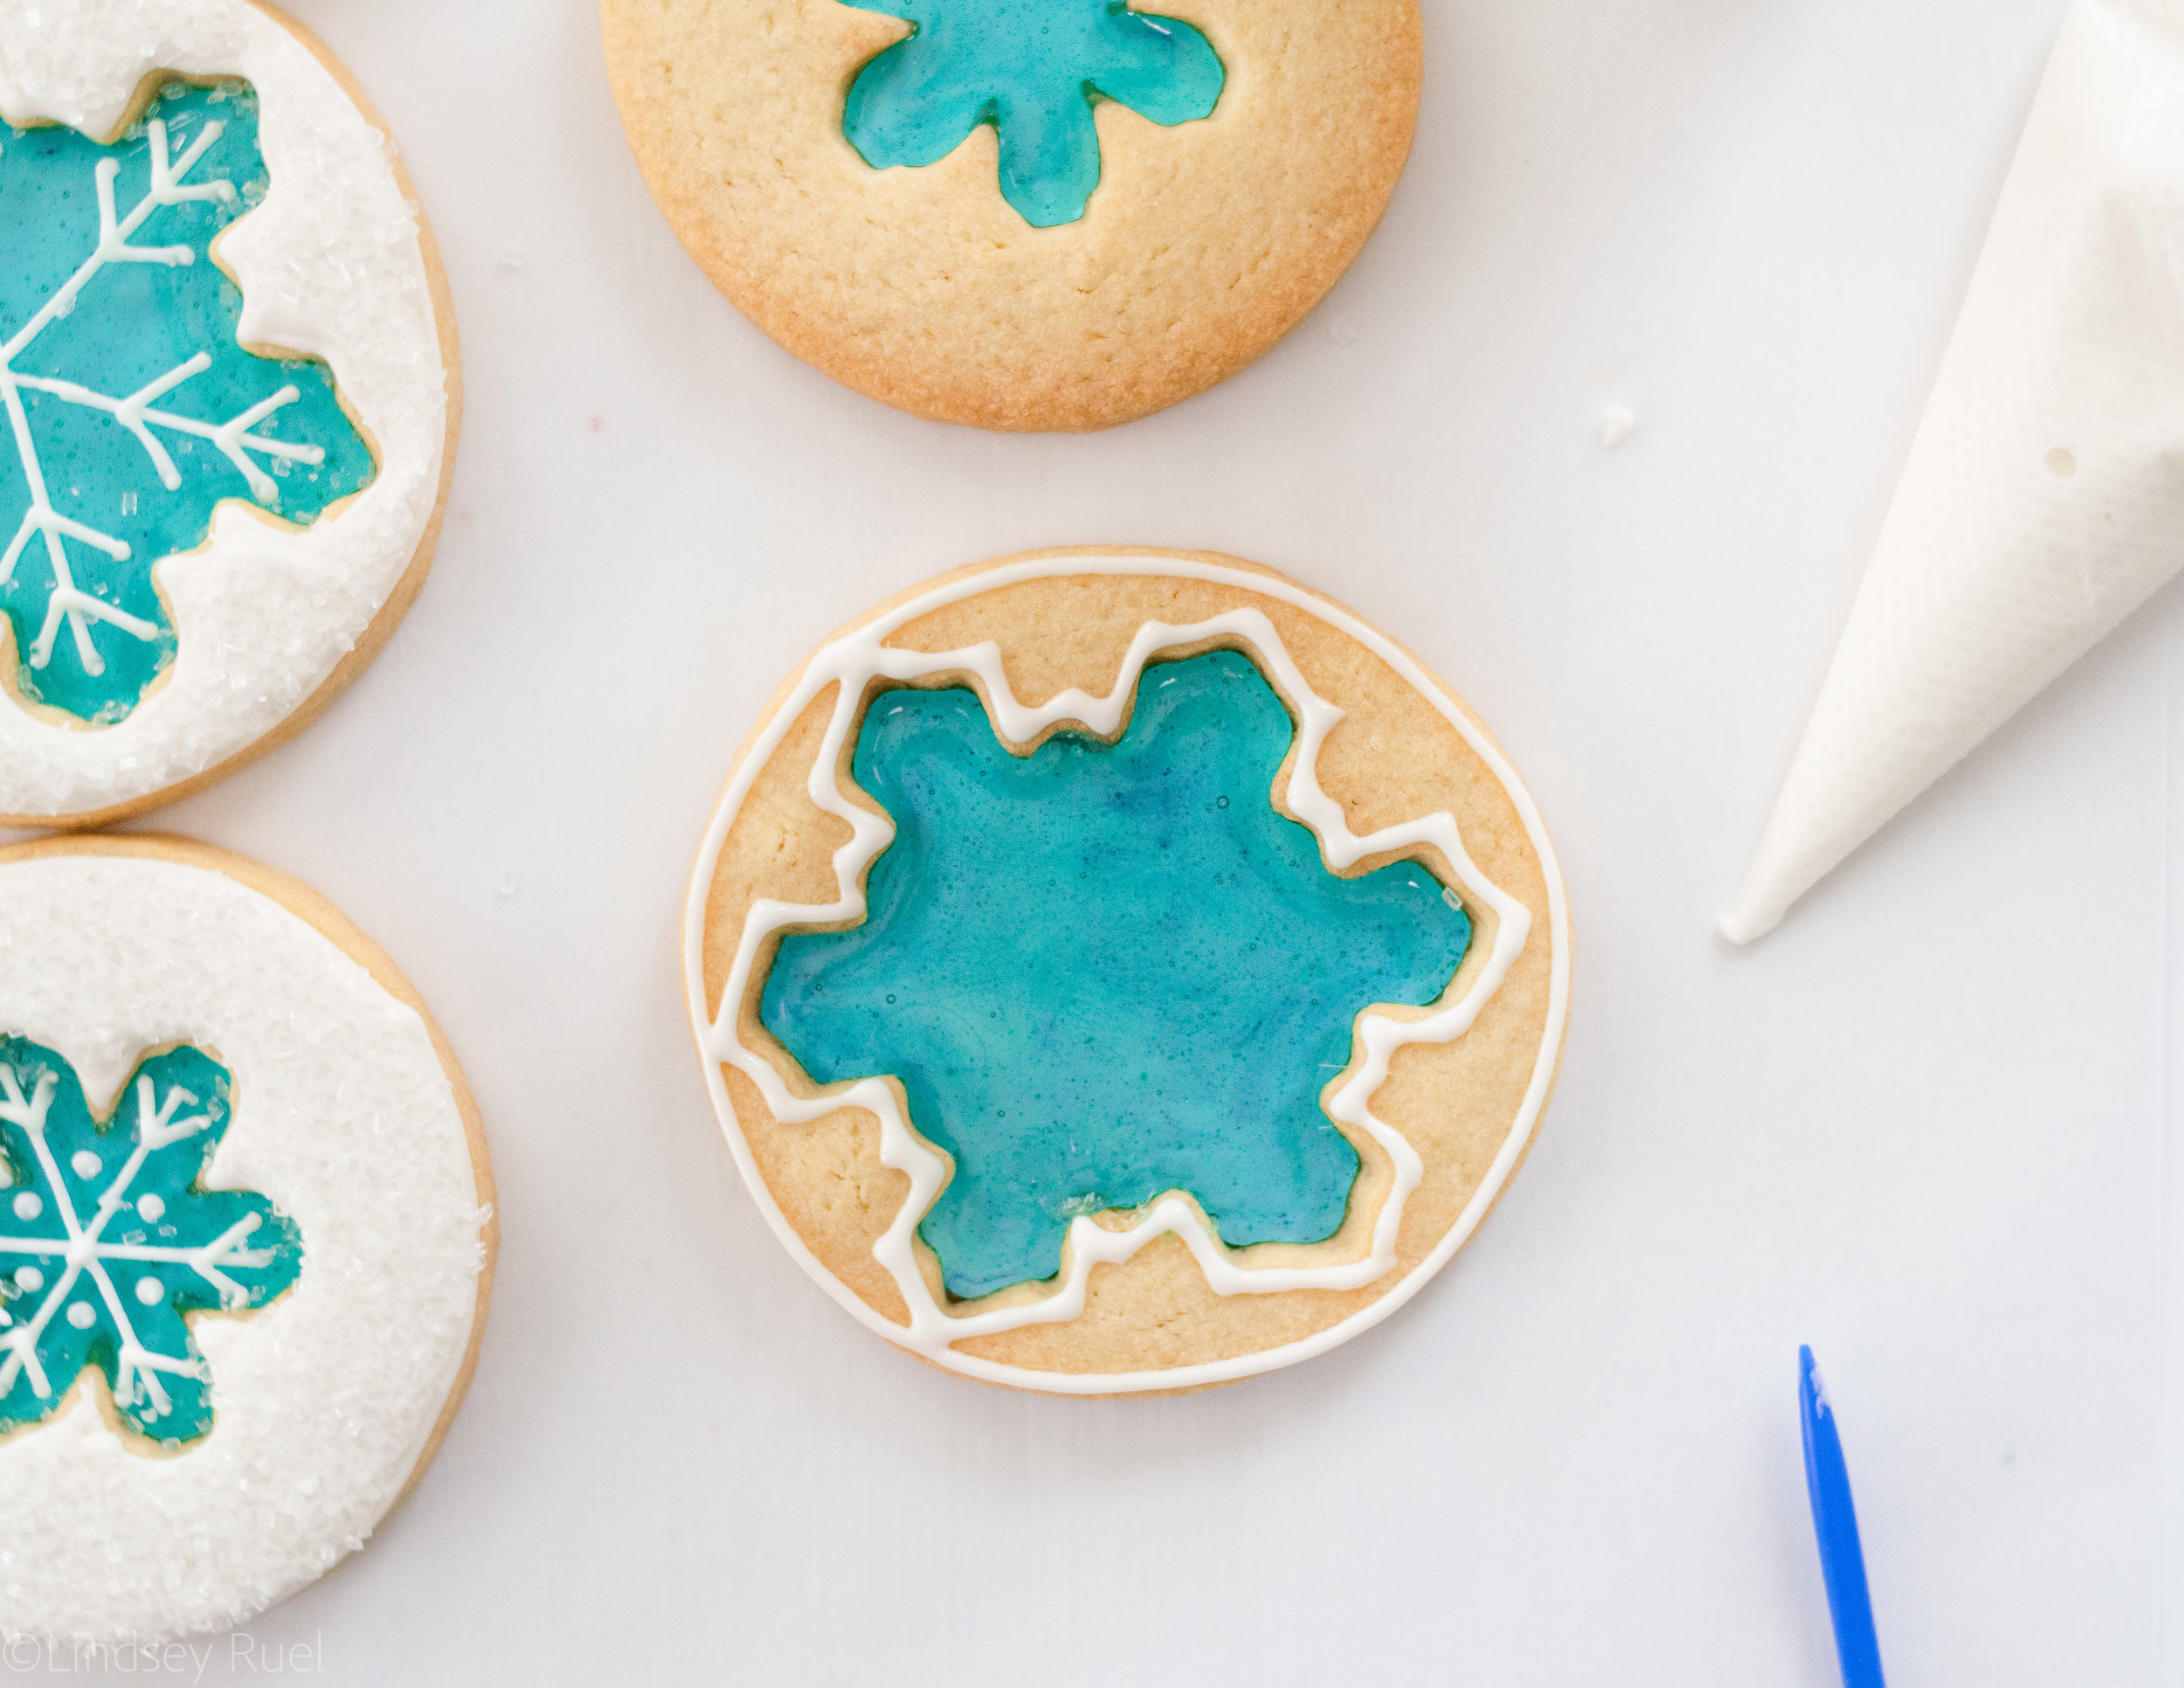

Outline the entire cookie with flood or piping consistency royal icing and let that sit for at least 2 minutes.
Then fill the cookie with flood consistency icing and sprinkle the sanding sugar on top.
Shake or brush any pieces of sugar off of the candy portion of the cookie.
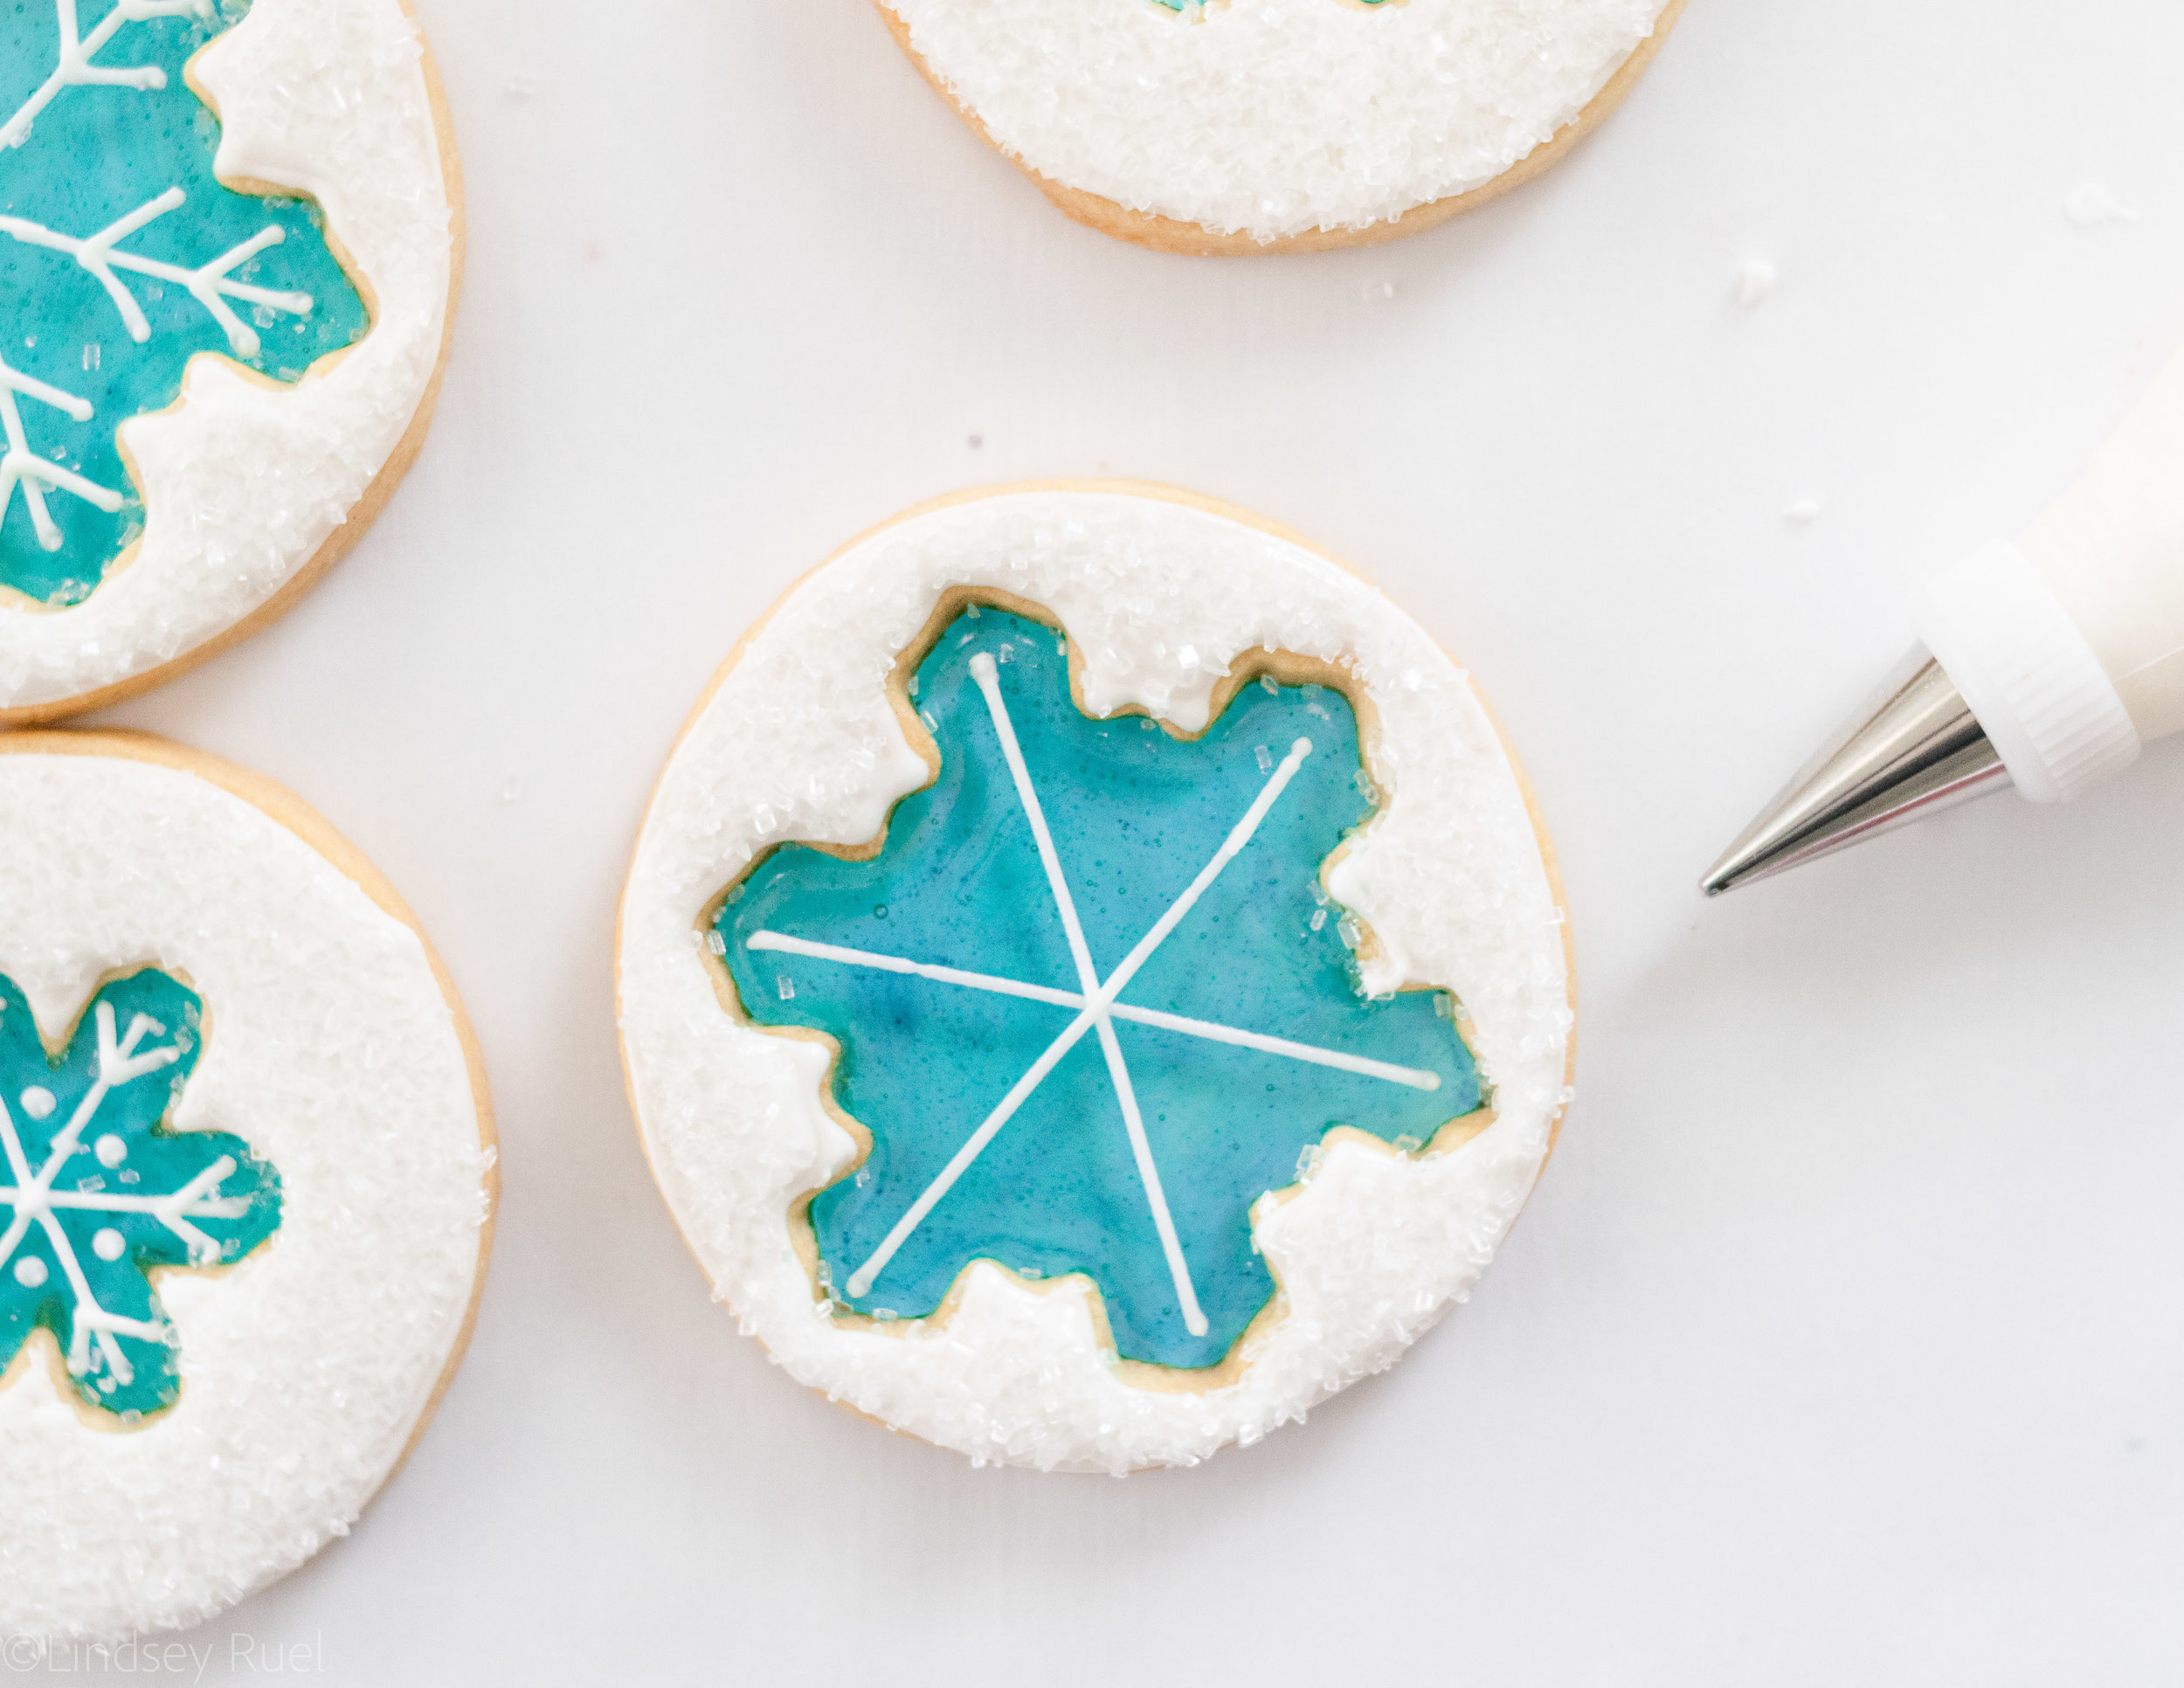
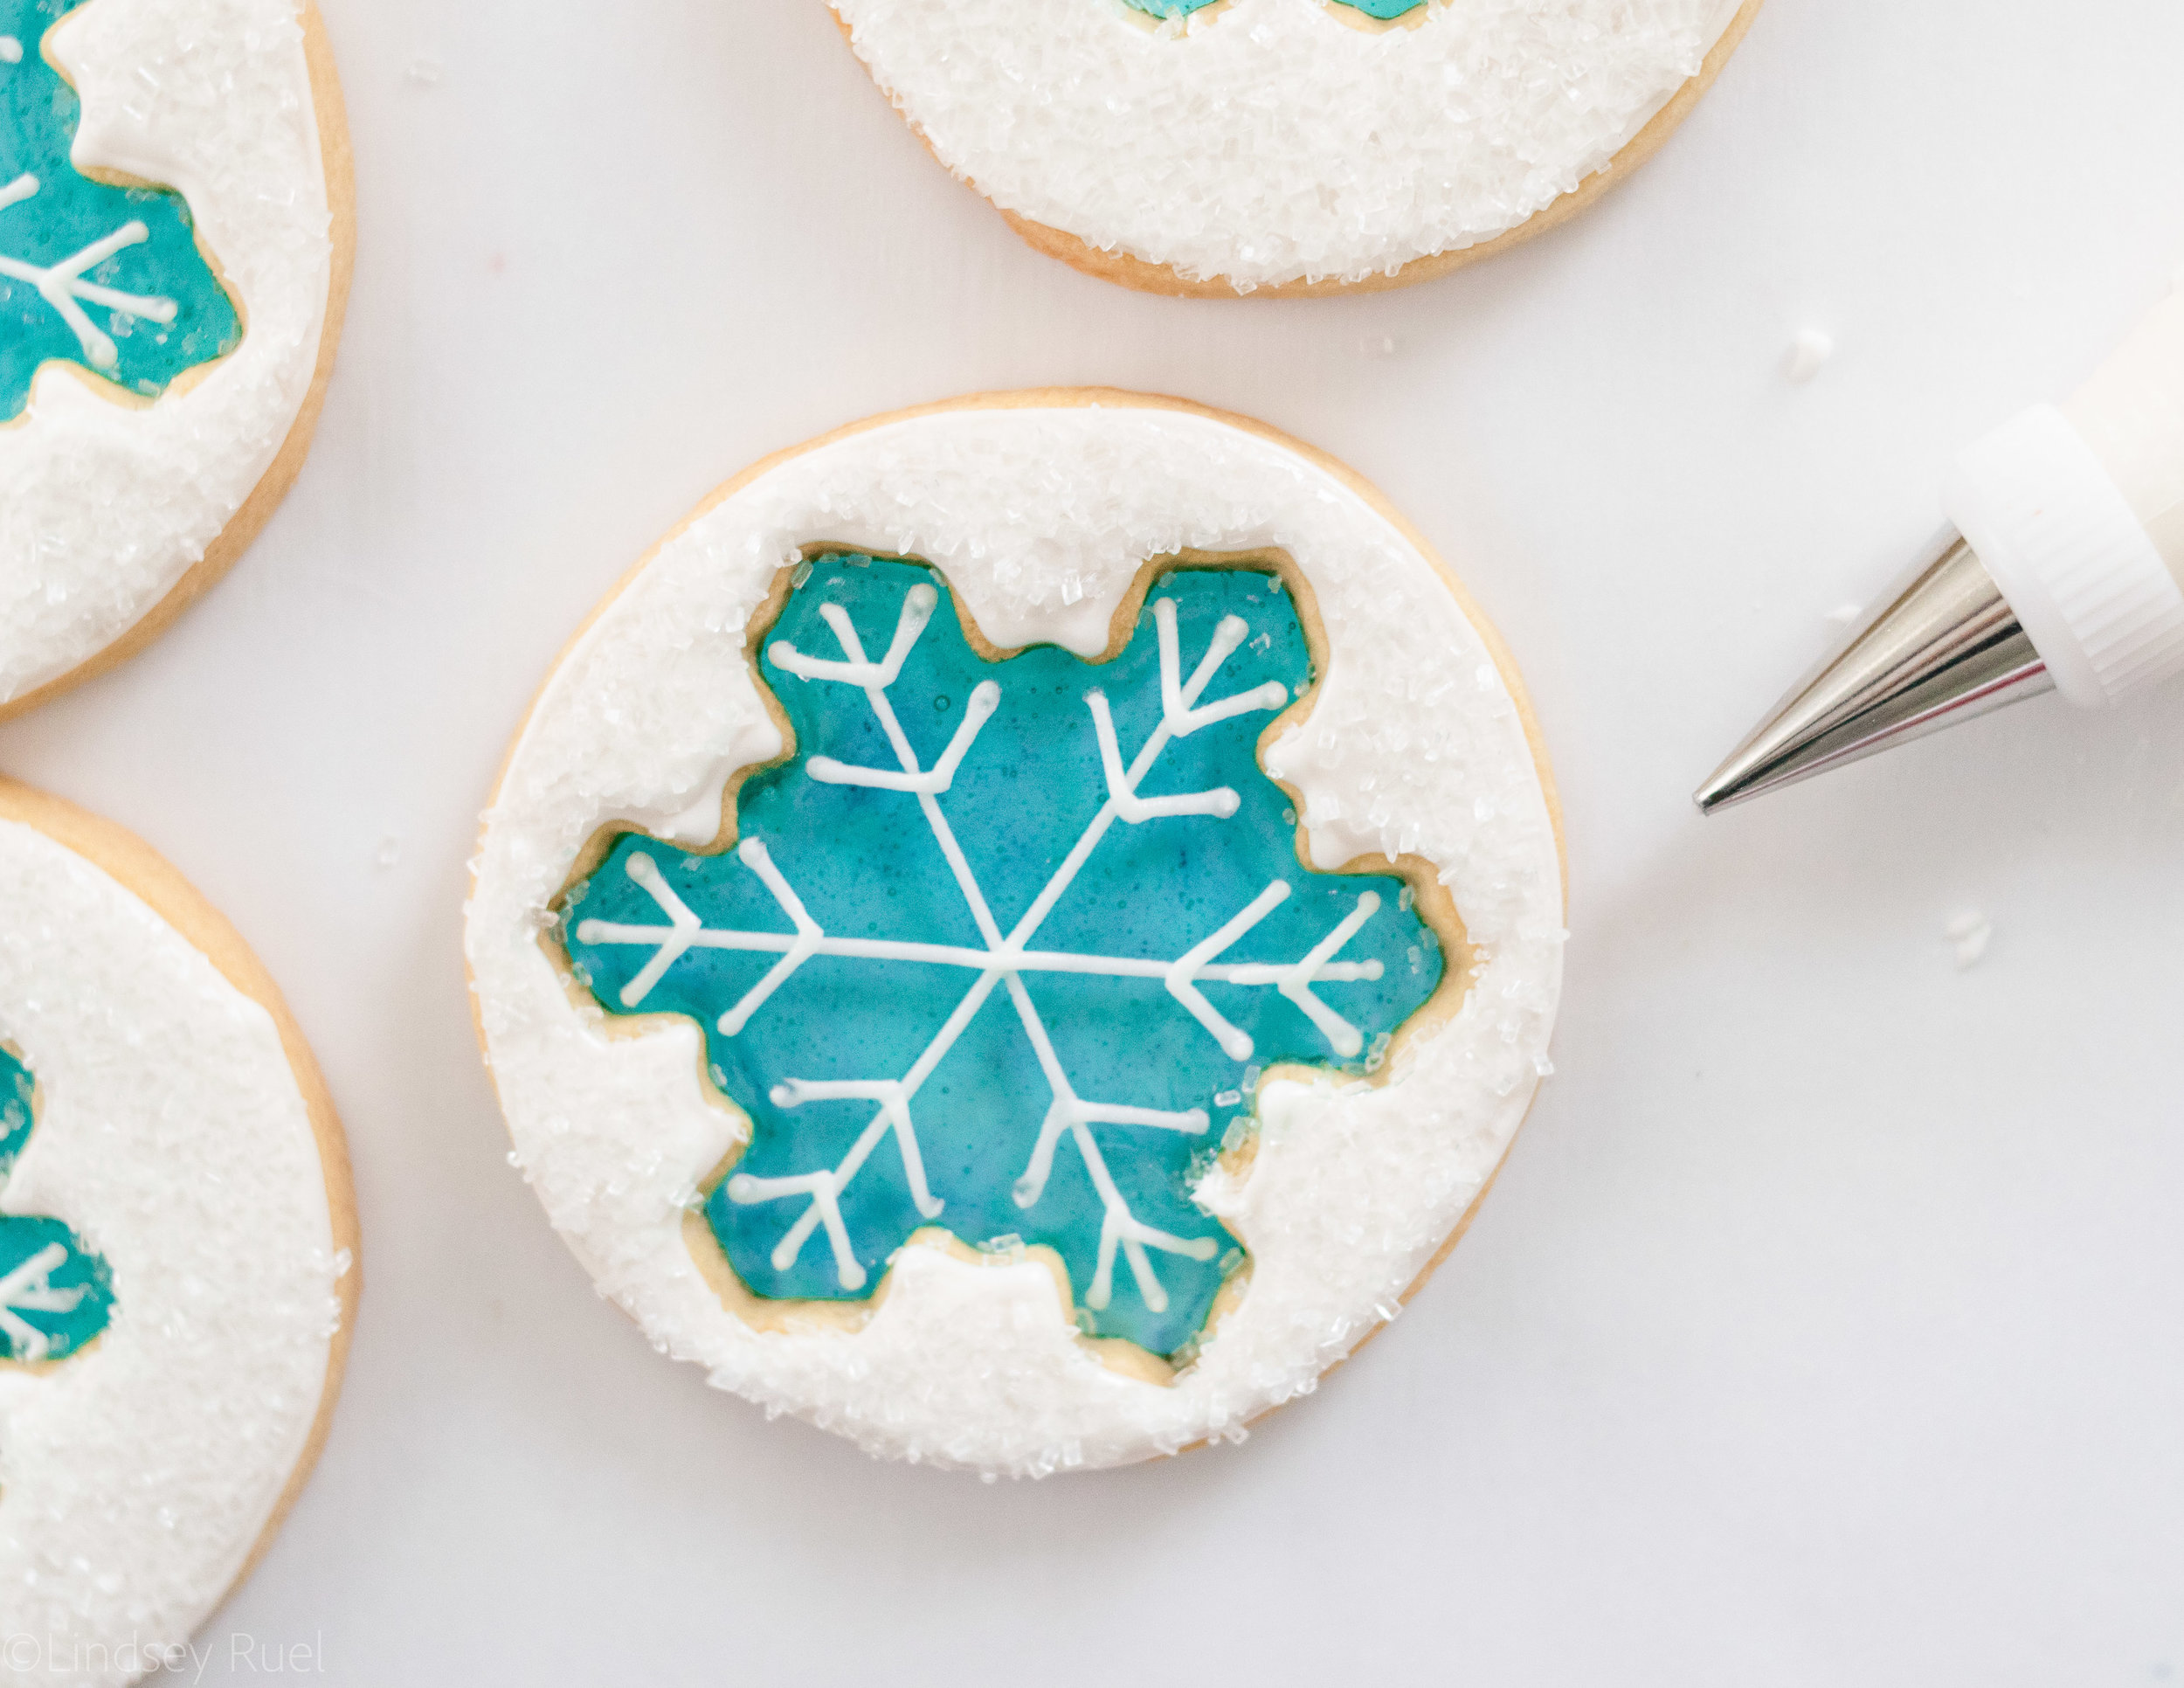
With piping consistency icing, pipe a design on top of the candy snowflake.
Let the entire cookie harden for at least 4 hours.

Then flaunt your hard work making these beauties!
I actually regret not adding a small hole at the edges so that I could string these up as ornaments because I think they are just so pretty.
But don’t let that stop you from digging in, because they are also delicious!
Recipes
Prep Time: 30 minutes Bake Time: 15 minutes Total Time: 45 minutes
Makes 18-24 cookies
Ingredients
1 batch sugar cookie dough
1 batch royal icing
Sugar Glass:
1 cup granulated sugar
1/3 cup corn syrup
1/2 cup water
blue food coloring
Instructions:
Preheat oven to 350 degrees.
Roll out cookie dough to about 1/4 inch thick. Cut into a circle, then cut a snowflake out from the center of the circle, leaving at least a 1/4 inch margin.
Bake for 15-17 minutes, or until barely golden brown around the edges.
While the cookies cool, make the sugar glass. Combine sugar, corn syrup, and water into a small sauce pan. Place over medium high heat and bring to a boil. Do not stir sugar while boiling. Continue to boil until mixture reaches about 290-300 degrees.
Remove from heat and gently stir in blue gen food coloring.
Place the cookies on a foil lines baking sheet. Spray lightly with baking spray.
Spoon the candy into the center of the cookie, using the spoon the spread the candy into the corners of the snowflake shape.
Let set for about 10 minutes, or until candy is completely hardened.
Outline the cookie and snowflake with royal icing, then fill the outlines with flood consistency icing. Sprinkle on sanding sugar, brushing off any that got onto the sugar glass.
Pipe a design on the sugar glass snow flake with piping consistency icing. Let the icing sit to harden for at least 4 hours.