Recently Viewed ›
Recently Downloaded 
Close x

 3d model
vikings
viking runes
viking helmet
viking weapons
viking longboat
viking shield template
3d model
vikings
viking runes
viking helmet
viking weapons
viking longboat
viking shield template
This resource is not yet rated. Why not leave your own review?
Our models enhance engagement, encourage curiosity and generate questions from learners. If you want to know more about using 3D and AR models, take a look at this useful guide.
Use this model to support learning about Vikings alongside other Twinkl resources and discover a new level of engagement.
How can I use the Viking Helmet 3D Model?: Rotate the Viking Helmet on your screen to see it from all angles. Zoom in to see the texture and the detail on the different parts of the helmet.
How can I use the Viking Helmet AR Model?: Through the camera on your device, view the Viking Helmet model in your classroom. Can you size it correctly so it looks as though your friend is wearing it?
For other 3D and AR models to support your teaching on Vikings, take a look at the History collection.
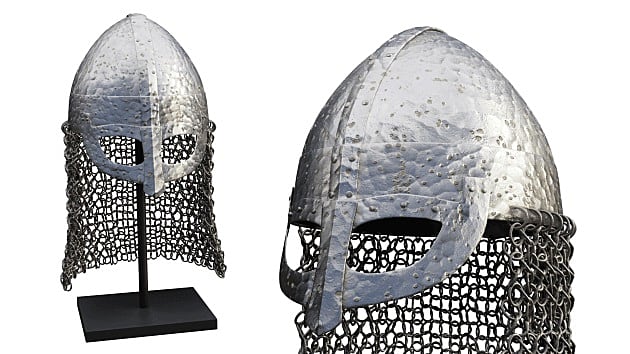
Viking helmets were made from several pieces of iron hammered flat and joined together in sections. This style of helmet was known as a spangenhelm. The helmet gave some protection from sword and axe blows but there is plenty of evidence to show that these weapons could cut through helmets.
Separate, shaped pieces of iron were added to the front of the helmet to protect the eyes and nose. A single iron band created a circle around the head. Two other iron bands which crossed over the top of the head were joined to it. Four flat iron plates were used to fill the gaps between the iron bands creating a bowl shaped helmet.
A rivet is a mechanical fastener. It is made of two parts, a head and a tail which join to hold materials together. A rivet is a permanent fastener and is very strong. The iron sections of the Viking helmet were joined with rivets. A chain mail curtain was attached to some helmets to protect the neck from sword and axe blows. Chain mail offered good protection for those who could afford it.
 Home
Home  Membership
  Customer Support
  Create
  Blog
Blog