


In a cooking rut? Try one of these taste-tested, family-approved recipes using ground beef.
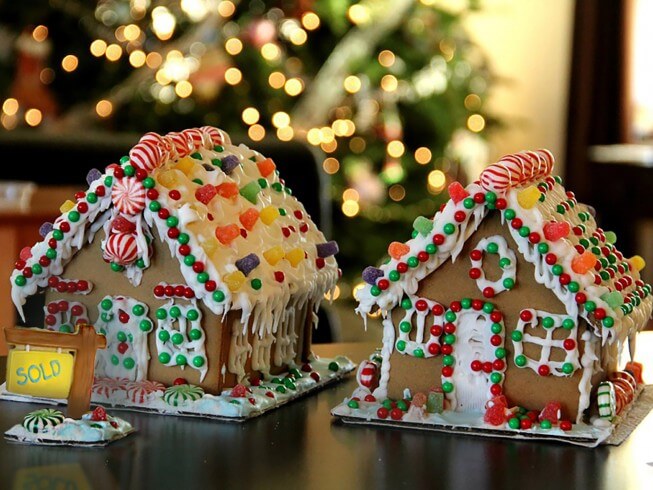
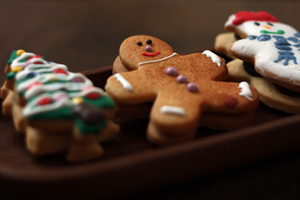
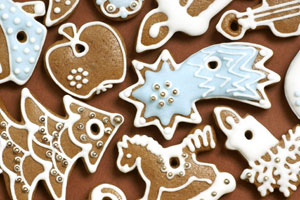
Building a gingerbread house with the whole family is a great way to create lasting memories. The recipe provides very detailed instructions on every step.
5 1/2 cups unsifted flour
1 1/2 teaspoon baking soda
1/4 teaspoon baking powder
2 teaspoons cinnamon
3 teaspoons ground ginger
2 teaspoons ground cloves
1 teaspoon nutmeg
1 cup butter, at room temperature
1 cup sugar
1 1/4 cup molasses
1 large egg
1 teaspoon vanilla extract
candies, for decorating
Icing
3 large egg whites, room temperature
3 3/4 cups confectioners' sugar
1 1/4 teaspoon cream of tartar
NOTE: This dough bakes into a firm, sturdy cookie material that is just right for gingerbread houses. The recipe makes enough dough for one house plus accessories. It's not that hard and it's a lot of fun, as long as you remember the following points: It will take more than one day and have everything ready before you start. You will need a pattern base to put the house on (see below).
For Ginger Dough: In a large bowl, thoroughly blend butter and sugar. Add molasses, egg and vanilla and beat until smooth.
Using another bowl, sift the dry ingredients into it. Gradually stir the dry ingredients into the molasses mixture. When the mixture becomes too stiff to stir with a spoon, work the dough with your hands until completely blended.
Separate the dough into 4 equal pieces. Wrap each in plastic wrap and chill for a several hours. The dough can be refrigerated for up to two weeks.
For gingerbread house dimensions, cut patterns from waxed or parchment paper that include 2 pieces of the following: side walls which are 10 inches wide and 5 inches high, end of house walls which are pointed are 6" inches wide and 8 inches high at the point, roof panels which are 11 inches wide and 6 inches high.
These measurements are just a guideline, you can make your house bigger or smaller.
Roof: 2 rectangles, 7 inches by 11 inches
Side walls: 2 rectangles, 5" x 8"
Front and Back: 2 base 5", total height 9". Cut door from one end.
Chimney (optional): 1" wide.
Front Back Side: 1 2.5" Side 2 2.5" 1.5"
Baking and Cutting : You can bake the pieces one day and attach the pieces for construction at another time, and add decorations even later.
Place a disk of chilled dough directly on aluminum foil cut to fit your baking sheet. Cover dough with plastic wrap and roll to 1/4 inch thickness with rolling pin on a well-floured surface.
Line several cookie sheets with aluminum foil, then butter and flour the foil. Place one of the paper pattern pieces on the dough and cut around the edges. Place pattern pieces for the gingerbread house (which you have pre-cut from paper), directly on dough, leaving at least a 1/2 inch border around pieces. Cut out the doors and windows. Save the windows you cut out, cut the window in half to make shutters.
Gently, using the spatula, lift the dough and place it on the prepared cookie sheet. Place foil directly on a flat baking sheet. Using your fingers or a spatula, remove scrap pieces of dough, leaving cut pieces intact on foil. Save the scraps for the kids to make gingerbread ghosts.
Preheat the oven to 325 degrees F. Bake at 325 degrees F, 12-25 minutes, depending on size of pieces. Gingerbread will darken, especially around edges, and feel firm to the touch. Remove the sheet from oven and allow gingerbread pieces to cool on sheet.
Gently peel gingerbread from foil. You may store pieces lying flat in a cool dry place or freeze in an appropriate container. Let cool on racks until firm enough to handle. Peel the foil off the sections and set the pieces aside to dry thoroughly overnight.
Construction: When you are ready to put the house together, spread the icing directly on a strong piece of plywood, or a flat unbreakable tray to cover area where house will be built. Spread or pipe icing on edges of each piece which will attach to one another. Press pieces firmly together and hold to form 90 degree angles. You may release your hold when pieces are self-standing. (This should only take a minute or two.) Allow sections of the house to dry before applying the roof or candy decorations.
Cover the plywood base with aluminum foil. Pipe (or spread with a knife) two straight lines of icing glue at a 90 degree angle from each other: one for a side wall and another for an end wall. Pipe glue on the side wall where it will meet the end wall. Place walls on base, touching each other. Hold them in place until they are dry enough to stand on their own (about 15 minutes, and you can use those tonic cans or soup cans as support).
Repeat with the remaining two walls, running a line of icing glue along the corners so that all the walls are glued together. Again hold walls in place until the glue is dry. Let the roof-less house dry at least 30 minutes until the icing is firmly set.
Pipe a lot of icing along the tops of all the walls. Run a thick line along one long side of a roof. Stick the two roof sections together at an angle and sit the two pieces on top of the house. Make sure that the roof overhang is the same at both ends of the house. Hold the roof gently in place until it dries (the tonic cans should be the right height to support them). Let dry half an hour.
Remove the soda cans. Attach shutters to windows. While the roof is drying, attach the door to the doorway by running a line of icing glue down one side and along the base. Make sure the door is open wide enough to slide a small flashlight inside later.
To attach the chimney: On one side of the roof near the peak, glue one angled piece to the roof. Glue the largest rectangle to the angled piece, then glue the second angled piece in place. Lastly, if there's room, glue the smallest rectangle to the other sections. Let the house dry until completely solid, preferably overnight.
NOTE: The icing is used as "cement" to put the house together. This recipe is for a single batch. You will need 2 or 3 batches to complete one house. Make each batch separately. If you must make them all at once, keep them in separate bowls. It dries very quickly and is like cement. Keep it well covered, one piece of Saran wrap touching the icing itself and another on the bowl. Any fat substance will inhibit the whites from beating so separate the yolks carefully and keep all utensils grease-free.
For Icing: Place room temperature egg whites in a bowl. Add cream of tartar. Sift confectioner's sugar directly onto egg whites. Beat for 4 minutes with electric mixer on high speed. The mixture will thicken as you beat it and when finished should be the consistency of mashed potatoes.
Place a piece of plastic wrap directly over icing while using to prevent air from drying it. If storing for use at another time, store icing in an airtight plastic container in the refrigerator. If icing becomes too firm, simply beat a little water into it.
For Decorations: When your gingerbread house is thoroughly dry and stands on it's own, you may begin decorating by attaching candy, cookies, and nuts to the house using the icing as glue. Select candy according to size and desired color. Vanilla wafers are ideal for the roof or you can use spoon size shredded wheat for shingles. The "dirt" can be icing tinted a peanut butter brown. You can also put some Oreo crumbs on the ground.
Place candy pumpkins, ghosts and cats around the outside of the house, You can use candy corns around the "yard" to make it look like a fence or stand up pretzels with the icing as a base. You can stand ghost shaped cookies in the yard or a scarecrow cookie.
For a chimney, use a candy bar with a "V" shape cut out of one end and stand it on the roof with icing. Complete your house with an inverted branch for a tree, be sure the branch has been washed and dried. A small green glow stick or small flashlight can be used to illuminate the inside.
dragonflytears


In a cooking rut? Try one of these taste-tested, family-approved recipes using ground beef.

If you're a fan of the menu at this American chain of restaurants which serves a variety of foods such as burgers, steaks, pasta, and seafood then you'll love this collection of copycat recipes.

Pizza night is always a favorite, especially when you have great tasting pizza from some of the most popular restaurants.

reviews & comments